Create Data Filter Policies
Create Data Filter Policies to limit which objects of a specific type users can view in EmpowerID. Data Filter Policies use SQL SELECT statements written against the Identity Warehouse to define which subset of objects is visible to users with the policy.
Prerequisites
Before creating Data Filter Policies, ensure you have:
- Access to create and manage Visibility Filter policies in EmpowerID
Procedure
-
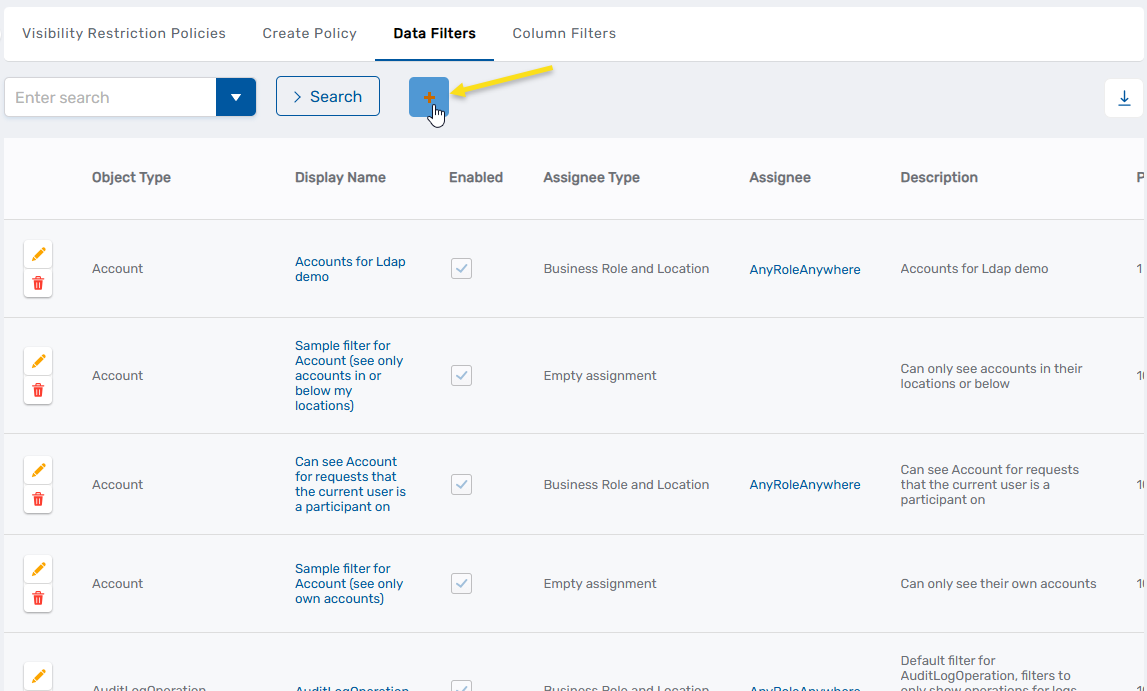
In the EmpowerID web application, navigate to Role Management > Visibility Restriction Policies.
-
Select the Actions tab.
-
Click Create Data Visibility Filter.
The Filter Details form displays.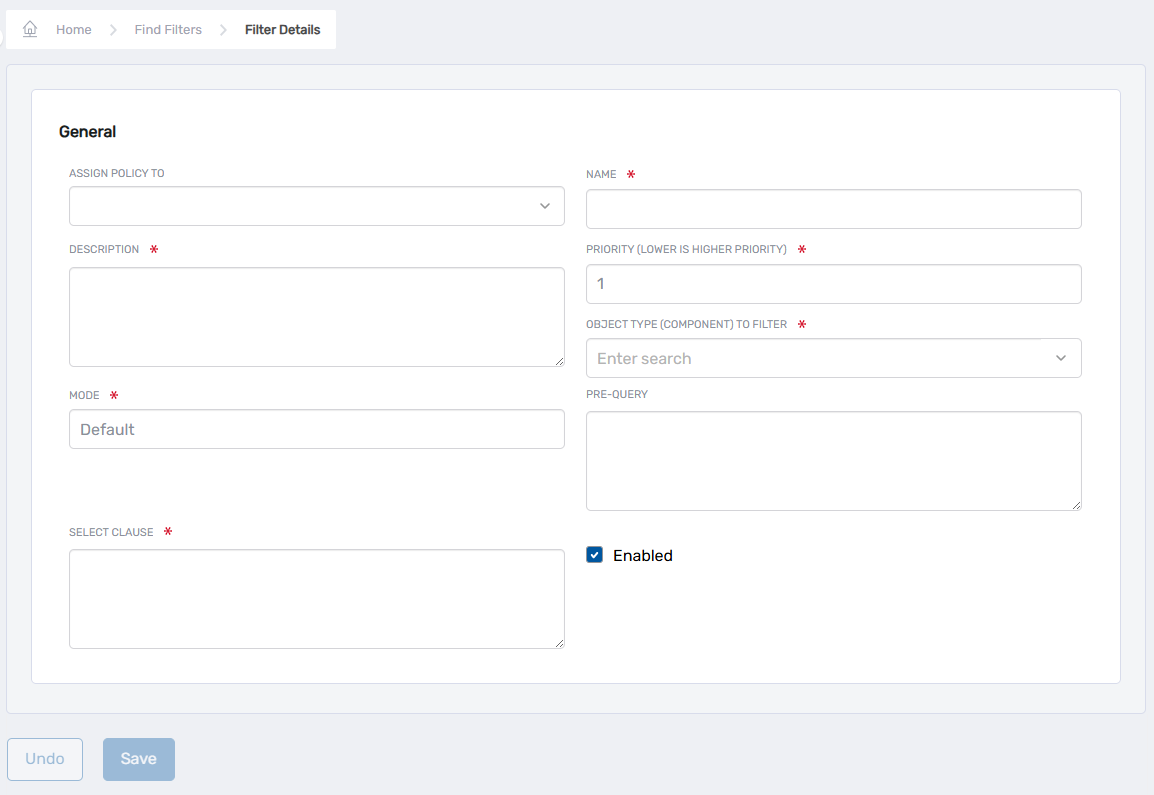
-
From the Assign Policy To dropdown, select the Actor type that will receive the policy:
- Person — Applies the policy to a specific person
- Group — Applies the policy to all members of a specific group
- Business Role and Location — Applies the policy to all people in a specific BRL combination
- Management Role — Applies the policy to all members of a specific Management Role
- Management Role Definition — Applies the policy to all child Management Roles of a definition
- Query-Based Collection (SetGroup) — Applies the policy to all members of a specific collection
-
In the assignee field that appears (labeled based on your Actor type selection), specify the actor to receive the policy:
- For most Actor types: Search for and select the specific actor
- For Business Role and Location: Click Select a Role and Location, search or browse for the desired Business Role and Location, then click Select

-
In the Name field, enter the internal name for the policy.
-
In the Description field, enter a description of what the policy filters.
-
In the Priority (Lower is Higher Priority) field, enter a numeric value from 1 to 100.
Lower numbers indicate higher priority when a user has multiple policies (priority 1 overrides priority 50).
-
Leave the Mode field set to Default.
-
In the Object Type (Component) To Filter field, search for and select the EmpowerID component you want to filter (e.g., Person, Account, Group).
-
Leave the Pre-Query field blank.
-
In the Select Clause field, enter the SQL SELECT statement that defines which objects users can view.
For example, to allow users to see only people with a specific job title (if the Title field is used in your environment):
SELECT PersonID FROM dbo.Person (NOLOCK) WHERE Title = 'Contractor' -
Ensure the Enabled checkbox is selected to activate the policy.
-
Click Save.
Verify the Results
After creating the Data Filter Policy:
-
Log out of the EmpowerID web application.
-
Log in as a user who should have the policy applied (e.g., a member of the group or Management Role to which you assigned the policy).
-
Navigate to a page where the filtered resource type is displayed.
For example, if you created a Data Filter for Person objects, navigate to the White Pages or People search.
-
Search for or view all objects of the filtered type.
-
Verify that only the objects permitted by your SQL filter appear in the results.
For example, if your filter limits visibility to people with Title = 'Contractor', verify that only people with the Contractor title appear.
-
Attempt to search for a specific object that should be filtered out (e.g., search for a person who is not a Contractor).
-
Verify that the filtered-out object does not appear in search results or is not accessible.
-
(Optional) Log in as a user without the policy and verify they can see the full set of objects.
Related Topics
- Visibility Filters Overview — Understand all visibility policy types and when to use Data Filters
- Create Visibility Restriction Policies — Apply location and role-based visibility restrictions
- Create Column Filter Policies — Hide or modify specific resource attributes