Login Assistance Workflow
The Login Assistance Workflow in EmpowerID is designed to help users resolve login issues through a guided self-service process. It provides comprehensive support for password recovery, account lockouts, and Multi-Factor Authentication (MFA) difficulties across both EmpowerID and Microsoft Azure platforms.
This workflow reduces helpdesk burden while maintaining security through automated verification and manual approval processes when needed.
Workflow Capabilities
The Login Assistance Workflow enables users to:
- Reset Passwords and Unlock Accounts — For both EmpowerID and Azure login credentials
- Send Azure Temporary Access Pass (TAP) — Provides temporary login access to Azure accounts when standard recovery methods are unavailable
- Reset Azure MFA — Unblocks or unenrolls users from Azure Multi-Factor Authentication
- Reset EmpowerID MFA — Unblocks or unenrolls users from EmpowerID Multi-Factor Authentication and removes all associated MFA assets and preferences
Authentication Methods
The workflow employs a tiered approach to user authentication:
Automated Methods: For users enrolled in MFA, the system utilizes registered MFA methods to verify identity and assist in resolving login issues. If a user is not enrolled in MFA but can access a personal email or mobile phone, the system attempts to send a One-Time Password (OTP) for verification.
Manual Methods: If the OTP is not received or the user does not have a suitable contact method, a business request is initiated as a fallback option. This requires an approval process where a designated individual vouches for the user's identity to resolve the login issue.
Configuration
Workflow Parameters
The Login Assistance Self Service Wizard workflow provides extensive customization options, enabling administrators to modify the displayed fields for users utilizing the workflow. These customizable parameters allow you to adapt the workflow according to your organization's specific requirements and preferences.
Complete Parameter Reference
| Parameter Name | Description | Default / Example Value |
|---|---|---|
| AzureADSCIMConnectorAssembly | Specifies the assembly information for the Azure AD SCIM connector | SCIMAzureConnector,Version=4.0.180.1,Culture=neutral,PublicKeyToken=2d2253f74d4496ef |
| AzureADSCIMConnectorType | Defines the type of Azure AD SCIM connector | Platform-specific configuration |
| CallBackURLDomain | Specifies the domain for the callback URL used in authentication flows | https://api.empoweriam.com |
| DateTimeFormatForEmail | Specifies the date and time format used for TAP expiration dates in email notifications | dddd, dd MMMM yyyy HH:mm:ss |
| DefaultAccountStoreFQNForPersonLookup | Specifies the default account store fully qualified name (FQN) used for person lookup operations | https://linux-scim-aad.azurewebsites.net |
| EmailMessageNameForTAP | Specifies the email message template name used for Azure TAP delivery emails | LoginAssistanceAzureTAPEmail |
| IsAzureFirstTimeLoginIssueEnabled | Determines whether to show or hide Azure first-time login as a problem. If set to true, users will see the option "Need help logging into Azure for the first time (TAP)" to help them resolve issues logging in for the first time with an Azure account | true or false |
| IsCreateCollaborationTask | Determines whether to generate an old-style workflow task instead of a business request for manual approval processes | true or false |
| IsMFAIssueEnabled | Decides whether the MFA issue should be displayed. Enabling it will prompt the user to select the option "I recall my password, but I am unable to perform multi-factor authentication" in the wizard | true or false |
| IsPasswordIssueEnabled | Determines whether to display the password issue option. If enabled, the user will be able to access the "I'm unable to remember my password or I've gotten locked out" option, which can assist them in resolving login issues caused by a forgotten password | true or false |
| IsTestMode | When enabled, the wizard relaxes certain restrictions, such as the "hasAccess" check, to facilitate testing | true or false |
| IsUnknownIssueEnabled | Determines whether to show or hide the unknown issue problem option in the wizard. If enabled, the wizard will show "I'm not sure what the problem is but I can't log in" option | true or false |
| OAuthConsumerID | Specifies the OAuth consumer ID used for integration with external services like Twilio and SendGrid | Organization-specific identifier |
| OTPValidityDurationInMinutes | Specifies the validity duration of the One-Time Password in minutes from the time it is generated | Configurable (typically 5-15 minutes) |
| SendPasswordToEmail | Determines whether the system will send the OTP to the email address linked to the user account when assisting with logging in through email and phone verification | true or false |
| SendPasswordToMobile | Determines whether the system will send the OTP to the mobile phone number linked to the user account when assisting with logging in through email and phone verification | true or false |
| SendPasswordToPersonalEmail | Determines whether the system will send the OTP to the personal email address provided by the user when assisting with logging in through email and phone verification | true or false |
| SendPasswordToTwilioSMS | Determines whether to send the OTP via Twilio SMS service | true or false |
| SendPasswordToTwilioVoiceCall | Determines whether to send the OTP via Twilio Voice Call service | true or false |
| SendTAPForAzureMFAIssue | If set to true, a Temporary Access Pass will be sent instead of performing an MFA reset for Azure MFA issues | true or false |
| SkipEmpowerIDMFA | Specifies whether to skip EmpowerID MFA verification during the workflow | true or false |
| SMSOTPKeyEntryName | Specifies the SMS message template name for OTP delivery via text message | PasswordResetCenterOTPSMSMessage |
| TwilioOTPVoiceMessageTemplateName | Specifies the Twilio voice call template name for OTP delivery via phone call | Organization-specific template name |
| WhichLoginIdP | Allows you to specify a specific Identity Provider (IdP) and hide the UI option to select. If the value is set to "all," the UI option to select an IdP is not hidden, and users can choose from all available IdPs during the assistance. To hide the UI option and enforce a specific IdP, replace the value "all" with the desired IdP identifier or name | "all" or specific IdP identifier |
Configuring Workflow Parameters
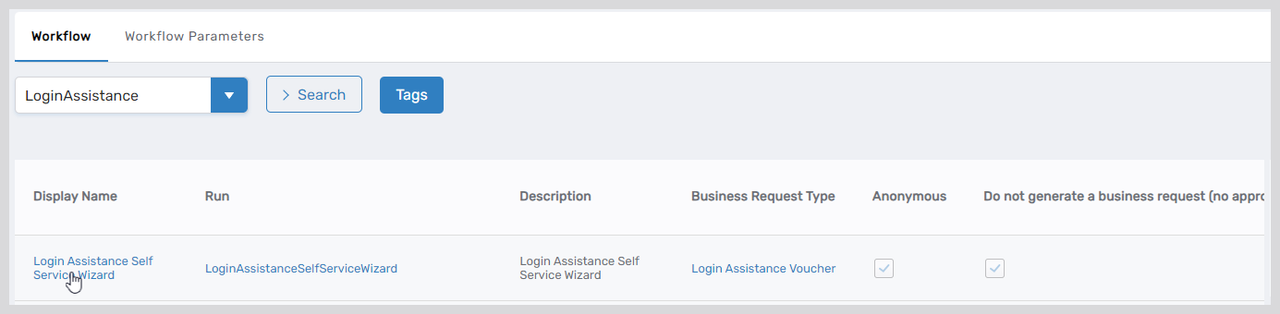
- On the navbar, expand Low Code/No Code Workflow and select Low Code Workflows.
- Select the Workflow tab and search for Login Assistance Self Service Wizard.
- Click the Display Name for the workflow to navigate to its View One page.
- Expand the Request Workflow Parameters accordion on the View One page for the workflow and search for the parameter you need to configure. In this example, we set the
IsUnknownIssueEnabledparameter tofalse, which means the wizard will not show the "I'm not sure what the problem is, but I can't log in" option. - Click the Edit button for the parameter, enter the new value (e.g., false) in the Value field for IsUnknownIssueEnabled, and click Save.
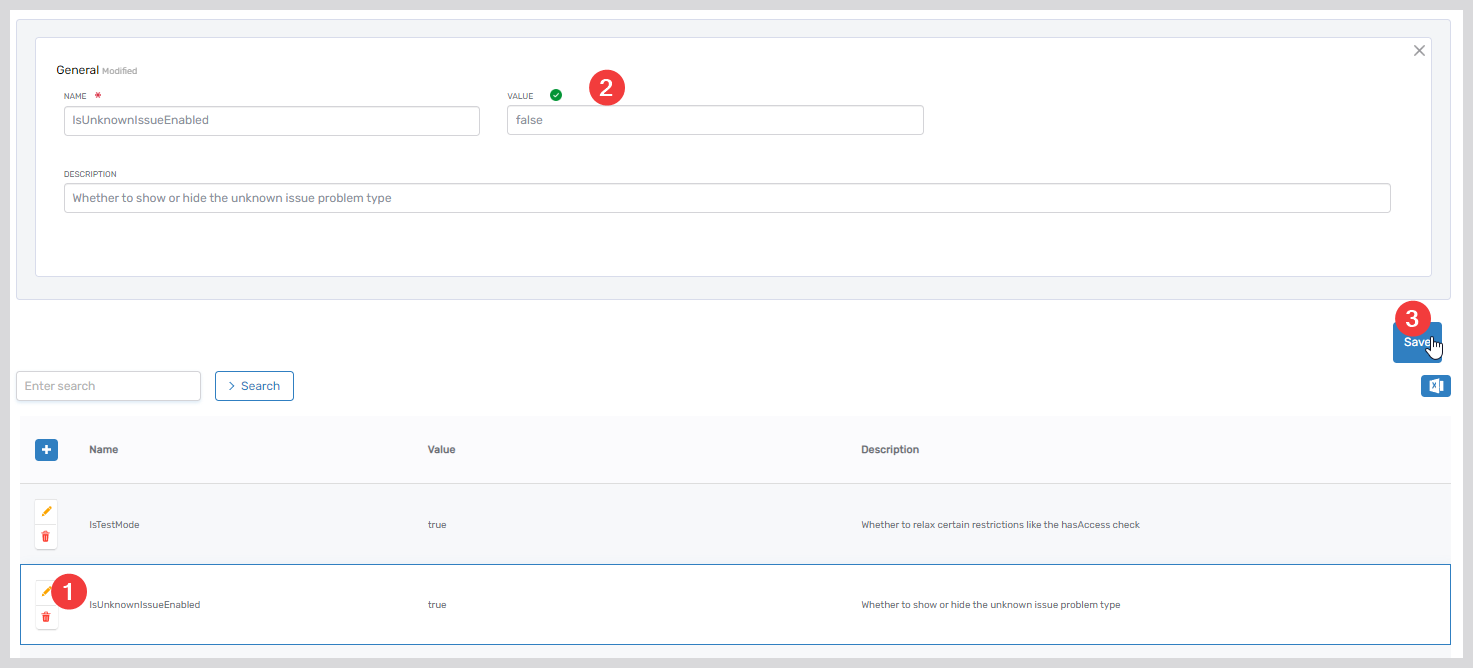
- Repeat the above steps to adjust any additional parameter values as needed
Business Request Approval Policy
If the automated validation of a user's request is unsuccessful, the system proceeds with manual approval to establish a business request. This step involves human verification that can be customized to fulfill particular organizational needs. The following steps guide you through viewing and modifying the policies that regulate the manual identity verification process.
- On the navbar, expand Low Code/No Code Workflow and click No Code Flows.
- Click the Business Request Type tab and search for the Login Assistance Voucher. Click on the edit icon to activate the edit mode of the business request type.
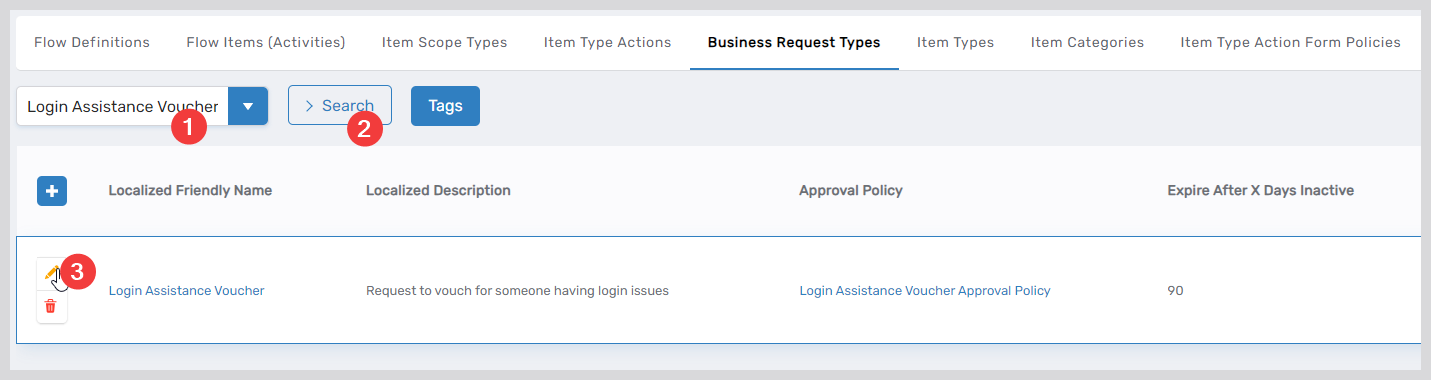
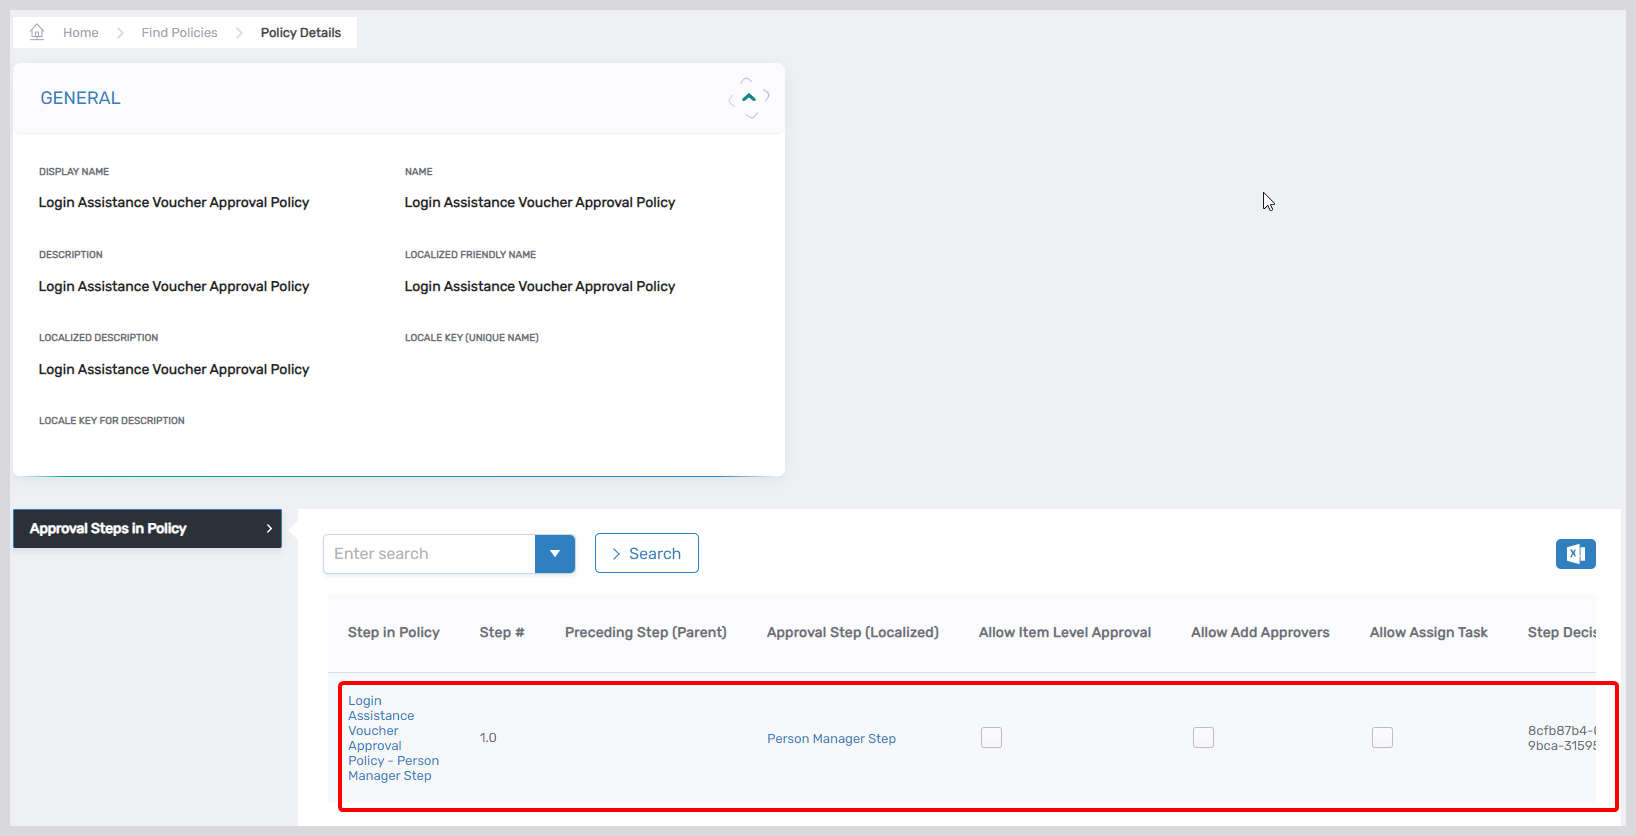
- While in the edit mode, you'll observe that the approval policy is configured to the Login Assistance Voucher Approval Policy. This is the standard policy used for handling business requests that require manual identity verification.
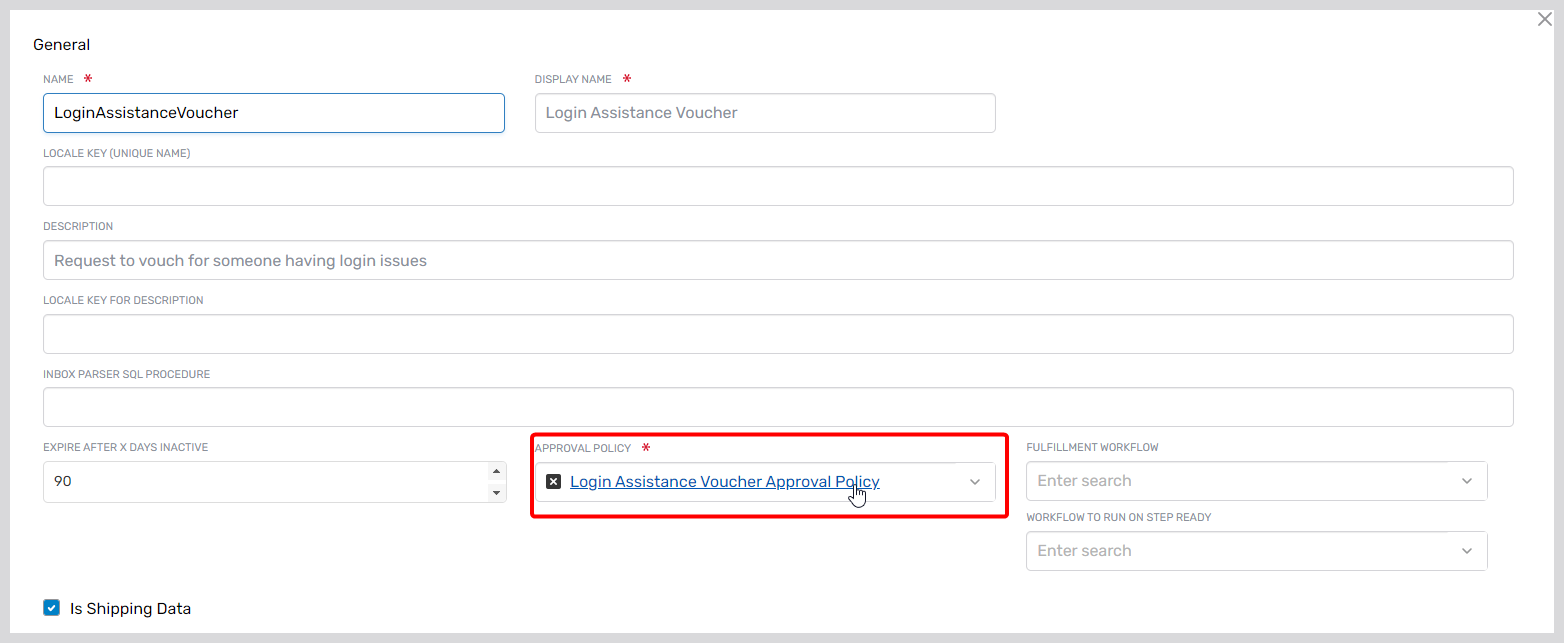
- Click on the Login Assistance Voucher Approval Policy link to navigate to the details page for the approval policy. Scroll to find the Approval Steps in Policy accordion to view the specific steps configured for the policy.
Using the Workflow
Accessing the Login Assistance Workflow
Users can access the Login Assistance Workflow when experiencing login difficulties:
- To receive help logging in to EmpowerID, click on the Login Assistance Workflow on the login screen.
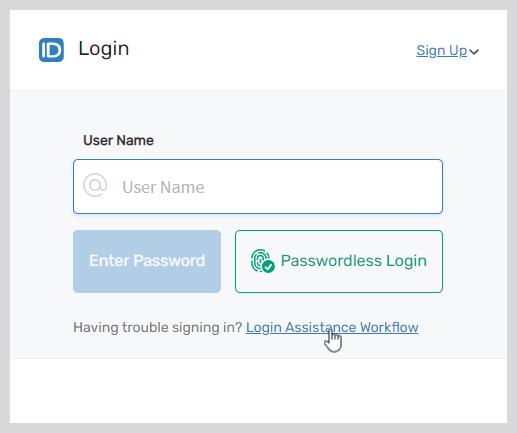
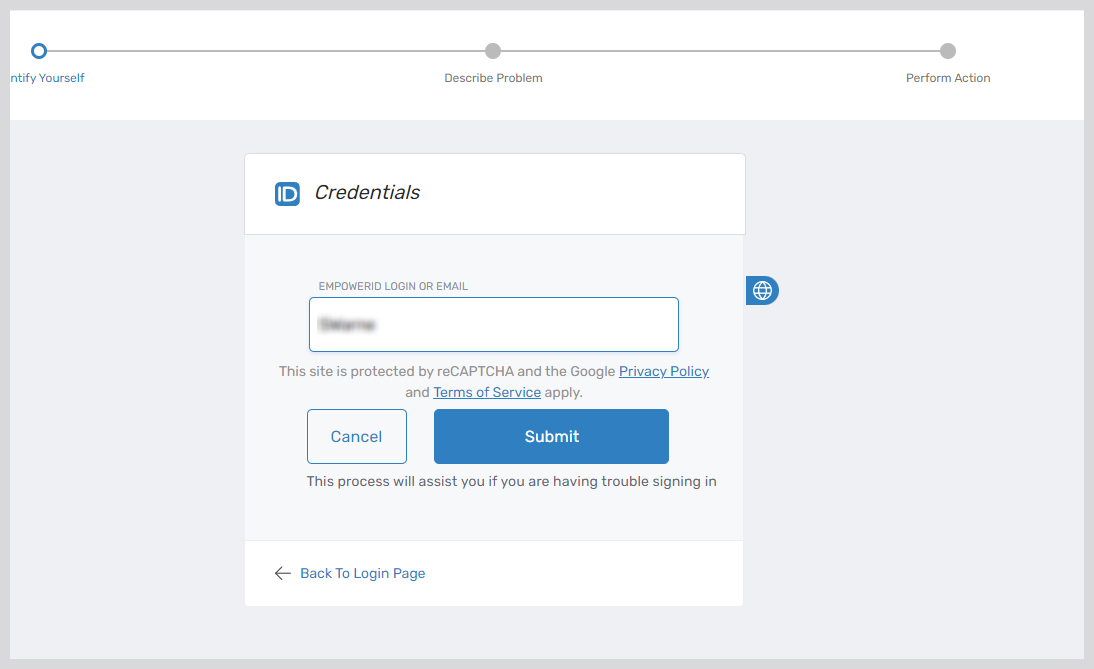
- Enter either your EmpowerID login name or the email associated with your account.
- Select Your Identity Provider (IdP): Based on your authentication method, choose between Microsoft Azure or EmpowerID
- If you choose "I log in using EmpowerID" — proceed with the instructions under EmpowerID Login Assistance Options.
- If you choose "I log in using Microsoft Azure" — proceed with the instructions under Microsoft Azure Login Assistance Options.
EmpowerID Login Assistance Options
Option 1: I'm Unable to Remember My Password or I've Gotten Locked Out
This option allows users who cannot remember their password or have been locked out of their account to regain access.
- The system identifies all registered MFA methods and prompts you to select one
- The wizard guides you through the recovery process using the Login Assistance with MFA flow
- If the account does not have MFA registration:
- The system locates the email and phone numbers registered for the user
- Attempts to send a One-Time Password (OTP) to either of them
- The wizard enters the Login Assistance with Email/Phone flow and guides you through recovery
- If you cannot receive an email or a voice call for the OTP:
- You can create a manual request to have someone vouch for you
- The wizard guides you through the recovery process using the Login Assistance by Requesting Identity Validation flow
Option 2: I Remember My Password, but I Can't Perform Multi-Factor Authentication
This option is useful for users who remember their password but face obstacles with MFA, such as losing their phone or acquiring a new one.
- The system locates the email and phone numbers registered for the user
- Attempts to send a One-Time Password (OTP) to either of them
- You can reset the multi-factor authentication registered for your account
- Follow the instructions in Login Assistance by Resetting MFA to troubleshoot your login issue
Option 3: I'm Not Sure What the Problem Is, but I Can't Log In
If you are facing login difficulties without a clear understanding of the underlying issue, selecting this option will provide helpful troubleshooting steps and guidance.
- The wizard enters the Login Assistance by Requesting Identity Validation flow for login recovery
Microsoft Azure Login Assistance Options
Option 1: I'm Unable to Remember My Password or I've Gotten Locked Out
This option allows Azure users who cannot remember their password or have been locked out of their account to regain access.
- Like EmpowerID, the system identifies all registered MFA methods and prompts you to select one
- The wizard guides you through the recovery process using the Login Assistance with MFA flow
- If the account does not have MFA registration:
- The system locates the email and phone numbers registered for the user
- Attempts to send an OTP to either of them
- The wizard enters the Login Assistance with Email/Phone flow
- If you cannot receive the OTP:
- You can create a manual request for identity validation
- The wizard guides you through the Login Assistance by Requesting Identity Validation flow
Option 2: I Remember My Password, but I Can't Perform Multi-Factor Authentication
This option assists Azure users who remember their password but cannot complete MFA.
- The system sends an OTP to your registered email or phone
- You can reset your MFA settings after verifying the OTP
- Follow the instructions in Login Assistance by Resetting MFA
Option 3: I'm Not Sure What the Problem Is, but I Can't Log In
Select this option if you're unsure about the login issue.
- The wizard initiates the Login Assistance by Requesting Identity Validation flow
Login Assistance Flows
Login Assistance with MFA
If the administrator has established a password policy with more than 2 Level of Assurance (LOA) points, you might have to go through multiple rounds of MFA.
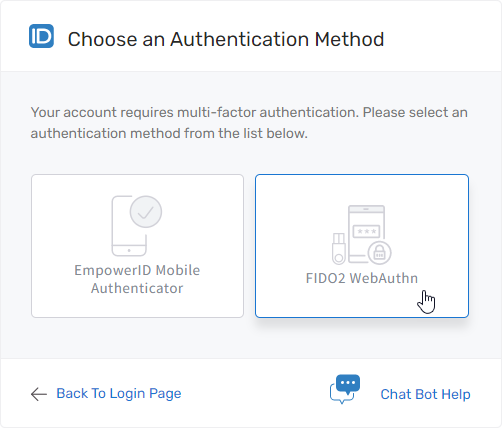
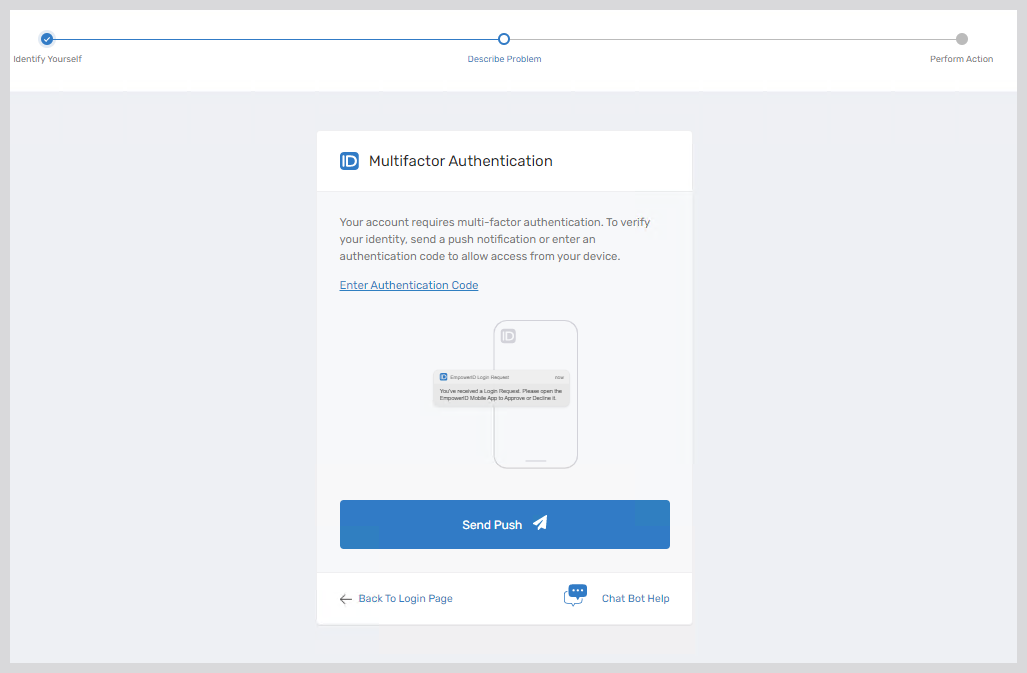
- The system identifies all registered MFA methods and prompts you to choose your preferred method.Note: Your available MFA options may vary, as the wizard will load the MFA methods configured for your account.
- After choosing your preferred MFA method, the wizard walks you through the necessary steps.
- For example, if you select the EmpowerID Mobile Authenticator, you will be prompted to approve a push notification or enter the authentication code.
- Upon successful MFA, you are directed to the Change Password page to reset your password.
- After you reset your password, the wizard provides a list of all the accounts for which it has been changed.
Login Assistance with Email / Phone
To receive assistance via email or phone:
- The system locates your account's email and phone numbers and attempts to send a One-Time Password (OTP).
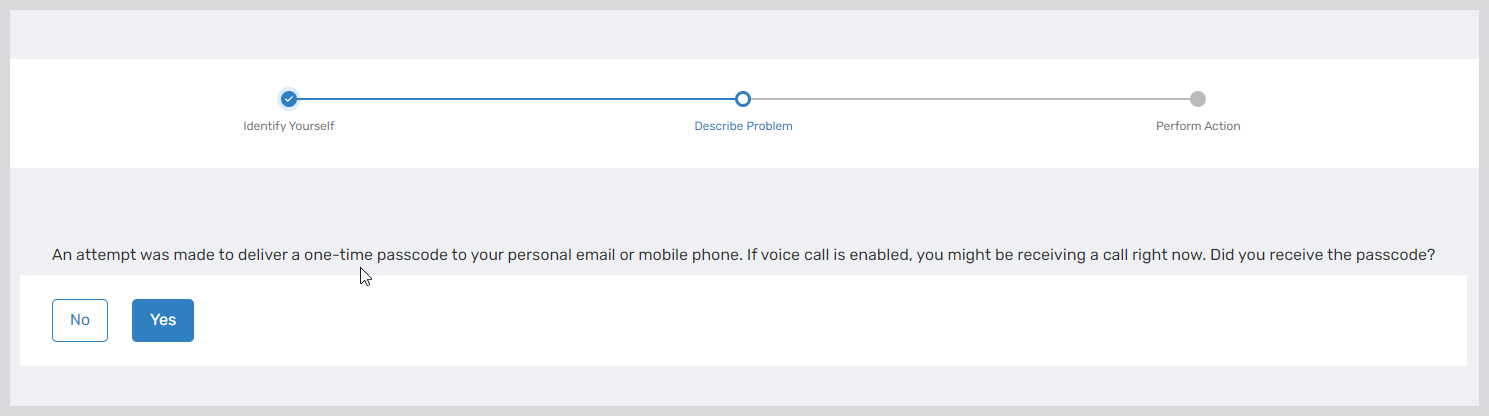
- If you received the OTP, select Yes and enter the passcode.
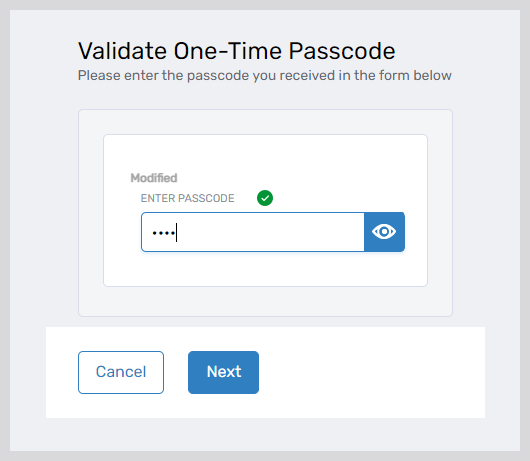
- Upon successful OTP verification, you are directed to the Change Password page to reset your password.
- The wizard lists all the accounts for which the password has been changed.
- If you have not received the OTP:
- Select No.
- The system will retry sending the OTP.
- After several attempts, you will be prompted to create a manual request for identity validation.
- Follow the instructions in Login Assistance by Requesting Identity Validation.
Login Assistance by Requesting Identity Validation
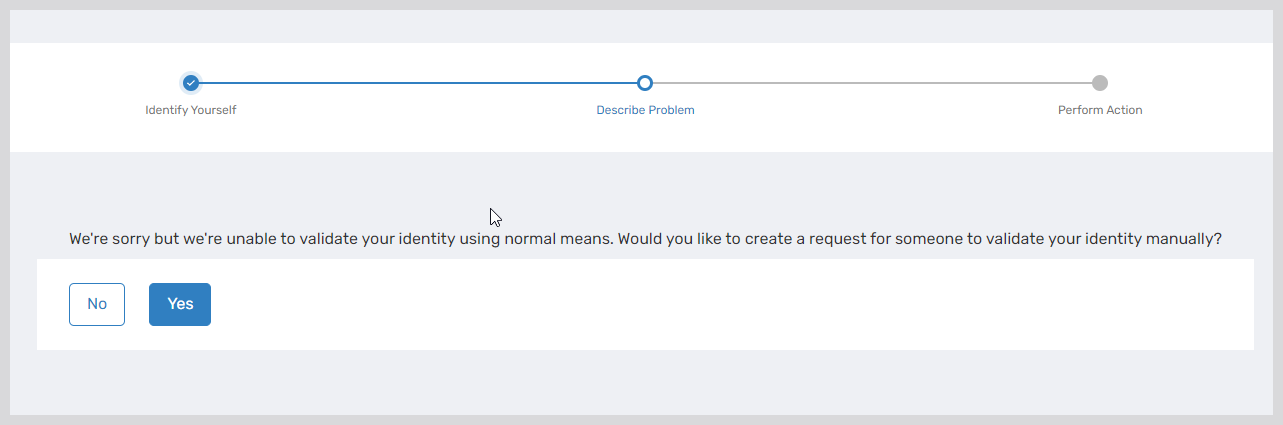
If all other options fail, you can request assistance for manual identity verification.
- When prompted, select Yes to create a request for manual identity verification.
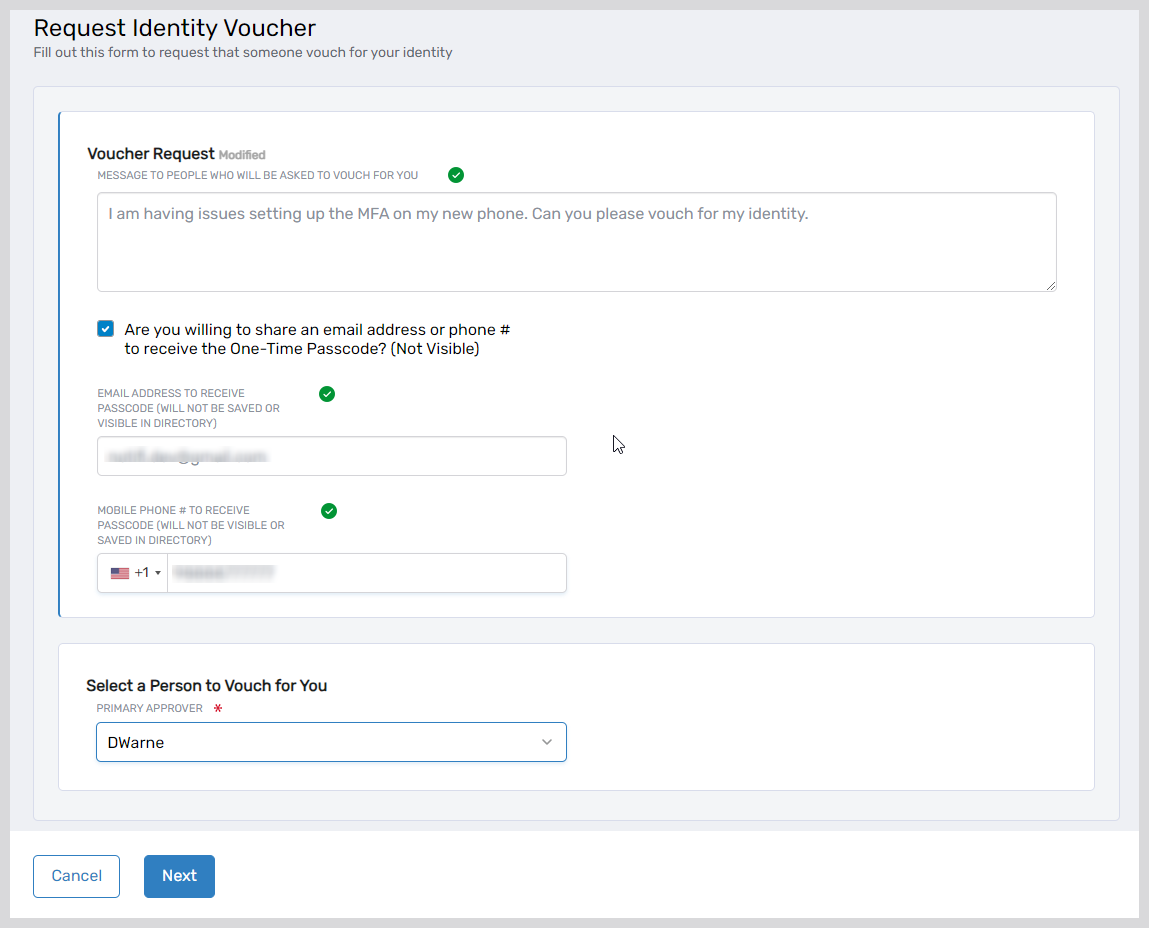
- Provide the following details:
- Message: Write a compelling and detailed message to the person who will vouch for your identity.
- Share Email and Phone: Provide an email or phone number that you currently have access to. This does not need to be the same as the one configured in your profile.
- Select a Person to Vouch for You: Choose someone who can confirm your identity.
- Once you have submitted the request:
- The approver will receive the business request.
- Upon approval, an OTP will be sent to the email or phone number you provided.
- Follow the instructions to complete the login assistance process.
Login Assistance by Resetting MFA
If your MFA isn't functioning properly:
- The system locates the email and phone numbers registered for your account and sends a One-Time Password (OTP).
- If you have received the OTP, select Yes, as shown below, and then enter your passcode.
If you don't receive the OTP, click No to trigger the Login Assistance by Requesting Identity Validation flow to help you log in.
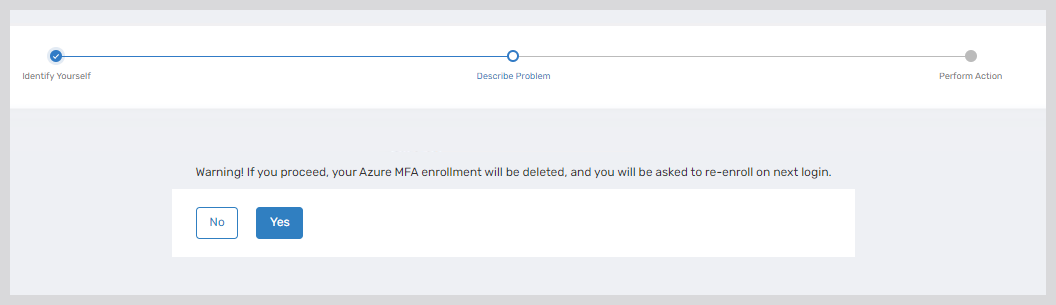
- After OTP verification, you will receive a warning indicating that your existing MFA registrations will be deleted. Click Yes to continue.
- On the next screen, you will receive instructions to:
- Open a browser in incognito mode.
- Navigate to My Apps.
- Register a new MFA for your account.
- Register your new MFA and attempt to log in again.
Workflow Details
Login Assistance with MFA
If the administrator has established a password policy with more than 2 Level of Assurance (LOA) points, you might have to go through multiple rounds of MFA.
- The system identifies all registered MFA methods and prompts you to choose your preferred method
Your available MFA options may vary, as the wizard will load the MFA methods configured for your account
- After choosing your preferred MFA method, the wizard walks you through the necessary steps
- For example, if you select the EmpowerID Mobile Authenticator, you will be prompted to approve a push notification or enter the authentication code.
- For example, if you select the EmpowerID Mobile Authenticator, you will be prompted to approve a push notification or enter the authentication code.
- Upon successful MFA, you are directed to the Change Password page to reset your password.
- After you reset your password, the wizard provides a list of all the accounts for which it has been changed.
Login Assistance with Email/Phone
To receive assistance via email or phone:
-
The system locates your account's email and phone numbers and attempts to send a One-Time Password (OTP).
-
If you received the OTP, select Yes and enter the passcode
-
Upon successful OTP verification, you are directed to the Change Password page to reset your password
-
The wizard lists all the accounts for which the password has been changed
-
If you have not received the OTP:
- Select No
- The system will retry sending the OTP
- After several attempts, you will be prompted to create a manual request for identity validation
- Follow the instructions in Login Assistance by Requesting Identity Validation
Login Assistance by Requesting Identity Validation
If all other options fail, you can request assistance for manual identity verification.
-
When prompted, select Yes to create a request for manual identity verification.
-
Provide the following details:
Message — Write a compelling and detailed message to the person who will vouch for your identity
Share Email and Phone — Provide an email or phone number that you currently have access to. This does not need to be the same as the one configured in your profile
Select a Person to Vouch for You — Choose someone who can confirm your identity
-
Once you have submitted the request:
- The approver will receive the business request
- Upon approval, an OTP will be sent to the email or phone number you provided
- Follow the instructions to complete the login assistance process
Login Assistance by Resetting MFA
If your MFA isn't functioning properly:
-
The system locates the email and phone numbers registered for your account and sends a One-Time Password (OTP)
-
If you have received the OTP, select Yes, as shown below, and then enter your passcode.
Note: If you don't receive the OTP, click No to trigger the Login Assistance by Requesting Identity Validation flow to help you log in
-
After OTP verification, you will receive a warning indicating that your existing MFA registrations will be deleted. Click Yes to continue.
-
On the next screen, you will receive instructions to:
- Open a browser in incognito mode
- Navigate to My Apps
- Register a new MFA for your account
-
Register your new MFA and attempt to log in again