Register an OAuth Application
To consume the EmpowerID API from an application external to the platform, you need to register that application as an OAuth Client app in EmpowerID. This integrates the application with EmpowerID and generates a unique API Key, Client Secret, and Client ID for it. You use these to get an OAuth 2.0 access token (JWT).
Your organization’s resources — user accounts, groups, mailboxes, etc. — as well as EmpowerID workflows, applications, and pages are protected resources secured by EmpowerID operations. Before users (or apps) can access a resource, their EmpowerID Person must have access assignments for the required operations. Because API calls execute these operations over HTTP, the applications you register must be linked to an EmpowerID Person with appropriate access. Otherwise, requests return 401 Unauthorized. Create one or more Person objects with the minimum required access for each application’s purpose.
How to register an application
- On the navbar of the EmpowerID Web interface, expand Apps and Authentication > SSO Connections and click OAuth /OpenID Connect.
- On the EmpowerID OAuth Client Apps tab of the OAuth page, click the Add button.

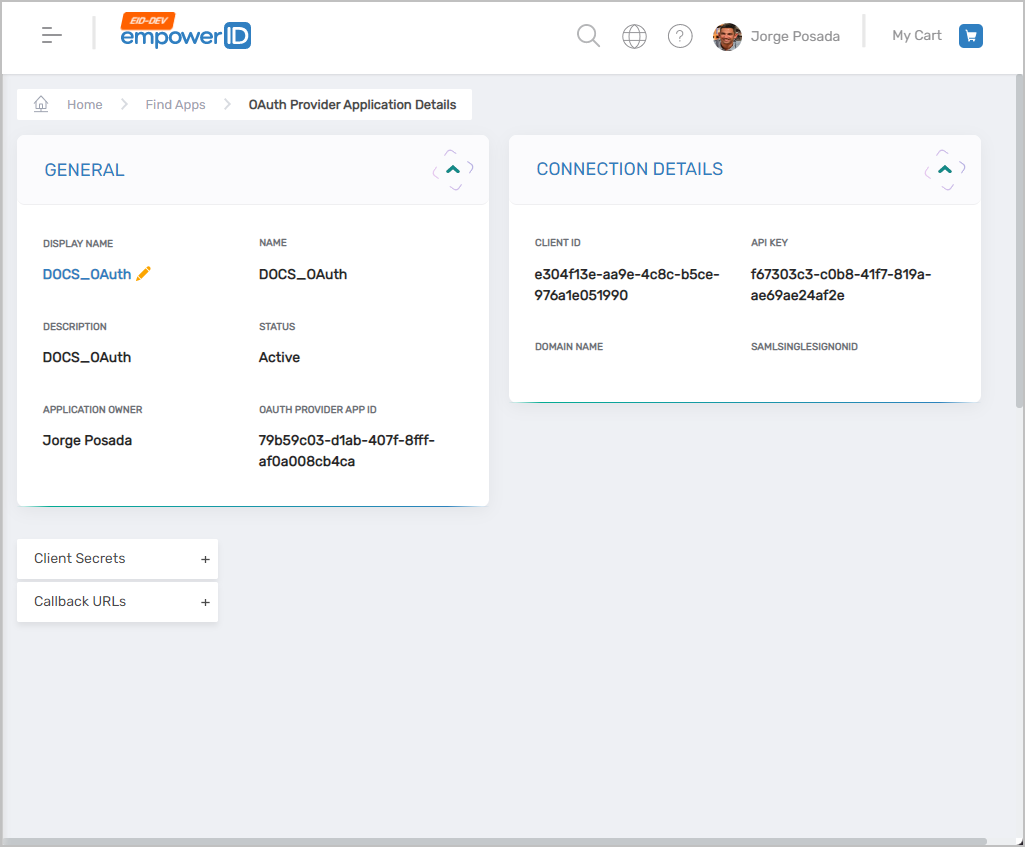
- On the General tab of the OAuth Provider Application Details page fill in the following:
- Name – Name of the application
- Display Name – Display name for the application
- Description – Description for the application
- Application Type – Select the appropriate application type from the drop-down; default is Web application.
- Application Owner – Person creating the app by default; or, search for another person
- Issuer – Defaults to EmpowerID; you can update the value to any string / URL you want.
- Signing Certificate – Select a certificate with a private key from the EmpowerID certificate store
- Click Save. The system creates the application and directs the browser to the View One page for it.
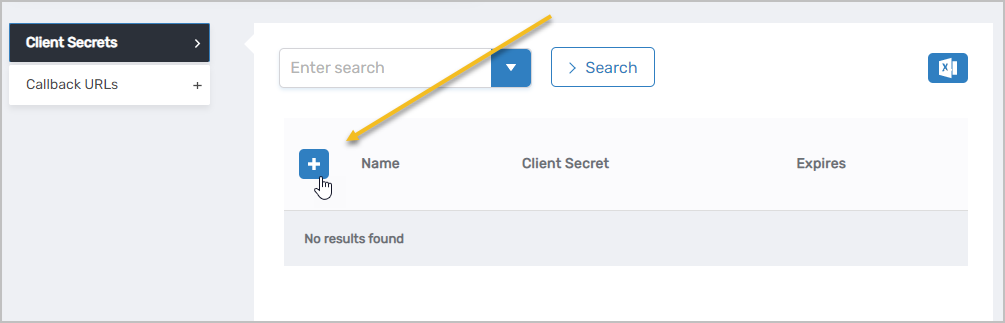
Adding Client Secrets and Callback URLs to the application
- On the View One page for the application, expand the Client Secrets accordion and click the Add button.
- Copy the string in the Client Secret field.
Note: This is the only time you will see the entire string. Once you create the secret, the value is encrypted and you will not be able to recover it.
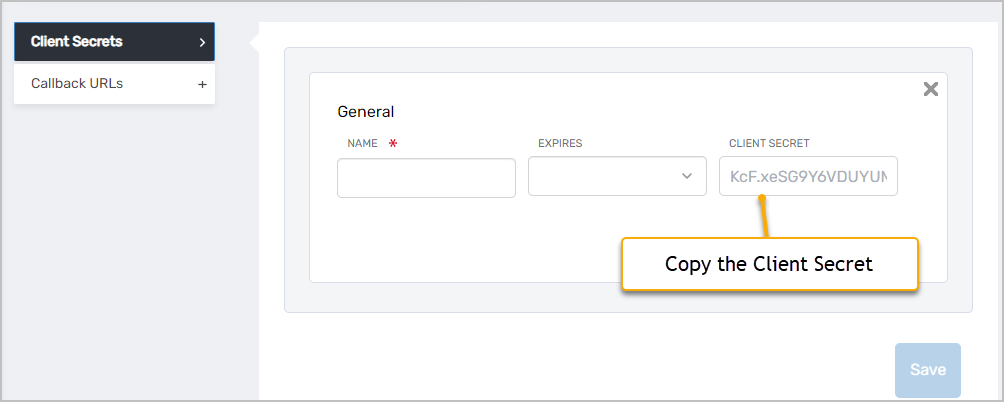
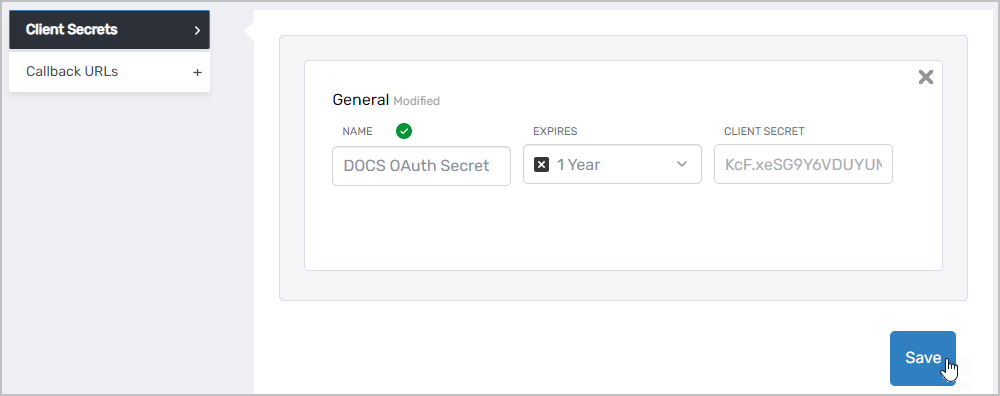
- After you have copied and saved the Client Secret, enter the following information:
- Name – Name of the secret
- Expires – Select I Year, 2 Years or Never.
- Click Save to create the secret.
- Expand the Callback URLs accordion and click the Add button.
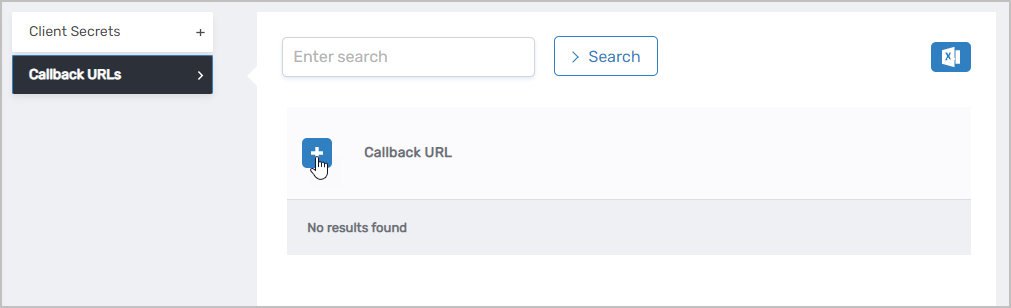
- In the Callback URL field, enter
https://<yourserver>/WebIdPForms/OAuth/V2, replacingyourserverwith the FQDN of your EmpowerID Web server. Add any other Callback URLs supported by your application. Please note that Callback URLs are case-sensitive.
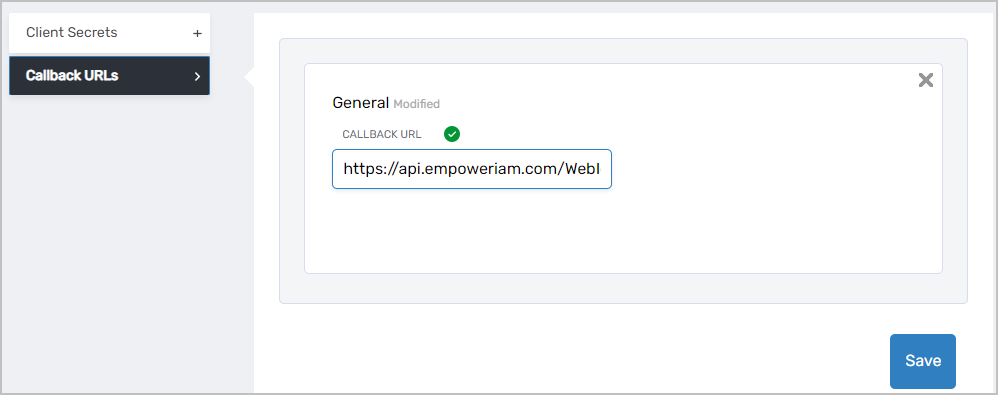
- Click Save.
Take note of the Client ID and the API key. You will need these values, as well as the Client Secret, to obtain an access token. See Get an Access Token.
How to configure advanced OAuth flows
- After EmpowerID creates the application, click the Edit link on the View One page to put the application in edit mode.

- On the edit page for the application, select the Advanced Configuration tab.
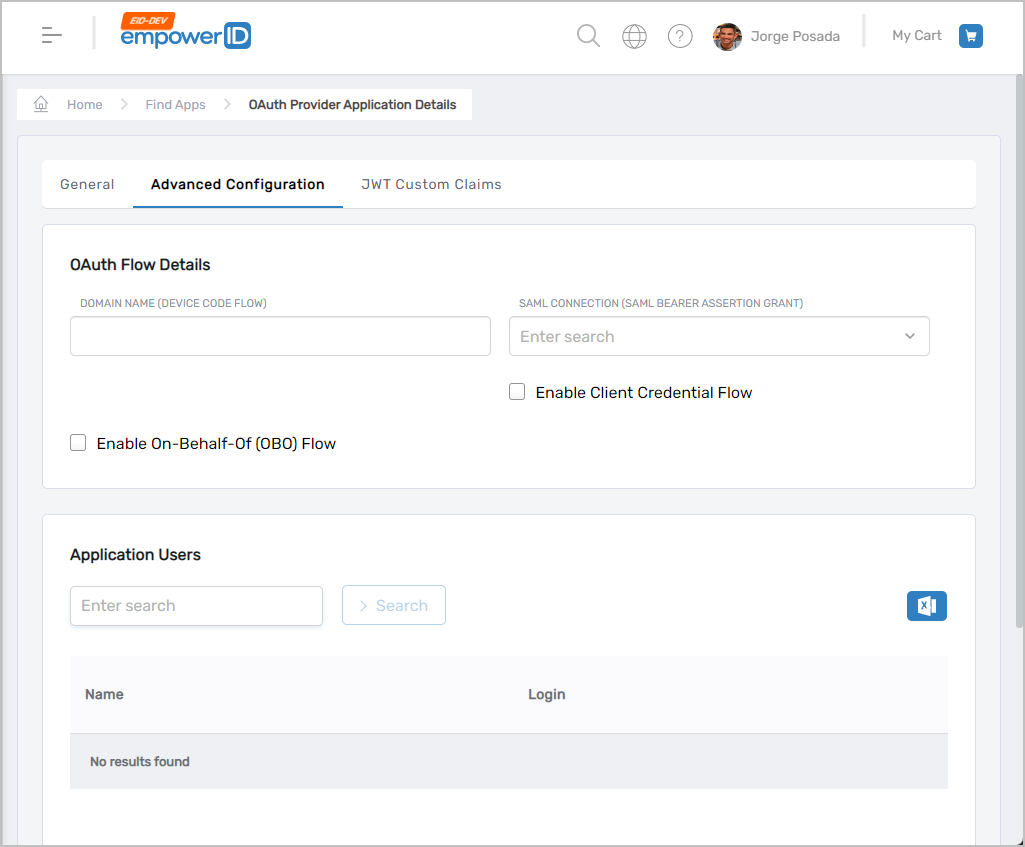
- Under the OAuth Flow Details section fill in the following details:
- Domain Name (Device Code Flow) – If you use this application for OAuth Device Code Grant Type, enter the server domain name. Eg., sso.empoweriam.com
- SAML Connection (SAML Bearer Assertion Grant) – If you use this application for OAuth SAML Bearer Assertion Grant Type, select an appropriate SAML connection from the drop down
- Enable Client Credential Flow – If you use this application for OAuth Client Credential Flow, enable this checkbox
- Enable On-Behalf-Of Flow – If you use this application for On-Behalf-Of flow, enable this checkbox