Editing Class Libraries in Visual Studio
If you want to take advantage of the speed and IntelliSense features in Visual Studio, you can edit class library code there, and add folders and files. These automatically update in Workflow Studio.
What You'll Learn
In this guide, you will:
- Create a new class library in Workflow Studio
- Open and bind the class library to source control in Visual Studio
- Edit class library code with IntelliSense support
- Update the target framework for the project
- Publish changes back to Workflow Studio
Prerequisites
caution
This tutorial assumes you have Visual Studio installed and are familiar with basic source control operations. You must have the appropriate source control credentials configured.
caution
There are still some things that you can do only in Workflow Studio:
- Add references (these do not update in Workflow Studio when you add them in Visual Studio)
- Publish your code
- Proprietary designs like workflows and activities
Create Class Library in Workflow Studio
- In Workflow Studio, on the Workspace tab, expand WCF Services, right-click Class Libraries, and select Add New Item, then EmpowerID Class Library.
- In the Add New Class Library dialog that appears, enter a name for your class library and click OK.
- On the Solution tab, in the Code Tree, right-click anywhere and select New Folder.
- In the Add New Folder dialog that appears, type Common Code and click OK.
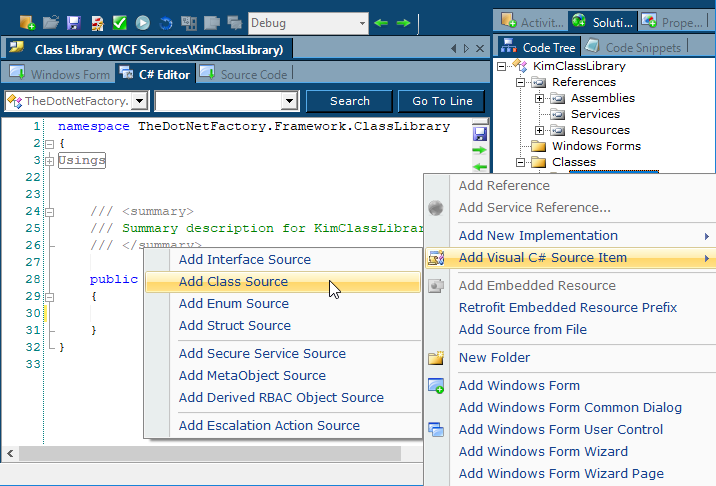
- Right-click the new folder and select Add Visual C# Source Item, then Add Class Source.
- In the Add New Class dialog that appears, enter a name for the class and click OK. The new class appears in the Common Code folder. Repeat as necessary, or you can add additional classes in Visual Studio.
- Compile and publish your changes.
- In the workspace, close the Class Library, and when prompted, save and check in your changes.
caution
If you have the class library open in both Workflow Studio and Visual Studio, you may inadvertently overwrite your changes. To avoid this, close one before opening the other.
Edit Class in Visual Studio
- Open Visual Studio, and in the Source Control Explorer, navigate to your folder.
- Double-click the solution file for the project.
- A dialog appears, asking whether you want to bind the solution to source control. Click Yes.
- In the Change Source Control dialog that appears, select the solution and click the Bind button.
- Select the class library on the second line and click Bind again, then click OK.
- In Solution Explorer, right-click the project (just under the solution) and select Properties.
- In the Properties window that appears, change the Target framework to the latest .NET framework.
- A dialog informs you that you must close and reopen the project, and asks whether you are sure you want to change it. Click Yes, and then close and reopen the project.
- In Solution Explorer, expand the Common Code folder and click your class file to open it for editing.
- Now you can add code, classes, and folders as needed in Visual Studio.
- When you are finished coding, from the Build menu, select Rebuild to compile the DLL and bring in references.
Publish Class Library in Workflow Studio
- In Workflow Studio, open your class library from the shortcut on the Startup page. Any changes you made in Visual Studio (except for any references you may have added) appear in Workflow Studio.
- In the Code Tree to the right, add any necessary references.
- Compile and publish your changes.