Create a Multi-Tab Page
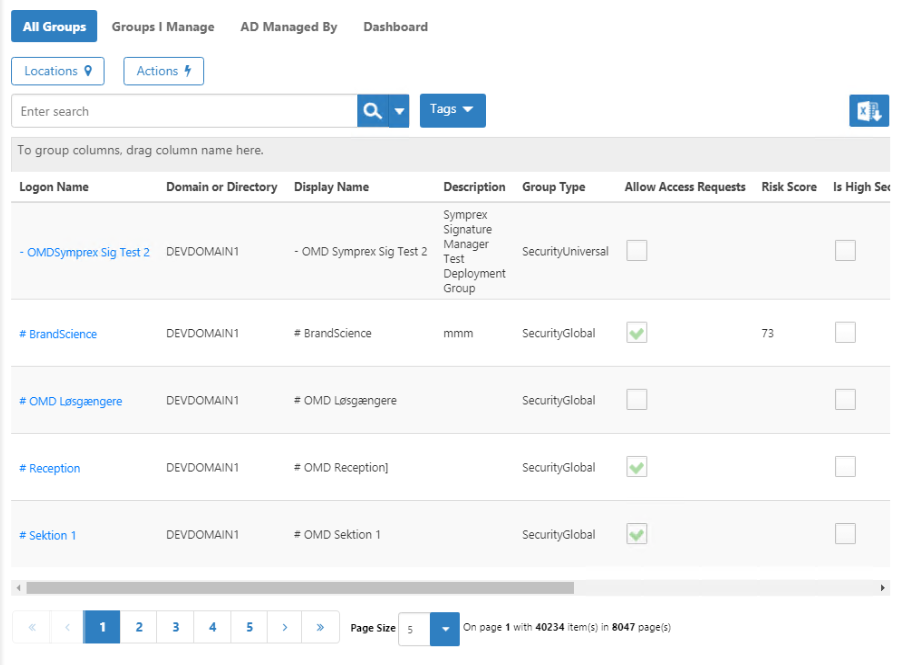
The Page Designer enables you to create custom pages with multiple tabs, each displaying different data views with their own search criteria, columns, and actions. This tutorial demonstrates how to build a simplified Groups management page with two tabs, location filtering, and context-sensitive actions.
What You'll Build
This tutorial shows you how to create a Groups management page with:
- Two tabs - All Groups and Groups I Manage
- Location tree - For filtering groups by organizational location
- Advanced search - Custom search fields for each tab
- Action panels - Context-sensitive operations based on selected group
- Custom columns - Displaying only the data users need
Plan Your Page Elements
Before building the page, identify which elements from the existing EmpowerID Groups page you want to include. For this example:
All Groups Tab:
- Location tree for filtering
- Four search fields: Logon Name, Display Name, Description, Email
- Four columns: Logon Name, Display Name, Description, Email
- Group action panel
Groups I Manage Tab:
- No location tree
- Three search fields: Logon Name, Display Name, Description
- Six columns: Display Name, Logon Name, Notes, Description, Allow Access Requests, Email
- Group action panel
Create the Page
-
Open Workflow Studio and click Solution Explorer.
-
Select the Workspace tab.
-
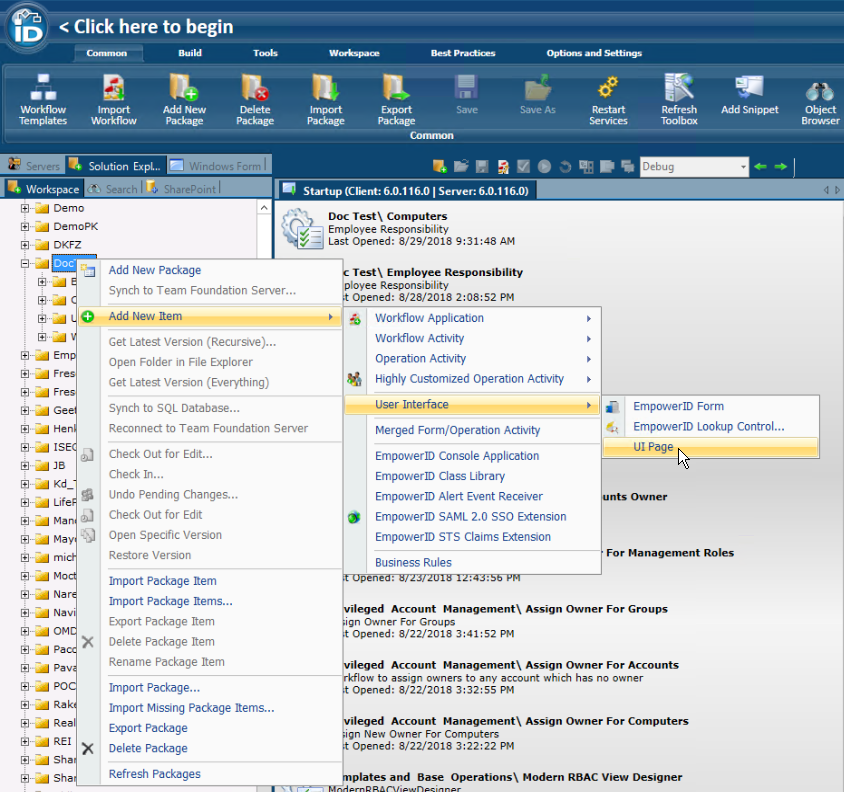
Right-click the package where you want to add the page.
-
Select Add New Item > User Interface > UI Page.
-
In the Add New UI Page dialog, enter a name (e.g.,
CustomGroups). -
Click OK.

An empty page design area appears.
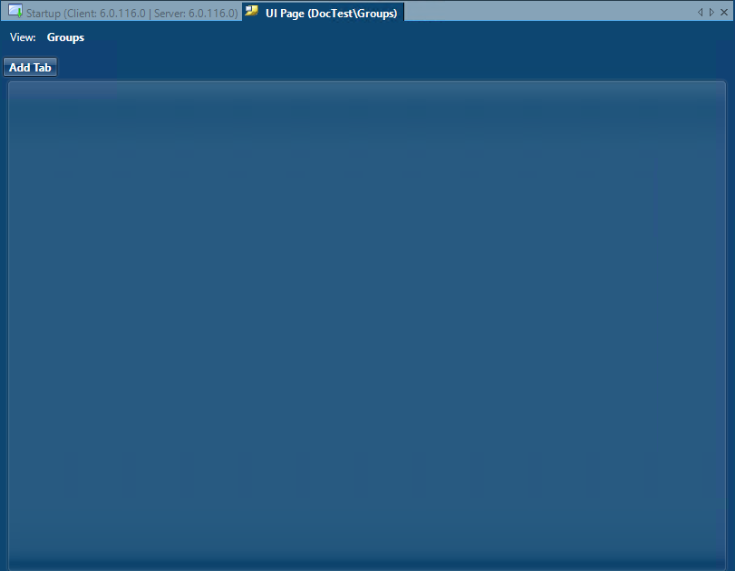
Create the First Tab
-
Click Add Tab.
-
Right-click the default No Tree tab that appears.
-
Select Edit Name.

-
Name the tab All Groups.
-
Click OK.

The tab now shows a tree panel and controls along the top.

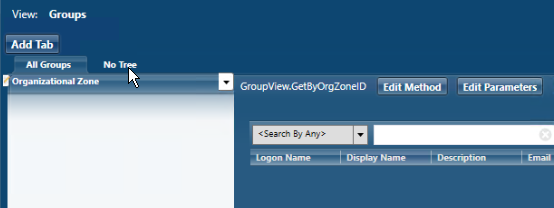
Add the Location Tree
-
At the top of the tree panel, click the arrow button.
-
Select All Locations tree.
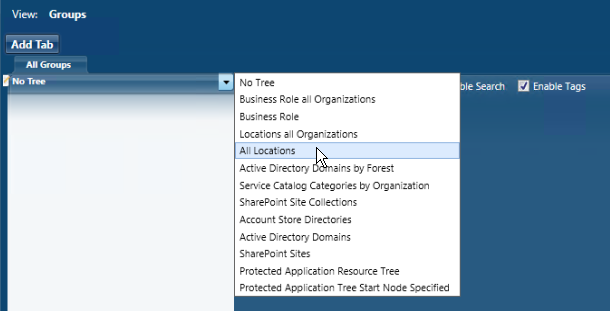
The tree panel label changes from No Tree to Organizational Zone.
Configure the Data Source
-
Click Edit Method.
-
In the Select an RBAC View Method dialog, enter
groupviewin the search box. -
Click Search to see all group-related view methods.

-
Select GetByOrgZoneID (this method retrieves all groups for a selected location).
-
Click OK.
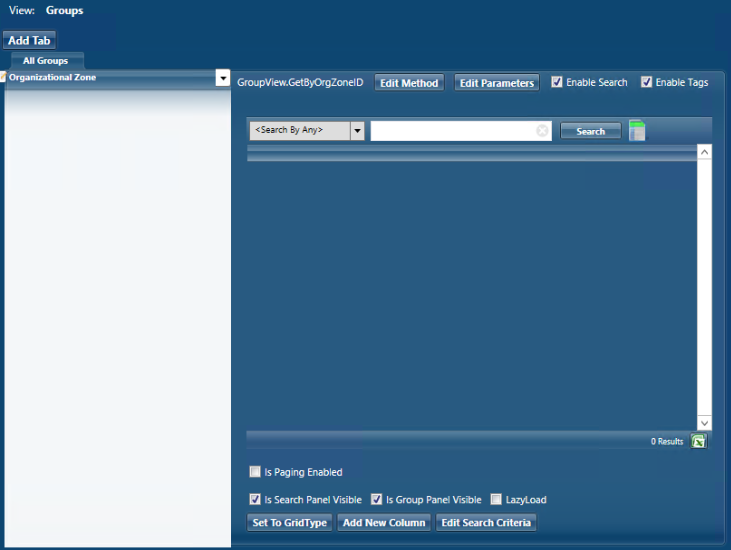
The method name appears beside the button and the grid UI displays with additional controls.
Configure Search
-
Above the grid, clear the Enable Tags checkbox (we're not using tags).
-
Ensure the Enable Search checkbox is selected.
-
Below the grid, ensure Is Search Panel Visible is selected.
-
Click Edit Search Criteria.
-
In the Edit Search Details dialog, select Is Advanced Search Enabled.
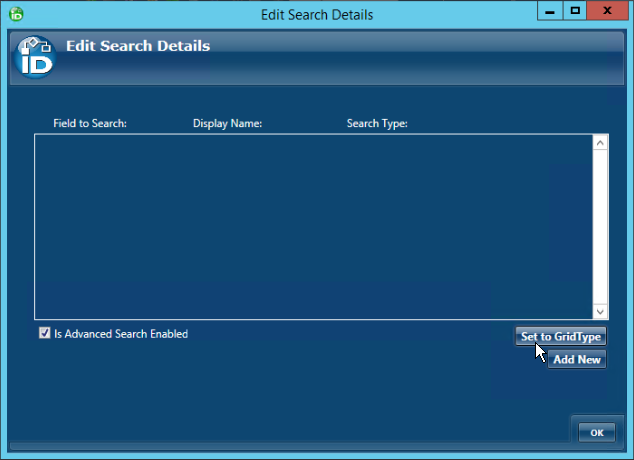
-
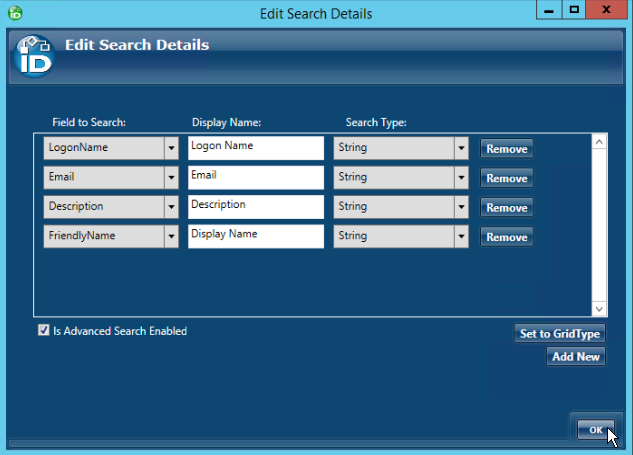
Click Add New and configure the first search field:
- Field to Search:
LogonName - Display Name:
Logon Name - Search Type:
String
- Field to Search:
-
Repeat for these additional fields:
- Display Name (field:
FriendlyName) - Description (field:
Description) - Email (field:
Email)
- Display Name (field:
-
Click OK when all fields are added.
Add Grid Columns
-
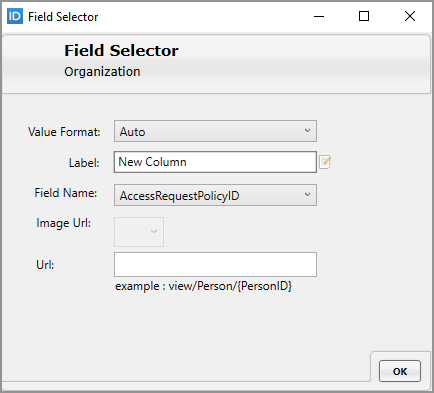
Click Add New Column.
-
In the Field Selector dialog, configure:
- Value Format:
Auto - Label:
Logon Name - Field Name:
LogonName
- Value Format:
-
Click OK.
-
Repeat for these additional columns:
- Display Name (field:
FriendlyName) - Description (field:
Description) - Email (field:
Email)
- Display Name (field:
Add Action Panel
-
Right-click the All Groups tab.
-
Click the No Action Tab arrow.
-
Scroll down and select the Group action panel.
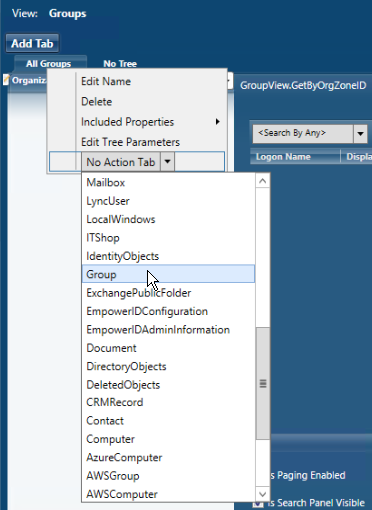
The action panel provides context-sensitive operations based on the selected group.
Create the Second Tab
-
Above the existing tab, click Add Tab.
A new tab named No Tree appears.
-
Click the new tab to open its workspace.
-
Right-click the tab and select Edit Name.
-
Change the name to Groups I Manage.
-
Click OK.
-
Leave the Tree setting as No Tree (this tab doesn't need location filtering).
-
Clear the Enable Tags checkbox.
Configure the Data Source
-
Click Edit Method.
-
Enter
groupviewin the search box and click Search. -
Select GetGroupsIManage.
-
Click OK.
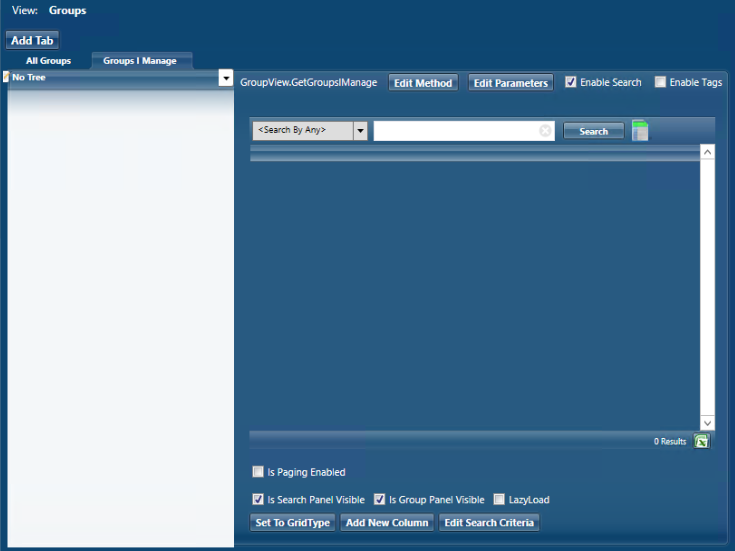
The method name appears and the grid displays with controls.
Configure Search
-
Ensure Enable Search is selected above the grid.
-
Ensure Is Search Panel Visible is selected below the grid.
-
Click Edit Search Criteria.
-
Select Is Advanced Search Enabled.
-
Add these search fields:
- Logon Name (field:
LogonName) - Display Name (field:
FriendlyName) - Description (field:
Description)
- Logon Name (field:
-
Click OK.

Add Grid Columns
Add these columns using Add New Column:
- Display Name (field:
FriendlyName) - Logon Name (field:
LogonName) - Notes (field:
Notes) - Description (field:
Description) - Allow Access Requests (field:
AllowAccessRequests) - Email (field:
Email)
Configure each column:
- Value Format:
Auto - Label: (column display name)
- Field Name: (field name listed above)
Add an Action Tab
For a unified view of available operations:
- Above the tabs, click Add Tab.
- Right-click the new tab.
- Select Action Tab.
- Select Group to match the grid type.
The action tab displays available operations and updates based on the selected item in either tab.
Publish and View the Page
- Right-click the UI Page tab and select Save Changes.
- Click Compile and Publish above the UI Page tab.
- In the publishing wizard, click Next.
- Select the server hosts for deployment.
- Click Next and wait for successful publication.
- Click No when prompted to restart services.
Access Your Page
-
Open SQL Server Management Studio.
-
Connect to your EmpowerID database.
-
Execute this query:
SELECT * FROM RBACView -
Find your package in the results and note its RBACViewID.
-
Navigate to:
https://your-server.com/UI/#common/pages/view/YOUR_RBACVIEWID
Your custom Groups management page loads with both tabs, the location tree, search functionality, and action panels.
Tips for Multi-Tab Pages
Tab Organization:
- Group related data views in separate tabs
- Use consistent naming conventions
- Consider the most frequently used view as the first tab
Trees and Filters:
- Add trees when users need to filter by organizational structure
- Location trees work well with "GetByOrgZoneID" type methods
- Consider whether each tab needs its own tree
Search Configuration:
- Match search fields to the data users actually search for
- Include properties on the tab for search fields to function
- Advanced search is optional - basic search may suffice for simple tabs
Action Panels:
- Action panels automatically show relevant operations
- They update based on the selected item
- Use the same action panel type across tabs for consistency
Column Selection:
- Display only columns users need to see
- Consider column width when adding many columns
- Use hyperlinks for navigational columns (requires included properties)
Related Topics
- Create a Simple Page with Advanced Search - Learn the basics of page creation