Onboard Groups
The Onboard Group workflow provides a structured approach for creating and configuring groups in EmpowerID. The workflow guides you through group creation, membership configuration, ownership assignment, and IAM Shop settings.
What the Onboard Group Workflow Configures
The workflow handles:
- Group creation – Creates the group in the selected directory or tenant
- Permanent membership – Adds specific users as permanent group members
- RBAC membership policies – Configures dynamic membership based on roles and locations
- Ownership settings – Assigns responsible parties, owners, and deputies
- IAM Shop publishing – Makes the group requestable with eligibility and approval policies
- Email settings – Configures mail-enabled group options (when supported by the directory)
Prerequisites
To run the Onboard Group workflow, you need the ACT and UI roles for group object administration. See Access Needed to Manage Groups for the specific roles required.
Configure Workflow Parameters (Optional)
The Onboard Group workflow includes customizable parameters that control which sections and fields appear to users. Common parameters include:
- ShowMembershipOptions – Controls whether membership configuration appears
- ShowIAMShopSettings – Controls whether IAM Shop publishing appears
- ShowOwnershipOptions – Controls whether ownership assignment appears
- DefaultGroupUsageTypeId – Sets the default group usage type (Generic, Privileged, Service, etc.)
To configure workflow parameters:
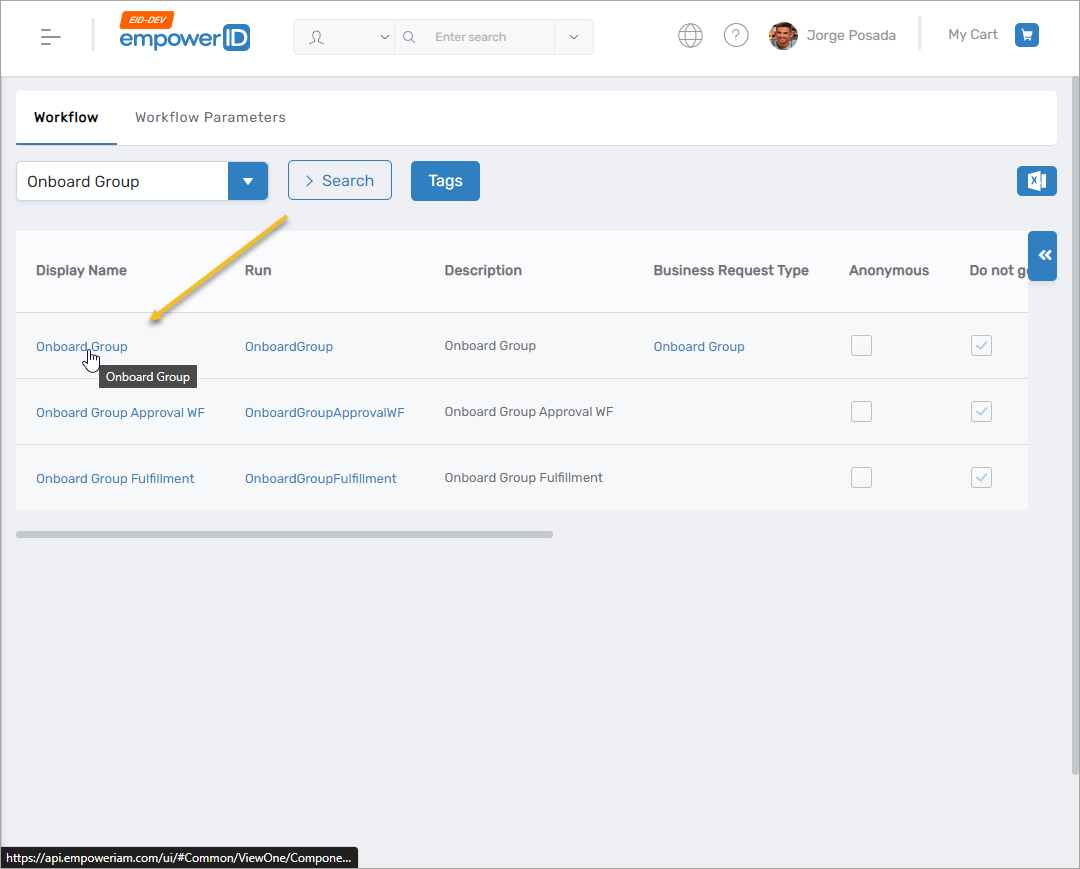
- On the navbar, expand Low Code/No Code Workflow and select Low Code Workflows.
- Select the Workflow tab and search for Onboard Group.
- Click the Display Name for the workflow.
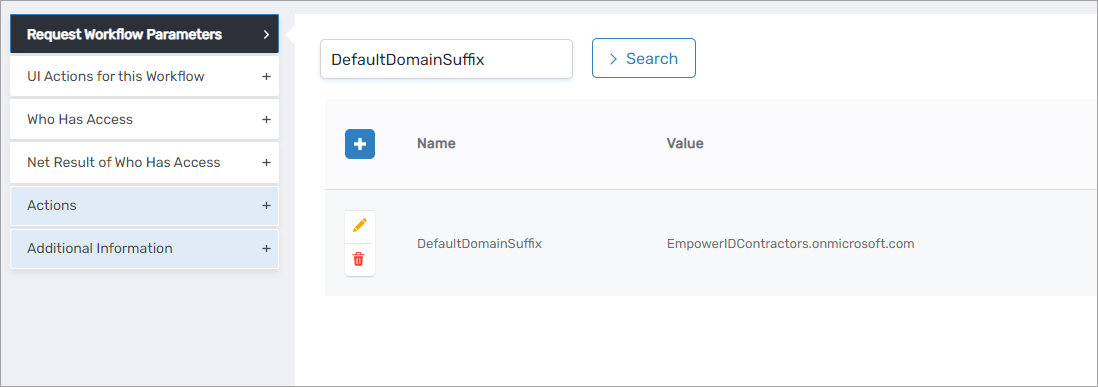
- Expand the Request Workflow Parameters accordion.
- Locate the parameter you want to configure and click the Edit button.
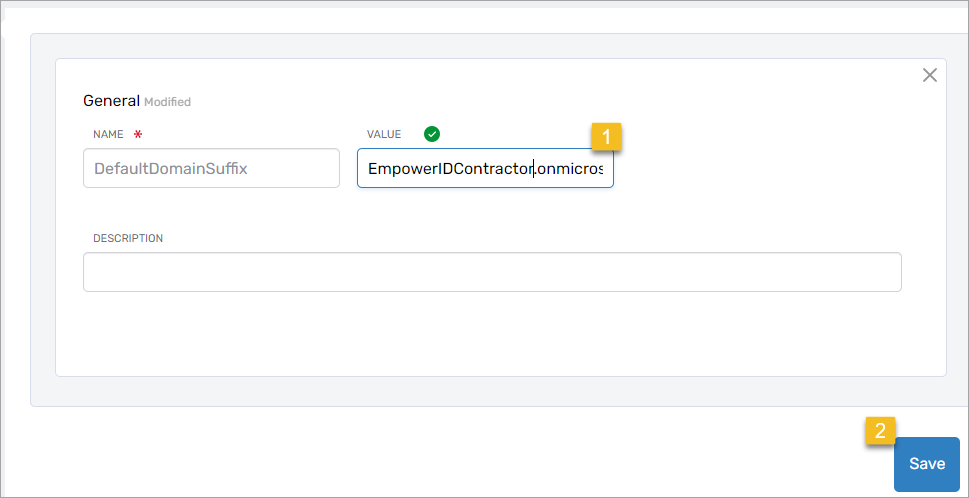
- Enter the new value in the Value field and click Save.
- Repeat for additional parameters as needed.
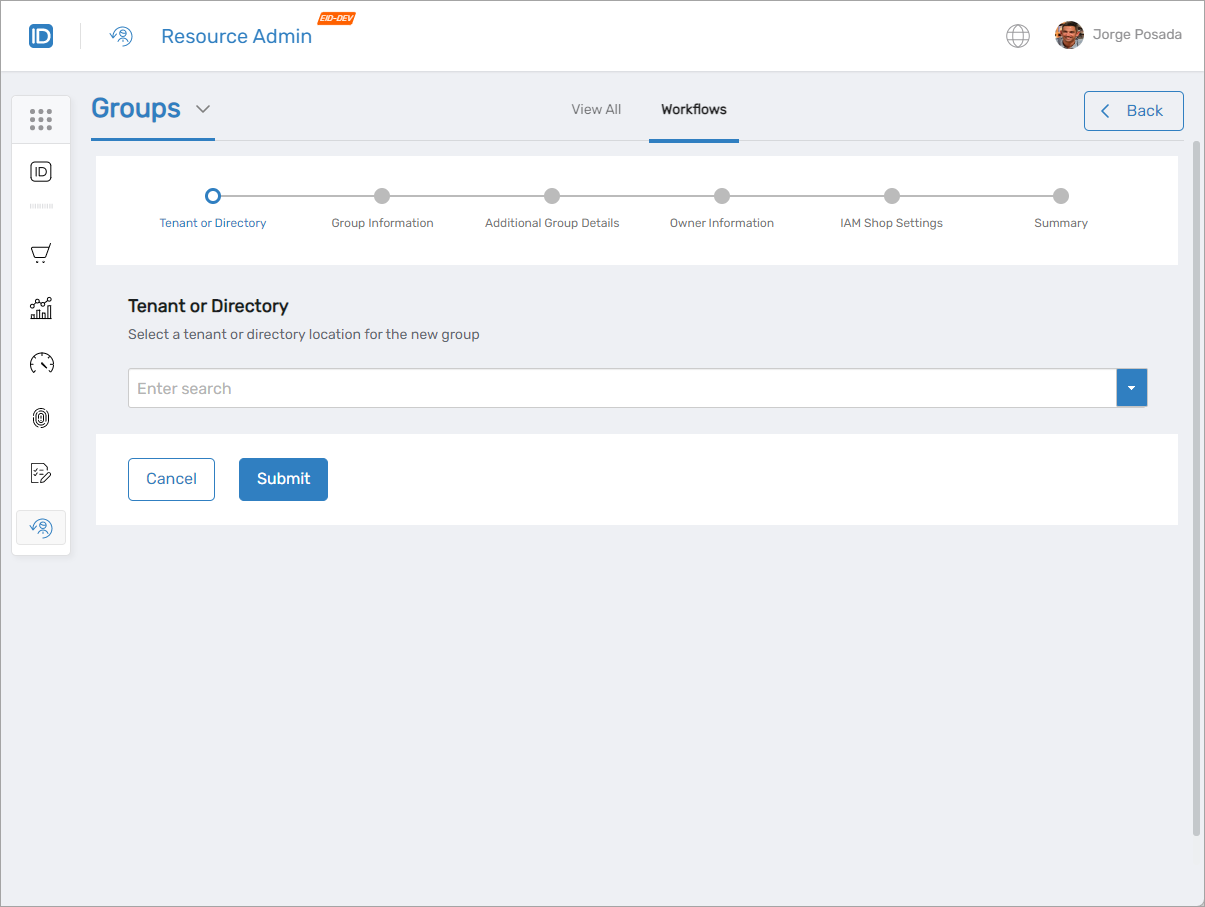
Onboard a Group
-
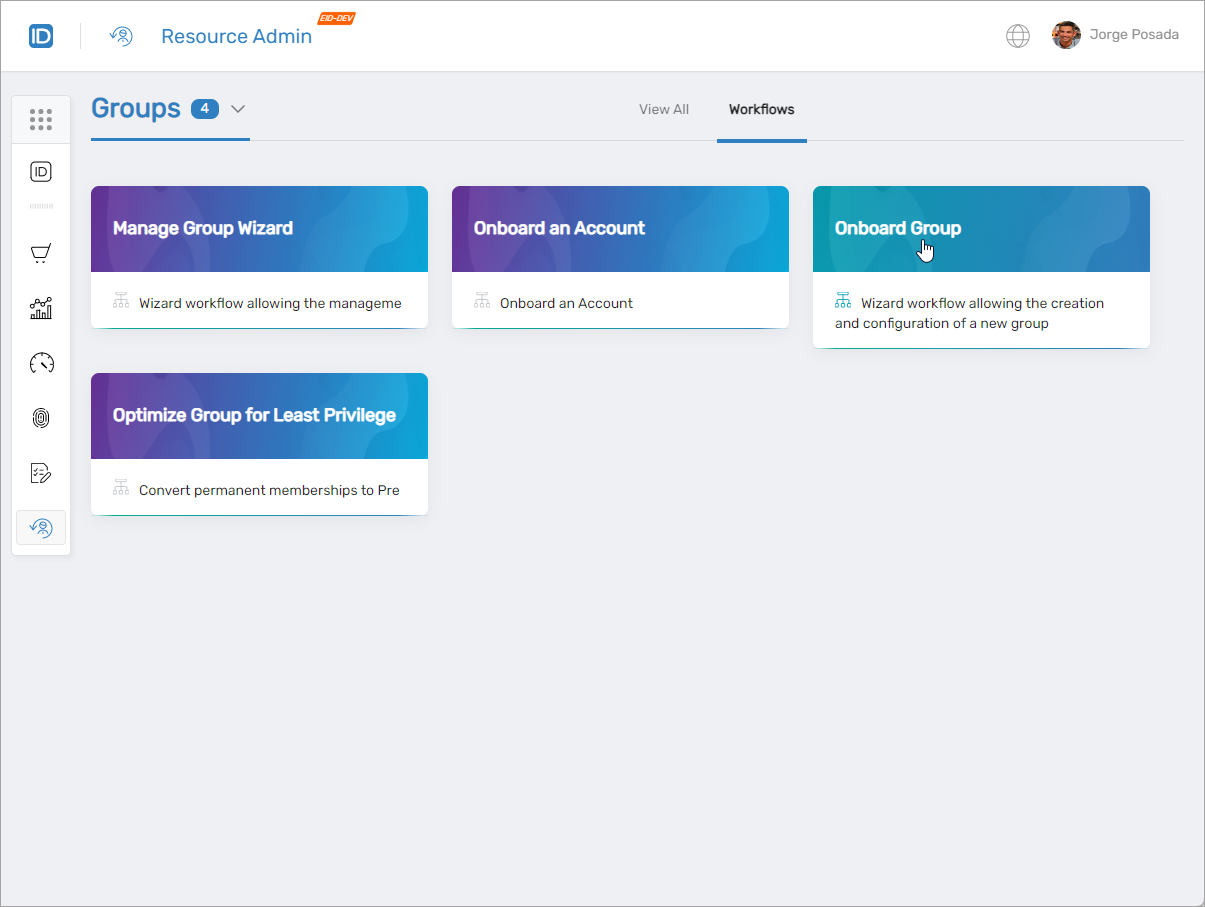
Log in to the Resource Admin app in your environment.
-
Select Groups from the Resource Type menu.
-
Select the Workflows tab.
-
Click Onboard Group to start the workflow.
 The Onboard Group wizard opens.
-
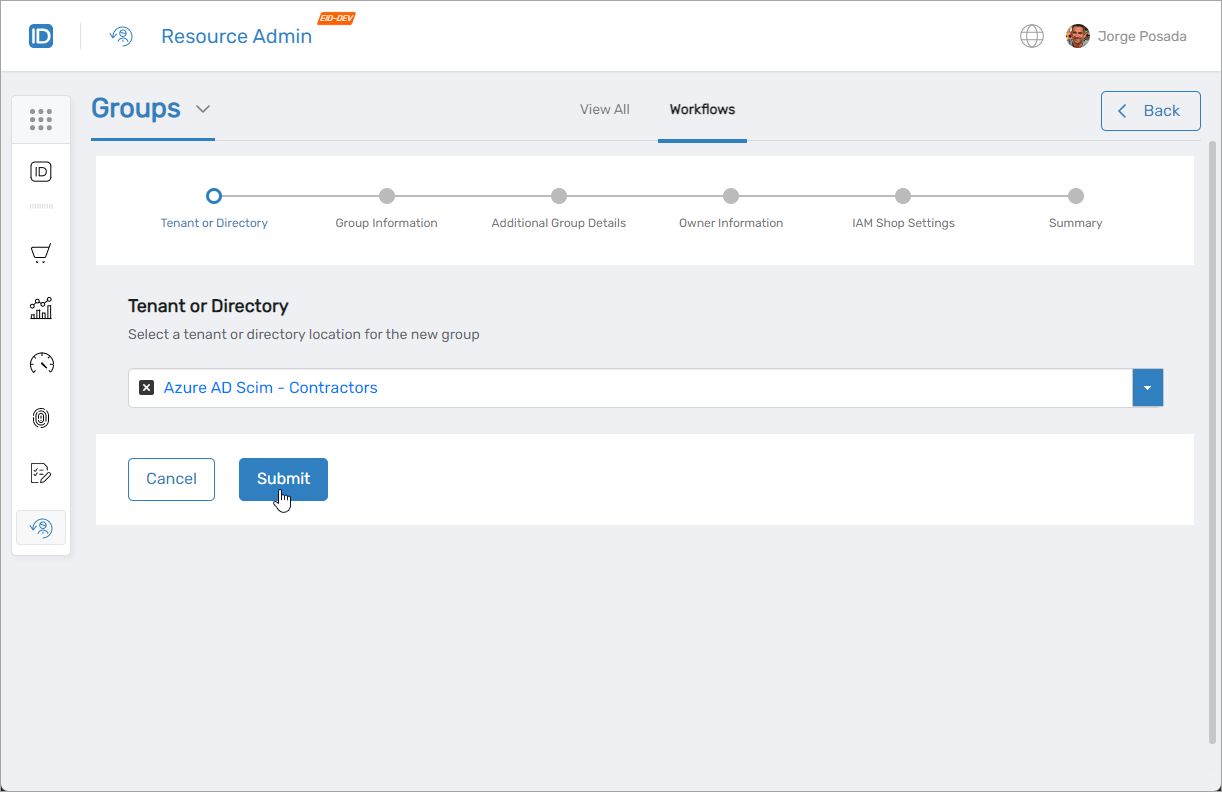
Choose the tenant or directory location for the new group. For on-premises directories like Active Directory, also select the appropriate Organizational Unit (OU).
-
Click Submit to proceed to the Group Information section.
-
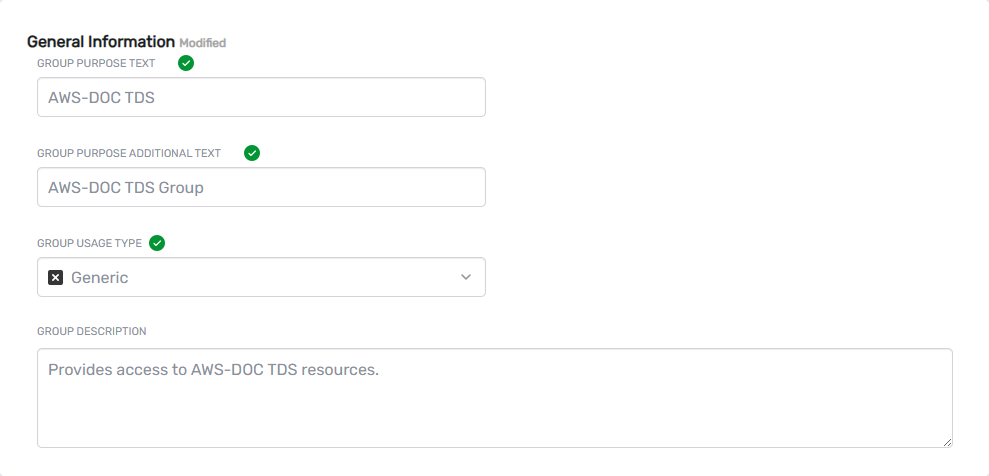
Fill in the group information fields:
- Group Purpose Text – Name for the group
- Group Purpose Additional Text – Display name for the group
- Group Usage Type – Usage category (Generic, Privileged, Service, Application, etc.)
- Group Description – Brief description (optional)
-
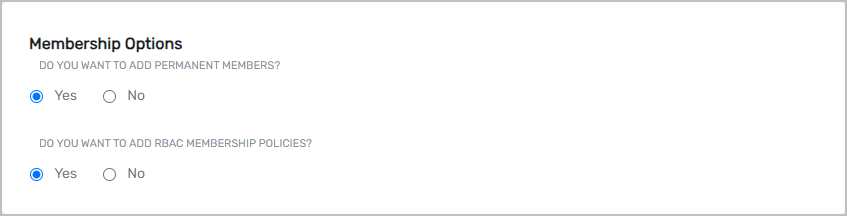
Configure membership options:
- Select whether to add permanent members
- Select whether to apply RBAC membership policies
-
Click Next to proceed to Additional Group Details.
-
Enter additional group information:
- Group Type – Type appropriate for the directory (Security, Distribution, etc.)
- Is Mail Enabled – Enable email functionality if supported (includes email domain and sender authentication settings)
- Notes – Additional notes about the group
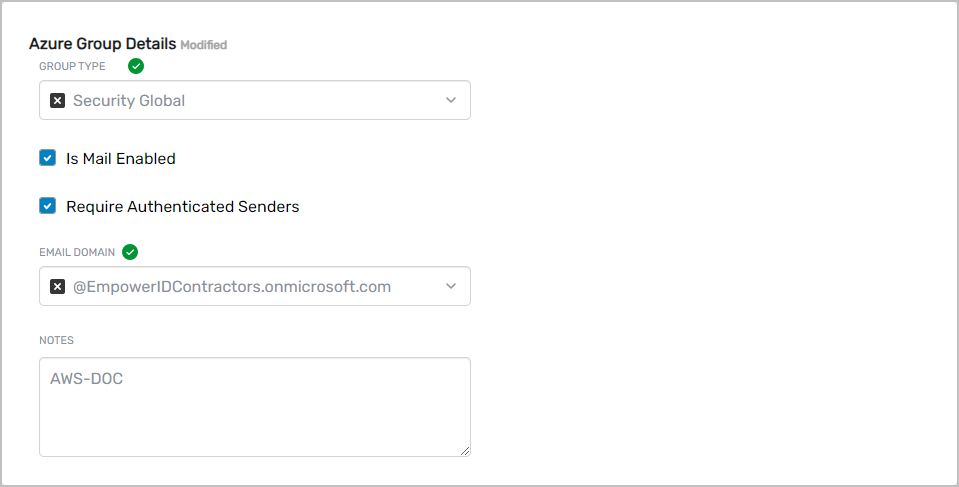
noteMail settings only appear when onboarding groups in directories that support email functionality.
-
Click Next to proceed to Owner Information.
-
Assign group ownership:
- Responsible Party – Person responsible for managing the group
- Owners – One or more users as group owners
- Deputies – One or more users as group deputies (optional)
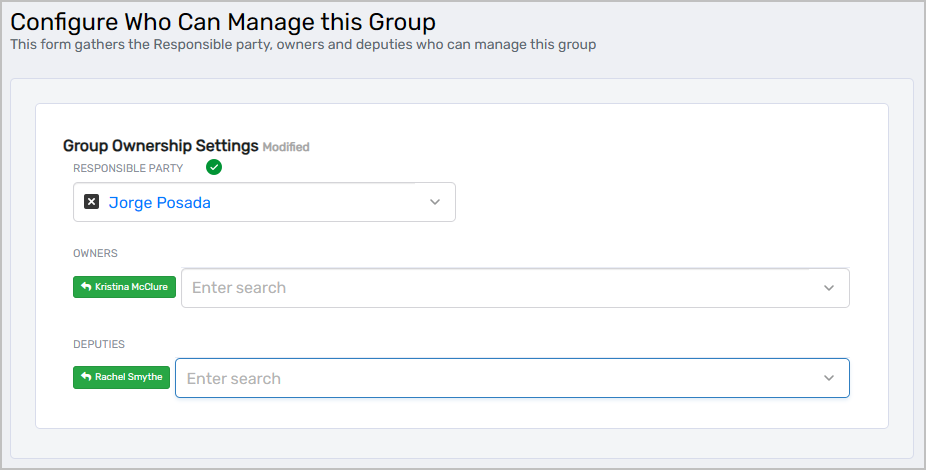
-
Click Next to proceed to IAM Shop Settings.
-
Configure IAM Shop publishing:
- Select whether the group should be requestable in the IAM Shop
- If publishing, select an Access Request Policy
- Define eligibility assignments:
- Eligible Assignees – Users who can request access (requires approval)
- Preapproved Assignees – Users who receive automatic approval
- Suggested Assignees – Users for whom the group is suggested
- Enter Additional IAM Shop Settings information (optional)
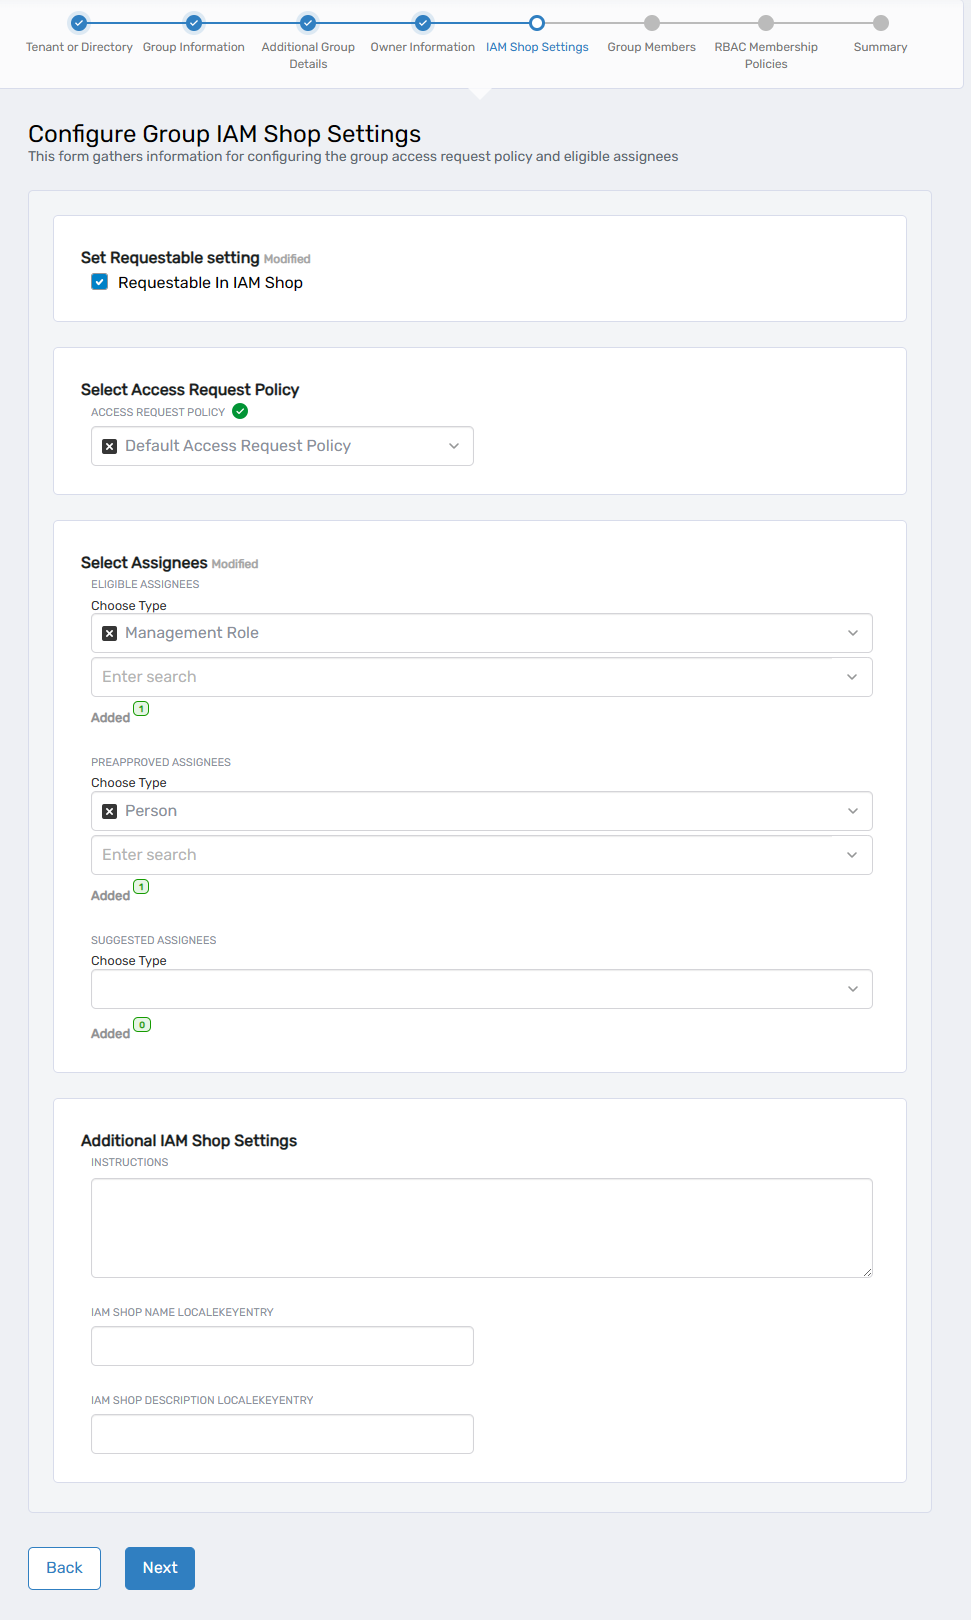
tipUsers must have an eligibility assignment (Eligible, Preapproved, or Suggested) to discover the group in the IAM Shop.
-
Click Next to proceed.
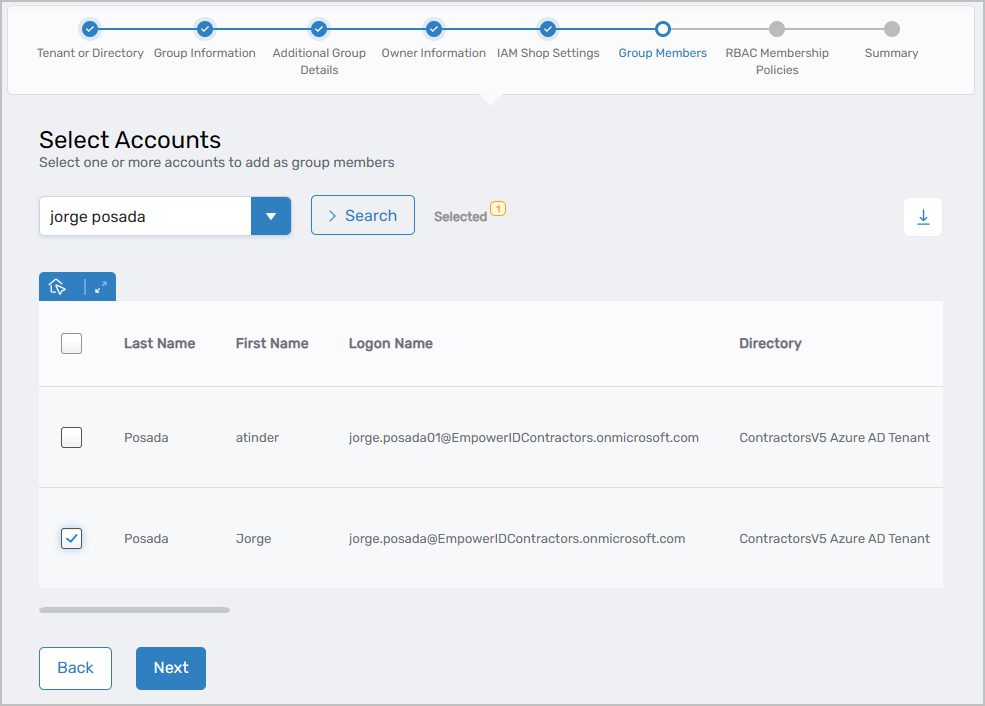
-
If you selected to add permanent members, search for and select accounts to add as group members, then click Next.
-
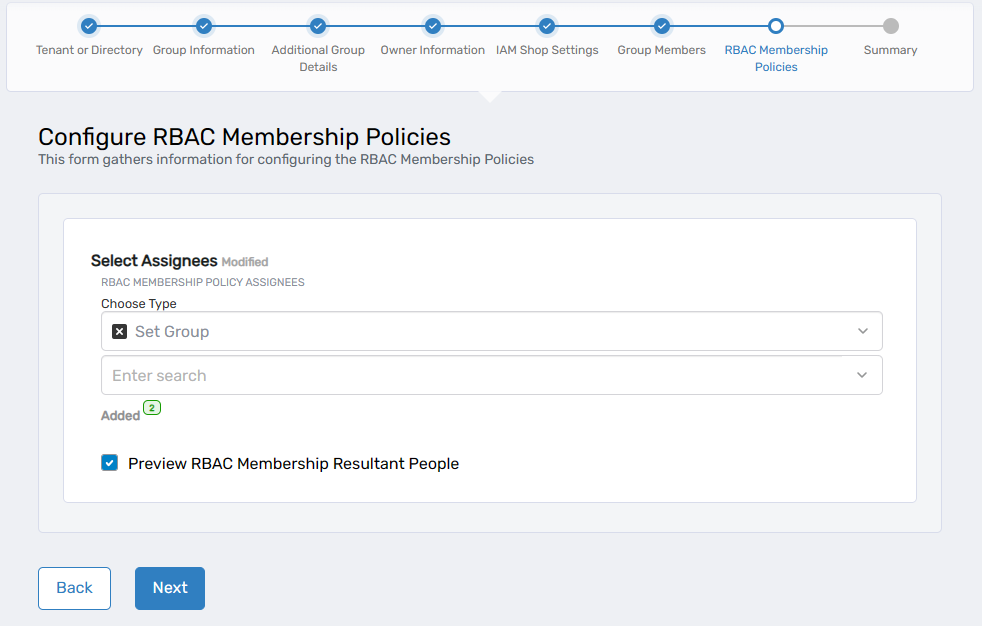
If you selected to add RBAC membership policies:
- Select the RBAC membership policy type (Person, Group, Set Group, Management Role, Business Role and Location, etc.)
- Search for and select the specific assignee for that type
- Repeat for additional policy types as needed
- Optionally, click Preview RBAC Membership Resultant People to see how many people will be added
-
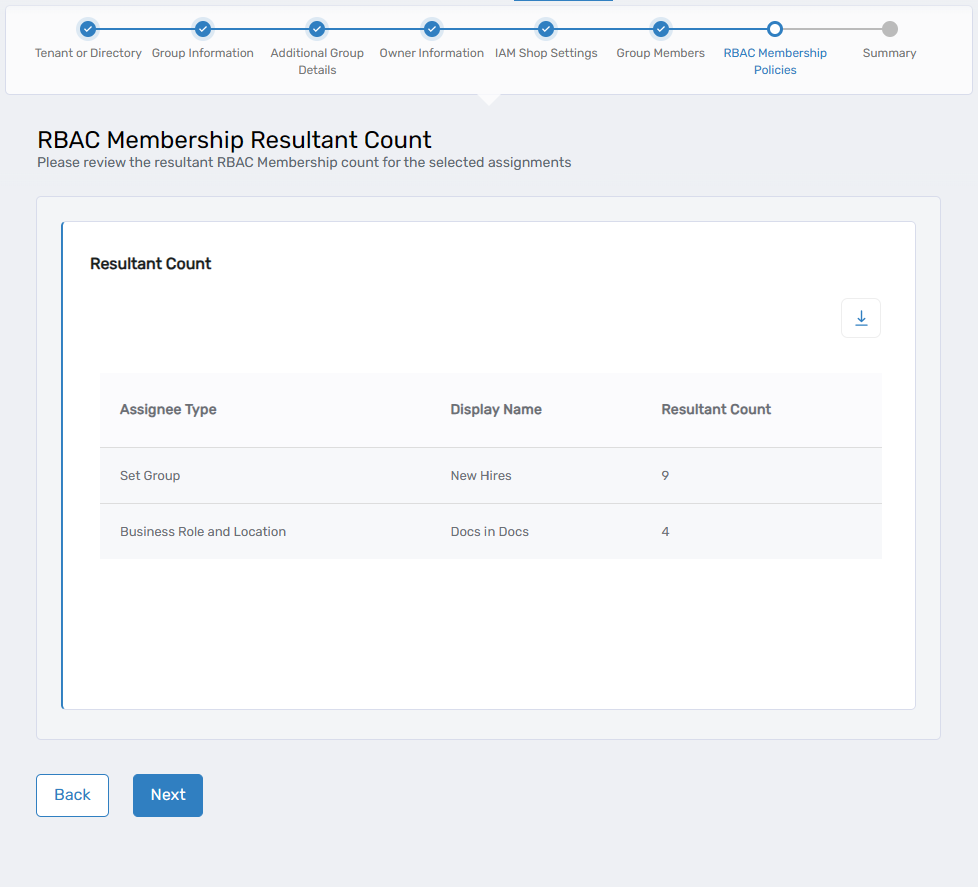
If you previewed RBAC membership, review the resultant count and click Next.
-
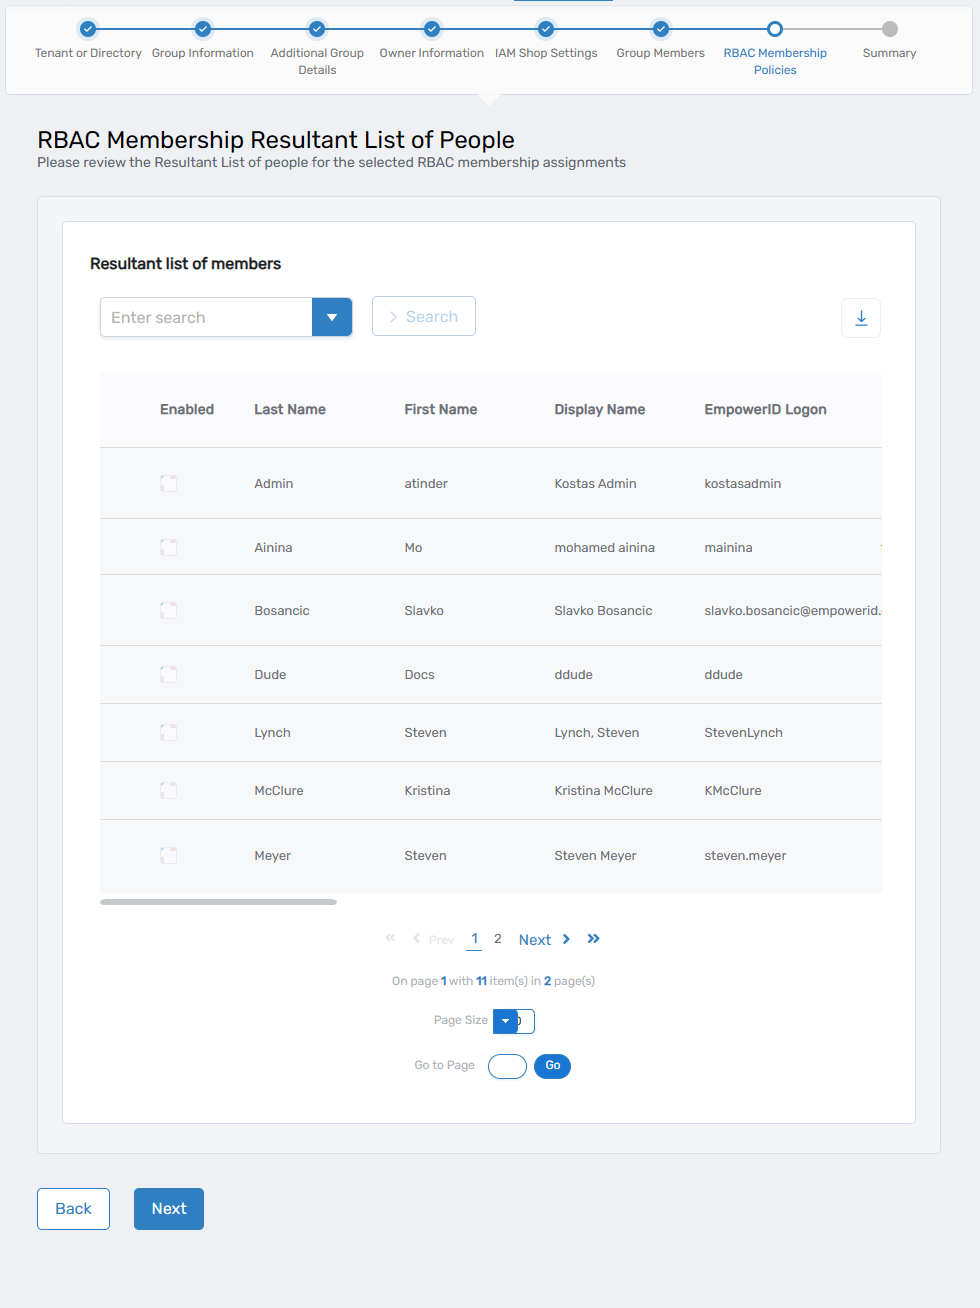
If you previewed RBAC membership, review the resultant list of people and click Next.
-
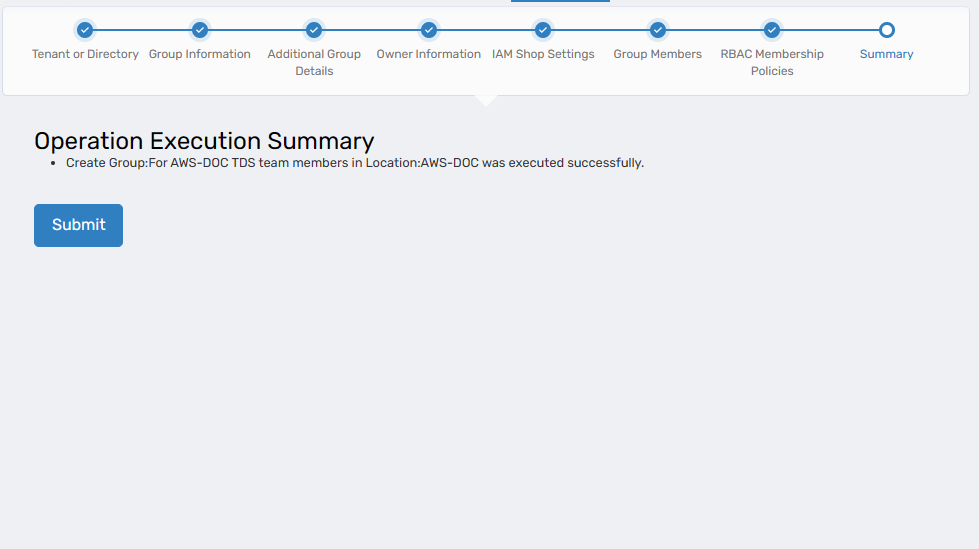
Review the summary information and click Submit to create the group.
-
Click Submit in the Operation Execution Summary.
-
Click Submit to exit the wizard.
Results
After completing the workflow:
- The group is created in the selected directory or tenant
- The group is registered in EmpowerID for management and auditing
- Permanent members (if configured) are added to the group
- RBAC membership policies (if configured) dynamically manage group membership based on role assignments
- Owners and responsible parties receive appropriate access levels for group management
- If published to the IAM Shop, eligible users can discover and request access to the group
- The group creation is logged in the EmpowerID audit log (System Logs > Audit Log)
Related Topics
- Add Groups to Groups – Nest groups for inherited permissions
- Role-Based Group Memberships – Detailed RBAC membership configuration
- Import Groups – Import groups from flat files
- About the View One Group Page – Manage groups after creation