Create Client Certificates
As an application owner, you can upload or generate client certificates to enable secure authentication or single sign-on for Microsoft Entra applications. EmpowerID handles the upload to Microsoft Entra ID on your behalf.
Two certificate types are available:
- Authentication Certificate — for app-to-service authentication. Requires a base64-encoded public key.
- SAML Single Sign-On Certificate — for signing SAML assertion tokens. EmpowerID generates the certificate internally; no upload is needed.
What You'll Need
| Requirement | Description |
|---|---|
| Base64 Certificate String | Required only for Authentication Certificates. You must provide the base64-encoded public key. |
Need to generate a self-signed certificate? Click here.
-
In the EmpowerID Web interface, go to Apps and Authentication > SSO Connections.
-
Click SSO Components.
-
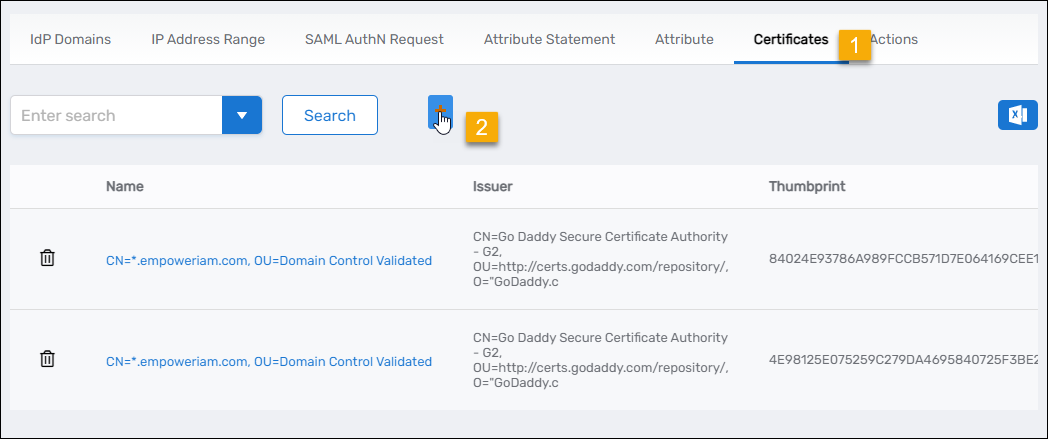
Select the Certificates tab and click Add in the grid header.
-
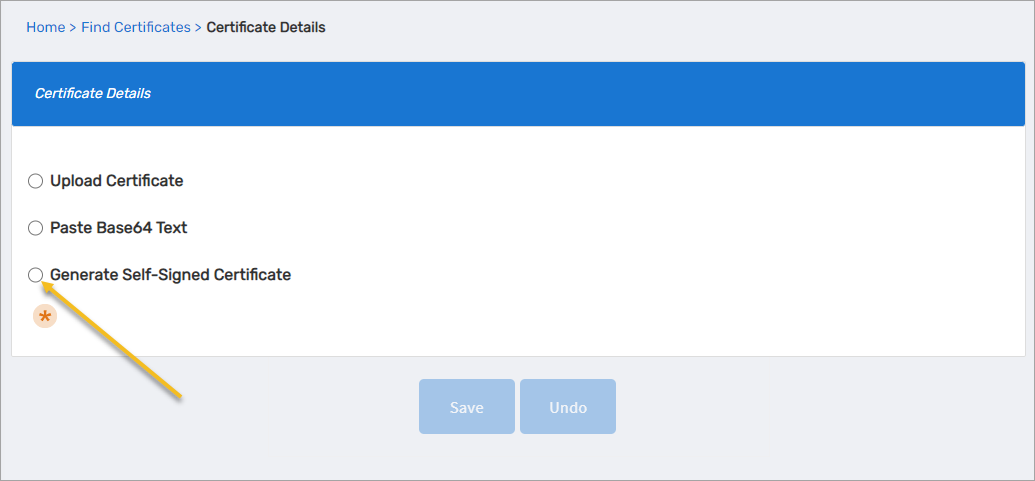
Select Generate Self-Signed Certificate.
-
Complete the form:
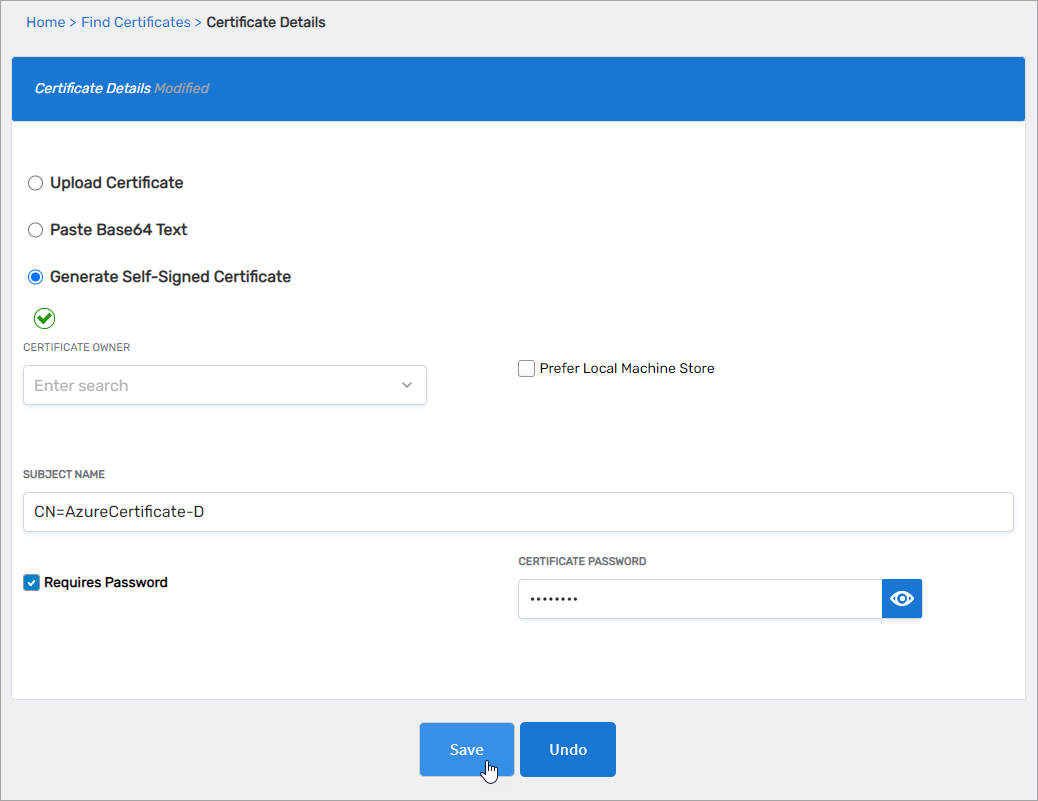
Field Value Certificate Owner Leave empty Prefer Local Machine Store Leave empty Subject Name Use a value like CN=AzureCertificateRequires Password Check to include a private key Certificate Password Enter a strong password tipSelect Requires Password when you need to export the certificate with its private key. If you only need the public key, leave it unchecked.
-
Click Save.
-
Click the Find Certificates breadcrumb to return to the SSO Components page.
-
Search for and click the certificate name.
-
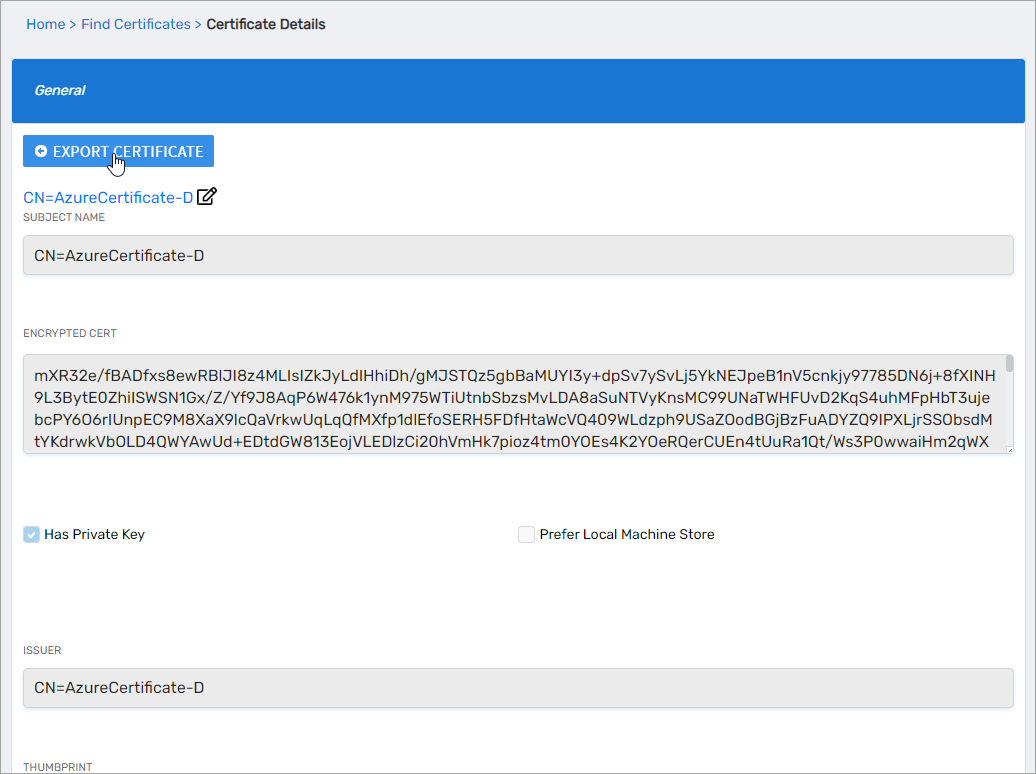
Click Export Certificate and save the file.
Steps to Create a Client Certificate
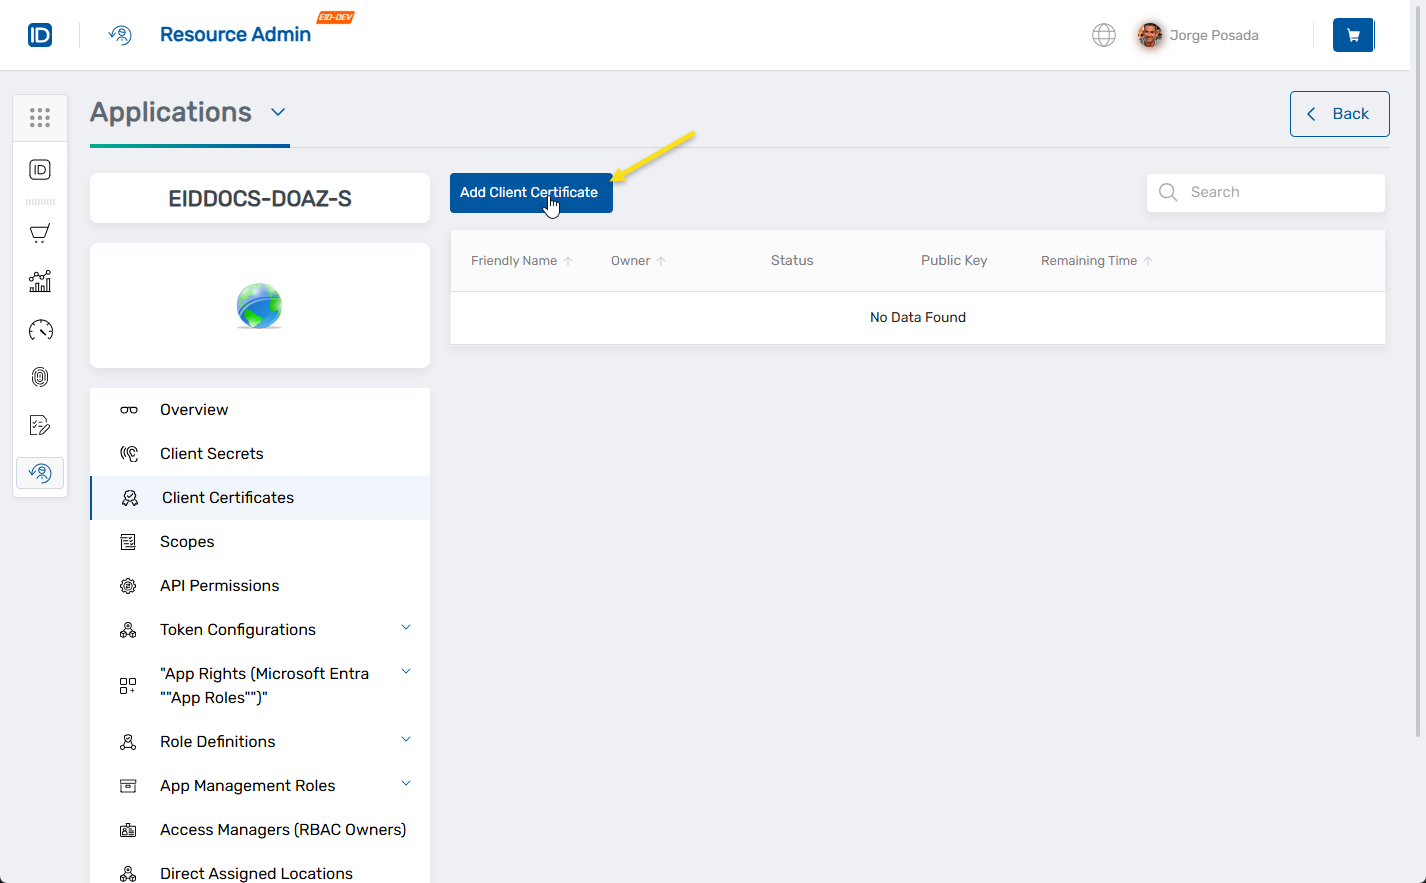
- Log in to the Resource Admin portal.
- From the Resource Type menu, select Applications and search for your Azure application.
- Click the Details button for the application to open its Overview page.

- In the left application menu, click Client Certificates.
- Click Add Client Certificate.
 The Client Certificate Details form opens.

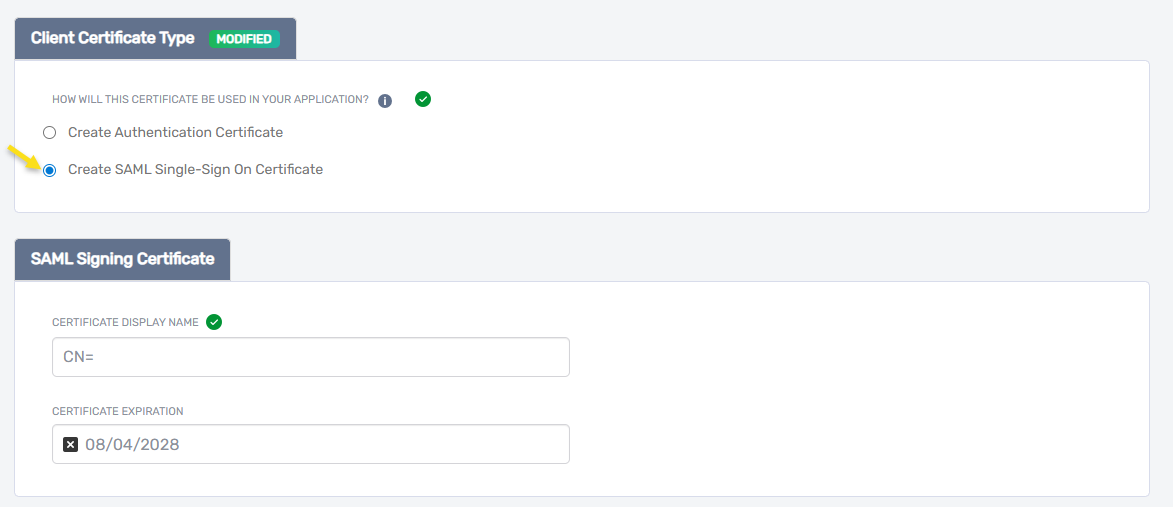
- Select the certificate type:
- Create Authentication Certificate — for client app authentication (for example, Microsoft Graph API)
- Create SAML Single Sign-On Certificate — for Microsoft Entra ID to sign SAML tokens for SSO
- Enter the certificate details based on the type you selected:
- Authentication Certificate: Enter a Certificate Name, a Certificate Description, and paste the Certificate Base64 Encoded String (your base64-encoded public key).

- SAML Single Sign-On Certificate: Enter a Certificate Display Name and select a Certificate Expiration date. EmpowerID generates the certificate automatically — no file upload is needed.
- Authentication Certificate: Enter a Certificate Name, a Certificate Description, and paste the Certificate Base64 Encoded String (your base64-encoded public key).
- Configure vaulting and access settings:

- Select Location — Choose where the certificate will reside within EmpowerID's RBAC hierarchy. Click × to clear any preselected location, then click Select a Location to browse or search.
- Vault this certificate — Check to store the certificate securely in EmpowerID's credential vault. Required for sharing and IAM Shop access control.
- Enable sharing for this certificate — Optional. Allows other users to find and request access to the certificate through the IAM Shop.
- Click Next, review the summary, and click Submit.
- Review the fulfillment status and click Submit to complete.
What Happens Next
- EmpowerID registers the certificate with the Azure application.
- If vaulting is enabled, the certificate is secured in the credential vault.
- IAM Shop sharing and access rules are applied based on your selections.
- The certificate appears in the Client Certificates tab of the application record.
All certificate actions are logged in EmpowerID's audit trail for compliance and security tracking.