Create MSTeams PowerShell Workflow
This tutorial demonstrates how to create and publish an MSTeams PowerShell workflow using Workflow Studio. The workflow executes PowerShell cmdlets against Microsoft Teams and displays results in a grid format.
Overview
You will build a workflow that:
- Uses AzXPowerShellActivity to execute PowerShell commands in the MS Teams microservice
- Retrieves team members from a Microsoft Teams group using
Get-TeamUser - Displays results using DynamicPowershellResultsGrid
The workflow executes this PowerShell command:
Get-TeamUser -GroupId <your-group-id> | ConvertTo-Json
Replace <your-group-id> with your actual Microsoft Teams Group ID.
Prerequisites
- MS Teams account store configured in EmpowerID
- Permissions to execute MS Teams PowerShell cmdlets
- A Microsoft Teams Group ID for the team you want to query
For detailed information about PowerShell activities and their properties, see PowerShell Activity Concepts.
To find your Microsoft Teams Group ID, use the Teams admin center or run Get-Team cmdlet to list available teams and their IDs.
Create the Workflow
Step 1: Initialize Workflow
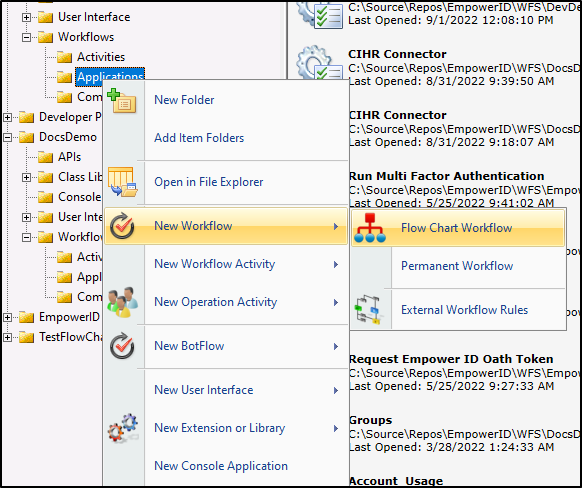
- In Solution Explorer, right-click the Package node and select New Workflow > Flow Chart Workflow.
- Save the workflow with a descriptive name (e.g., "MSTeamsPowershellWF").
Step 2: Add AzXPowerShellActivity
- From the Activities tab, search for AzXPowerShellActivity.
- Drag the activity to the designer window.
- In the Properties tab, set Name to a meaningful value (e.g., "CallGetTeamsCmdlet").

Step 3: Configure PowerShell Command
-
Right-click the activity and select Edit Get/Set Data logic.
-
Add the PowerShell library reference:
using PS = TheDotNetFactory.Framework.PowerShell; -
Implement the SetDataCode method:
public virtual void SetDataCode(uni.WorkflowExecutor context, uni.IActivity activity)
{
    try
    {
        // Create PowerShell command
        PS.PSCommand cmd = new PS.PSCommand();
        cmd.IsScript = true;
        // Replace <your-group-id> with your actual Microsoft Teams Group ID
        cmd.CommandText = "Get-TeamUser -GroupId <your-group-id> | ConvertTo-Json";

        var commands = new List<PS.PSCommand>();
        commands.Add(cmd);

        // Configure activity properties
        this.CurrentWorkflow.CallGetTeamsCmdlet.PSServiceType = AzPowerShellType.MSTeams;
        this.CurrentWorkflow.CallGetTeamsCmdlet.AccountStoreID = 2615; // Replace with your MS Teams account store ID
        this.CurrentWorkflow.CallGetTeamsCmdlet.Commands = commands;
        this.CurrentWorkflow.CallGetTeamsCmdlet.RestrictDelayToSameServer = true;
        this.CurrentWorkflow.CallGetTeamsCmdlet.EnablePassiveResultsHandling = false;
        this.CurrentWorkflow.CallGetTeamsCmdlet.MaxWaitLoopCount = 10;

        TdnfTrace.Current.TraceData(TraceEventType.Verbose, 411,
            "Starting to execute command: " + cmd.CommandText);
    }
    catch(Exception ex)
    {
        TdnfTrace.Current.TraceData(TraceEventType.Error, 411,
            "Error executing PowerShell command: " + ex.Message);
        throw; // Re-throw to allow workflow error handling
    }
}
Key Configuration Properties:
Property Value Description PSServiceTypeAzPowerShellType.MSTeamsSpecifies MS Teams as the PowerShell service target AccountStoreIDYour account store ID Identifies the MS Teams account store for authentication RestrictDelayToSameServertrueEnsures execution on the same server EnablePassiveResultsHandlingfalseDisables passive result collection MaxWaitLoopCount10Maximum polling attempts for command completion cautionReplace the following placeholders with your specific configuration:
- AccountStoreID: Replace
2615with your MS Teams account store ID. Find this in Object Administration > Account Stores. - GroupId: Replace
<your-group-id>with your actual Microsoft Teams Group ID in the PowerShell command.
- AccountStoreID: Replace
Step 4: Add Results Grid
- Search for DynamicPowershellResultsGrid in the Activities tab.
- Drag the activity to the designer.
- Set Name to "ShowUserResults" in the Properties tab.
Step 5: Connect Activities and Configure Results
-
Right-click AzXPowerShellActivity and select Edit Get/Set Data logic.
-
Implement the GetDataCode method to pass results to the grid:
public virtual void GetDataCode(uni.WorkflowExecutor context, uni.IActivity activity)
{
    // Transfer PowerShell results to the grid display
    this.CurrentWorkflow.ShowUserResults.Result = this.CurrentWorkflow.CallGetTeamsCmdlet.Results;
} -
Connect all activities in the workflow designer.
Step 6: Compile
Click the Compile icon to compile the workflow code. Address any compilation errors before proceeding.
![]()
Publish the Workflow
- Click the Compile and Publish button in the Workflow Studio toolbar.
- In the Publish Workflow wizard that appears, click the Next button.
- Select the host server and click Next.
- Click Next again to begin compiling the workflow. Upon a successful compilation, Workflow Studio publishes the workflow.
- Select Yes when prompted to restart one or more services.
- In the Active Services window that appears, make sure the EmpowerID Web Role Service is selected and click Restart.
- Click No when prompted to restart Workflow Studio.
Verify Workflow Execution
- Log in to the EmpowerID portal.
- Navigate to Low Code/No Code Workflows > Low Code Workflows
- Locate your published workflow and click the workflow name in the Run column.
- Verify the grid displays Microsoft Teams group member data.
Related Topics
- PowerShell Activity Concepts - Learn about PowerShell activity properties and configuration
- Create Azure AD PowerShell Workflow - Build workflows for Azure AD services
- Create MSOnline PowerShell Workflow - Build workflows for Microsoft Online services