Localize Text in EmpowerID
EmpowerID uses Locale Keys to represent every text string in the web user interface. These keys are used by developers and administrators to control titles, descriptions, labels, and other UI elements.
The Localized Text page allows administrators to:
- Modify the default English strings used across the application
- Add translated values for other supported languages
This is useful for aligning terminology with your organization’s internal language or branding, as well as enabling internationalization.
The Default Value of a locale key is what displays for users assigned the en (English) locale. This acts as a fallback for all users unless a specific translation exists for their language.
You Will Learn How To:
- Customize Default Strings
- Localize Strings by adding translations for other supported languages
Customize Default Strings
Customizing default strings allows you to adapt EmpowerID terminology to match your organization’s language. For example, if your industry uses the term attestation instead of recertification, you can easily update the interface accordingly.
Steps to Customize a Default String
-
Navigate to the Localized Text Page
Go to Admin > Miscellaneous > Localized Text -
Search for the Locale Key
- Select the Localized Strings tab
- Use the search bar to locate the string. For this example, search for
recertification.
-
Open the Locale Key for Editing
- Click the Key Entry Name (e.g.,
RecertificationRevokesAllDescription)
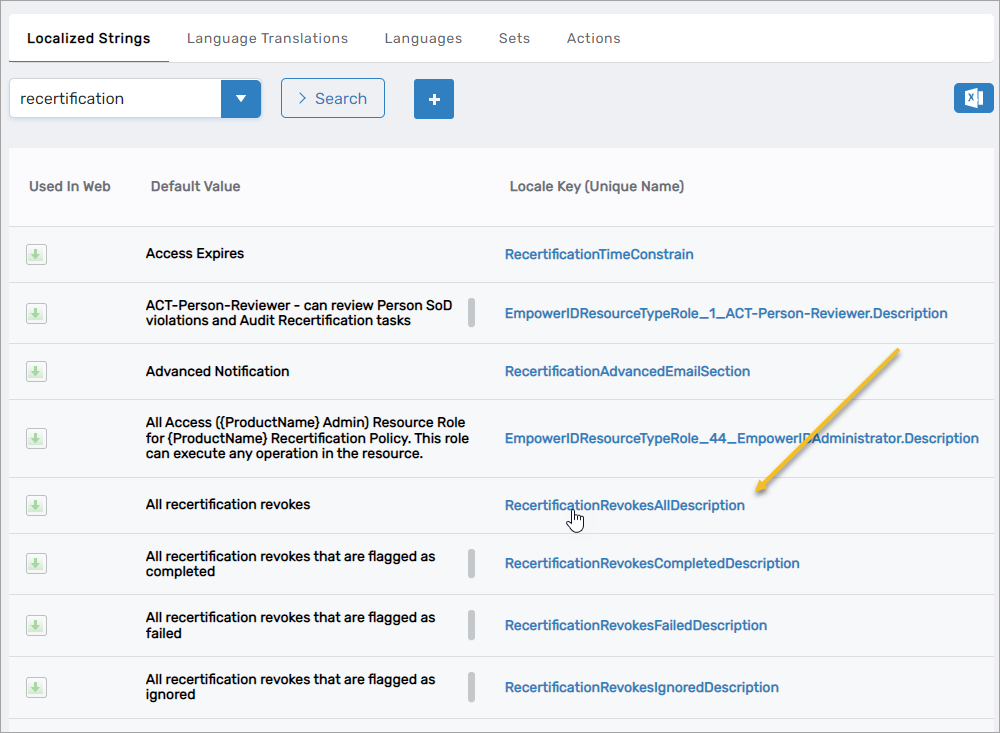
- On the View page, click Edit

- Click the Key Entry Name (e.g.,
-
Update the Default Value
- Replace "recertification" with "attestation"
- Click Save
Localize Strings for Other Languages
Localization allows you to provide translated versions of UI text for users with non-English locales set in their profile.
Steps to Add or Update a Translation
- Search for the Locale Key
- Go to the Localized Strings tab
- Search for the text you want to translate
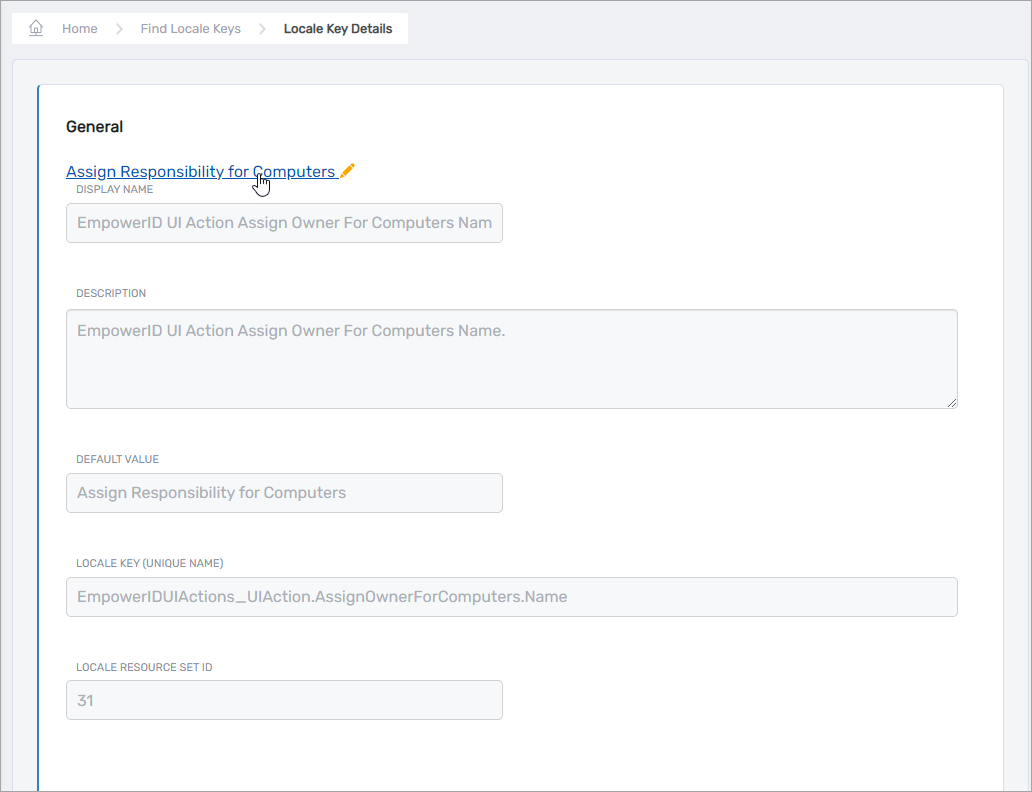
- Open the Locale Key View Page
- Click the Locale Key (Unique Name) to open the detail view
- Click Edit to enable editing
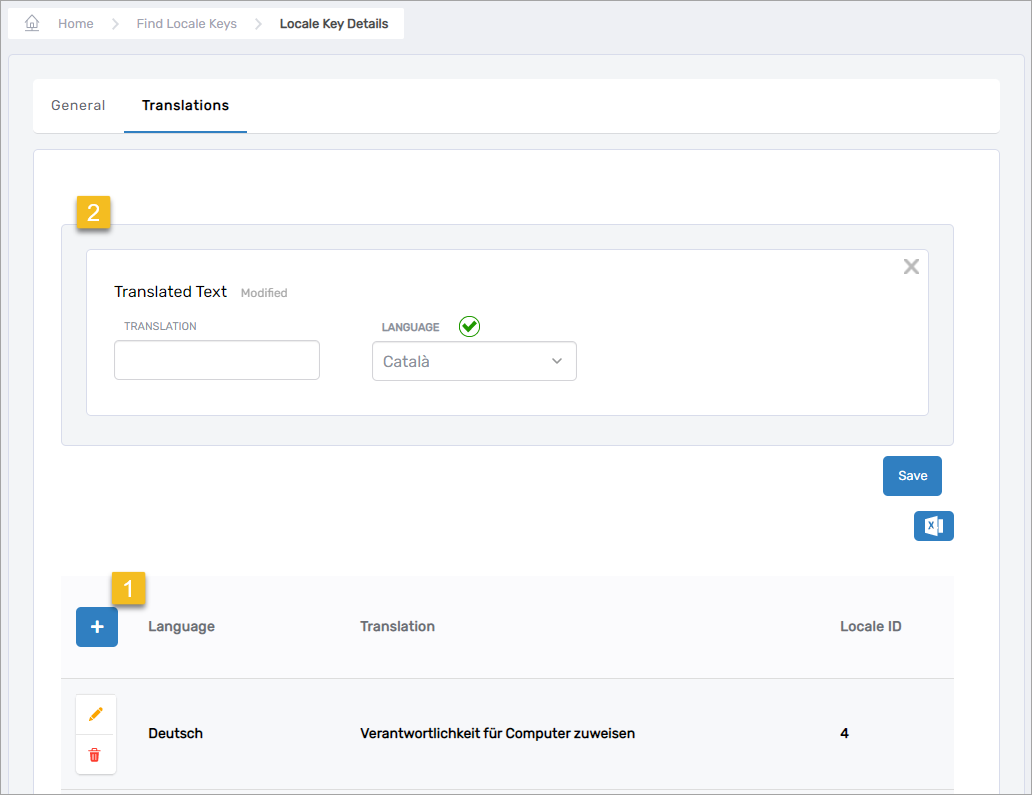
- Add or Edit Translations
- Select the Translations tab
- To edit an existing translation:
- Click Edit, update the value, then click Save
- To add a new translation:
- Click Add New, choose the language, enter the value, and click Save
- Click Add New, choose the language, enter the value, and click Save
Best Practices for Managing Localized Text
-
Use Consistent Terminology
Ensure consistent use of translated terms across similar functions to avoid confusion. -
Always Provide a Default Value
Even if your application supports multiple languages, EmpowerID requires a default value for fallback behavior. -
Test in User Context
After updating or adding translations, test by switching a test user’s locale and verifying the interface in context.