Localizing Support Contact Information
The EmpowerID web interface includes a Support item at the bottom of the navigation bar, which displays support contact information such as phone numbers and email addresses. These values can and should be customized and localized to reflect your organization’s specific support details and multilingual requirements.
This article explains how to localize those values using the Localized Text feature in the EmpowerID web interface.
Note: If you want to remove the Support navbar item rather than localize it, see Managing the Display of the Support Navbar Item.
Understanding the Locale Keys
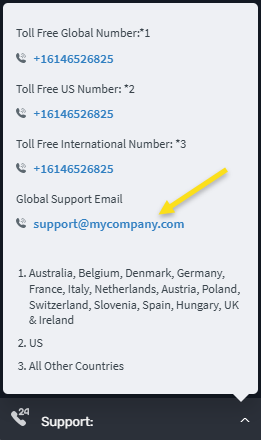
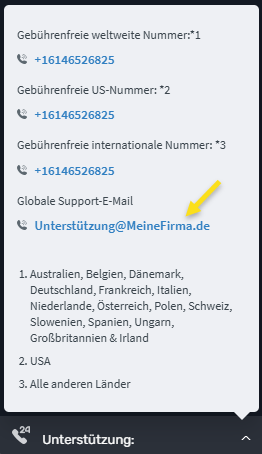
The Support control is displayed as shown below:
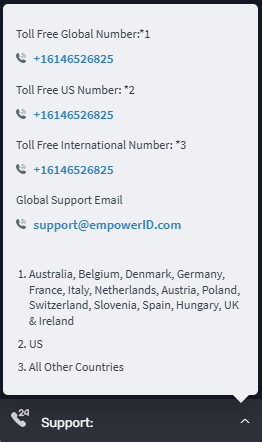
Each label and value in this section corresponds to a Locale Key, which can be customized and translated.
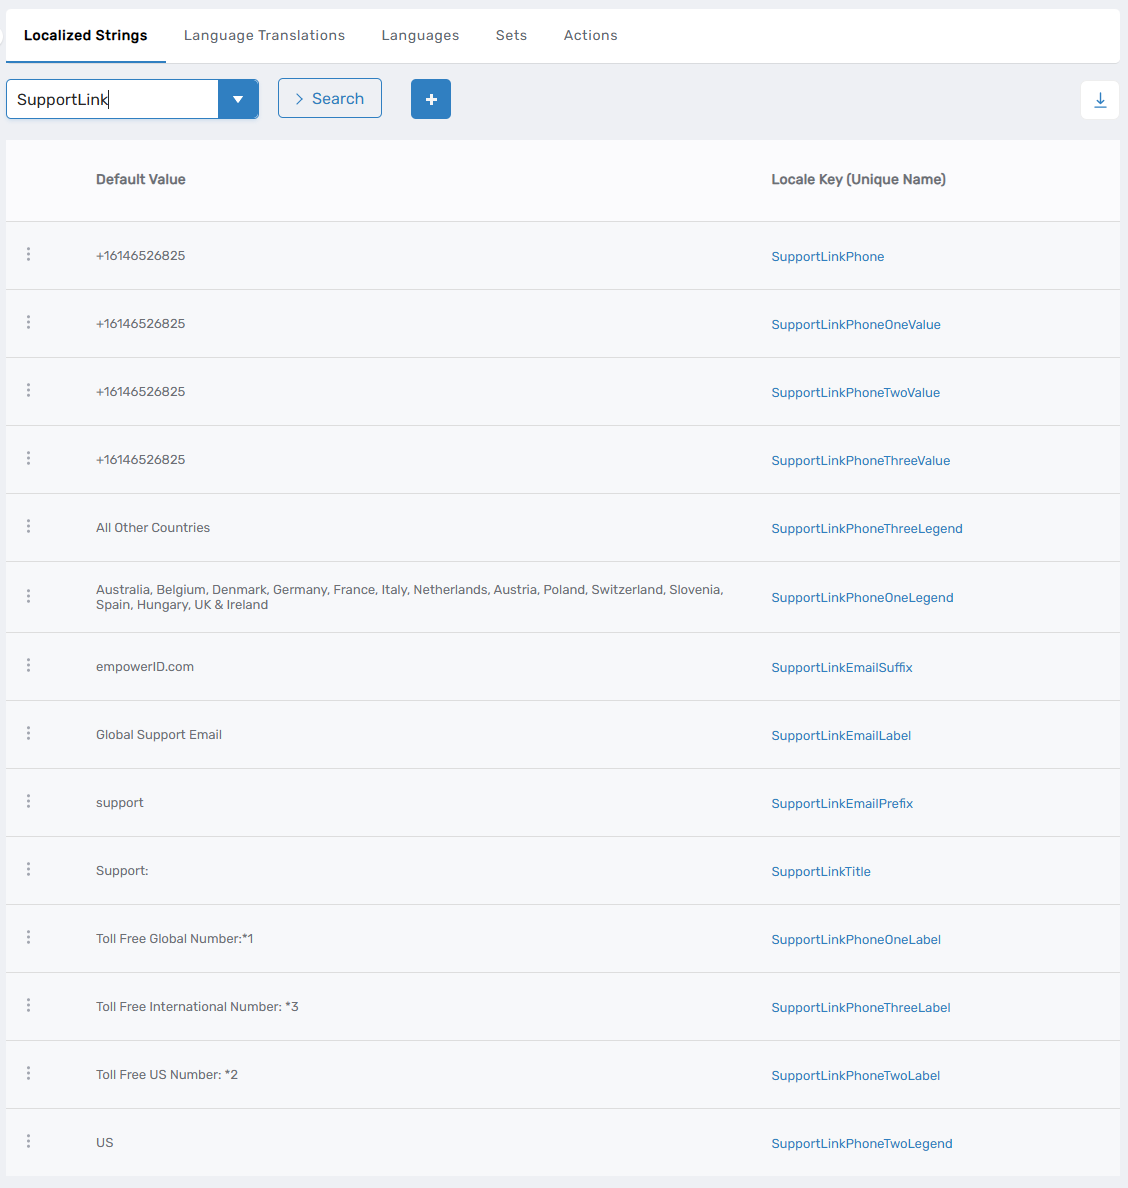
| Locale Key | Default Value |
|---|---|
SupportLinkPhoneOneLabel | Toll Free Global Number: *1 |
SupportLinkPhoneTwoLabel | Toll Free US Number: *2 |
SupportLinkPhoneThreeLabel | Toll Free International Number: *3 |
SupportLinkPhone | +16146526825 |
SupportLinkPhoneOneValue | +16146526825 |
SupportLinkPhoneTwoValue | +16146526825 |
SupportLinkEmailLabel | Global Support Email |
SupportLinkEmailPrefix | support |
SupportLinkEmailSuffix | SupportLinkEmailSuffix |
SupportLinkPhoneOneLegend | Australia, Belgium, Denmark, Germany, France, Italy, Netherlands, Austria, Poland, Switzerland, Slovenia, Spain, Hungary, UK & Ireland |
Steps to Localize Support Contact Information
Step 1: Access the Localized Text for Support
- From the navbar, go to Admin > Miscellaneous > Localized Text.
- Click the Localized Strings tab.
- Search for
SupportLinkin the search field.
You will see all Locale Keys related to the Support section.
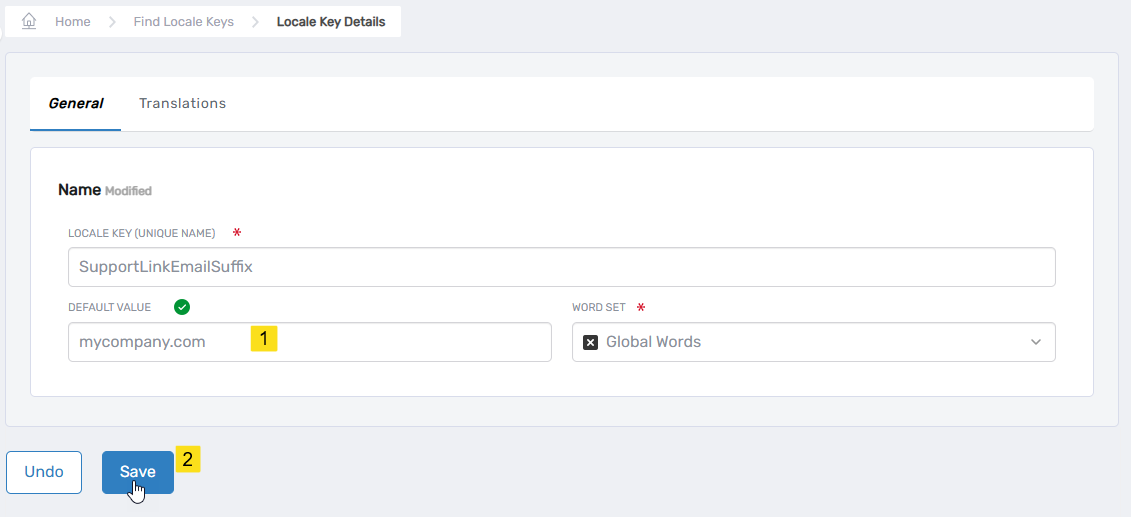
Step 2: Edit the Default Value for a Locale Key
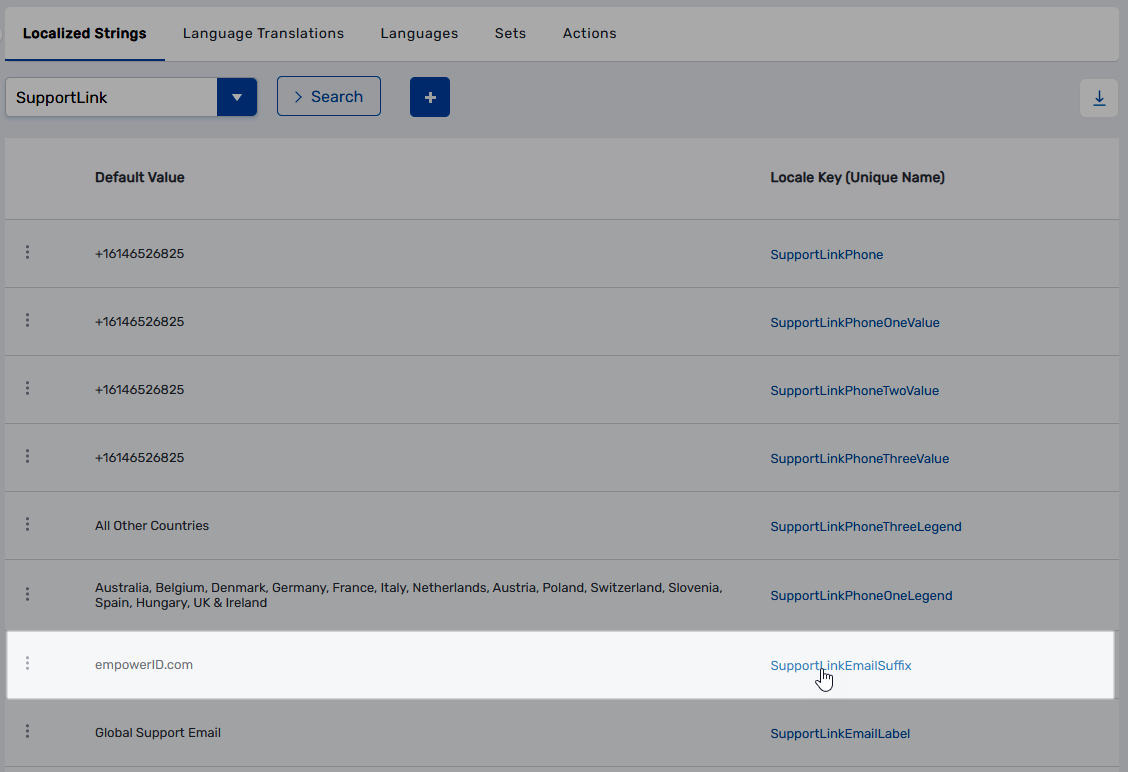
- Click the Locale Key (Unique Name) link for the item you want to modify.
- On the Locale Key Details page, update the Default Value to match your organization's support contact info.
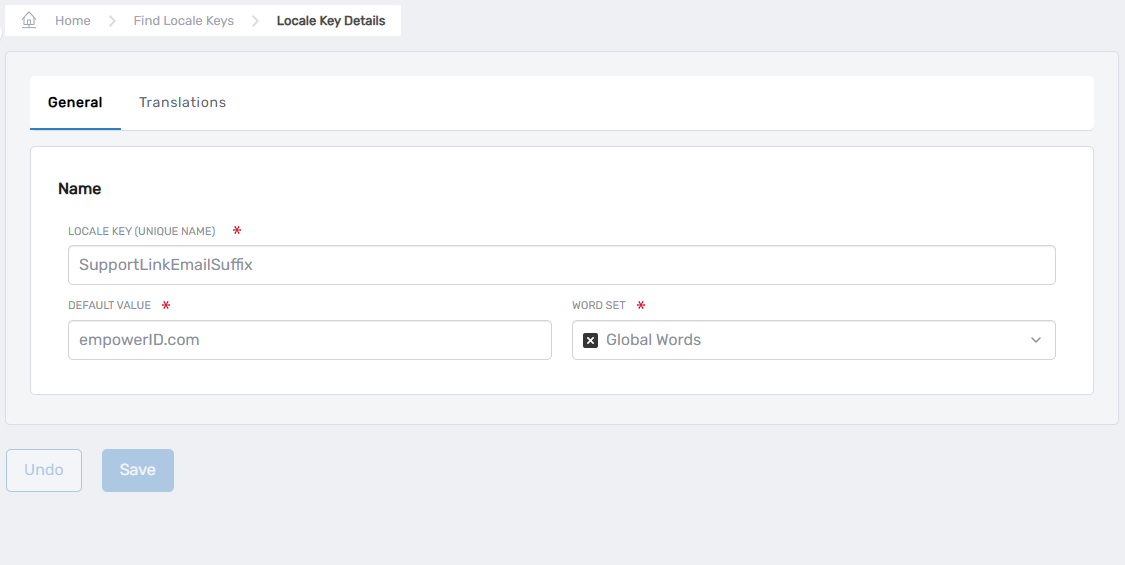
- Click Save.
Step 3: Add Translations for Additional Languages (Optional)
- On the Locale Key Details page, go to the Translations tab.
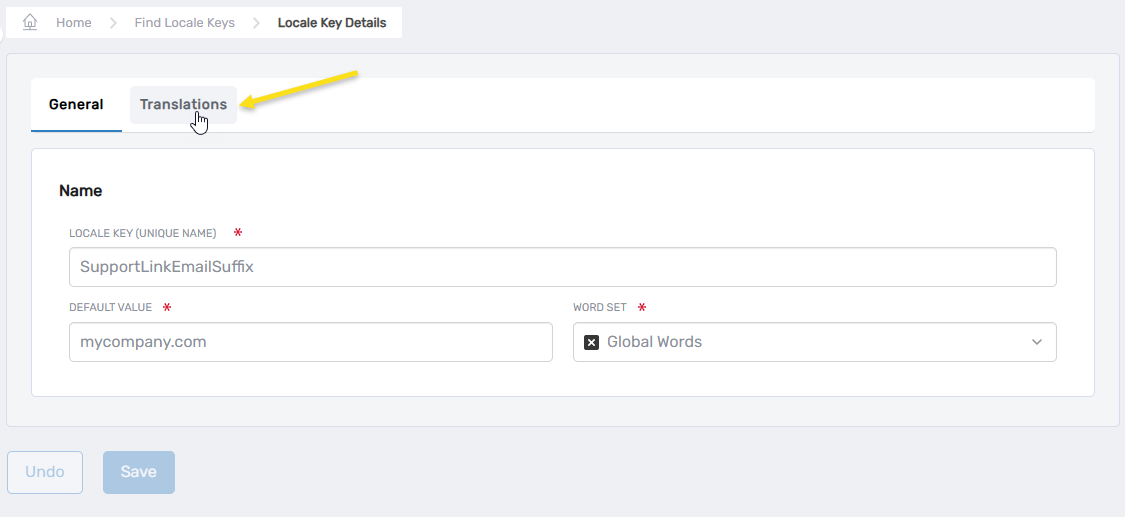
- Click Edit next to the language you want to localize.
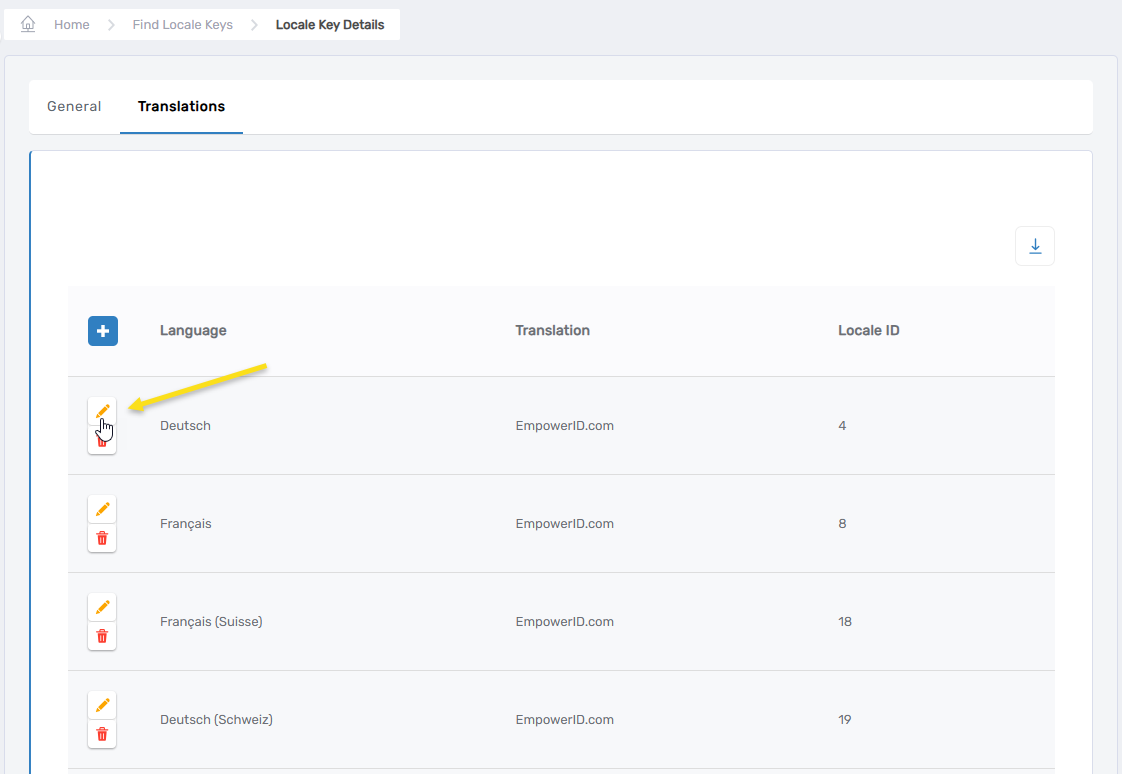
- Enter the localized version of the value in the Translation field and click Save.
- Repeat for other languages as required.
Step 4: Verify the Changes
Once saved, verify that the localized data appears correctly in the EmpowerID interface:
- Navigate to the Support item in the navbar.
- Confirm that the updated values appear as expected.
Example: TheSupportLinkEmailSuffixvalue has been customized.
- If translations were added, switch your user interface language to confirm localized values display correctly.
Step 5: Repeat for All Locale Keys
Repeat the above steps for each Locale Key listed earlier to ensure that all support contact details are fully customized and localized.
✅ Tip: Always review your localized values directly in the EmpowerID interface to verify correct formatting, spelling, and alignment.