Assigning App Rights
App rights assignments grant users the appropriate level of access based on their role, organizational membership, or business justification. Rights can be assigned to individuals, groups, Management Roles, Business Roles and Locations, or query-based collections, with optional duration limits and field type scoping.
You can assign multiple app rights in a single request and configure each with different access parameters before submitting them together through the shopping cart.
This article demonstrates how to assign app rights in EmpowerID.
Prerequisites
Before assigning app rights, ensure you have:
- Access to Resource Admin with the Application RBAC Owner Management Role (or higher)
- An existing PBAC application with app rights already created
- Understanding of which users or groups require access
Procedure
-
Sign in to Resource Admin with at least the Application RBAC Owner Management Role.
-
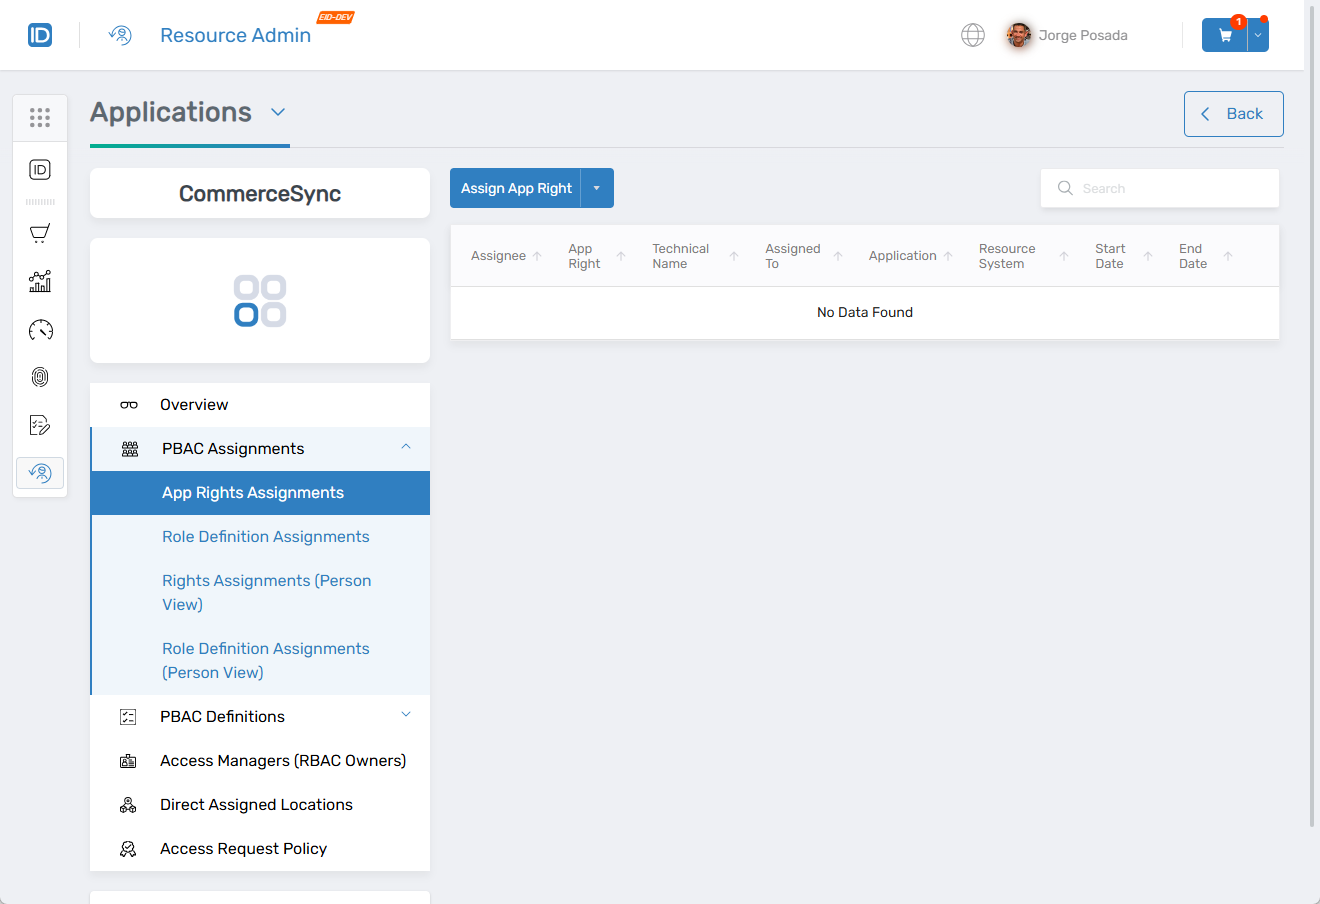
Select Applications from the Resource Type menu, search for the target PBAC application, and click the Details button.
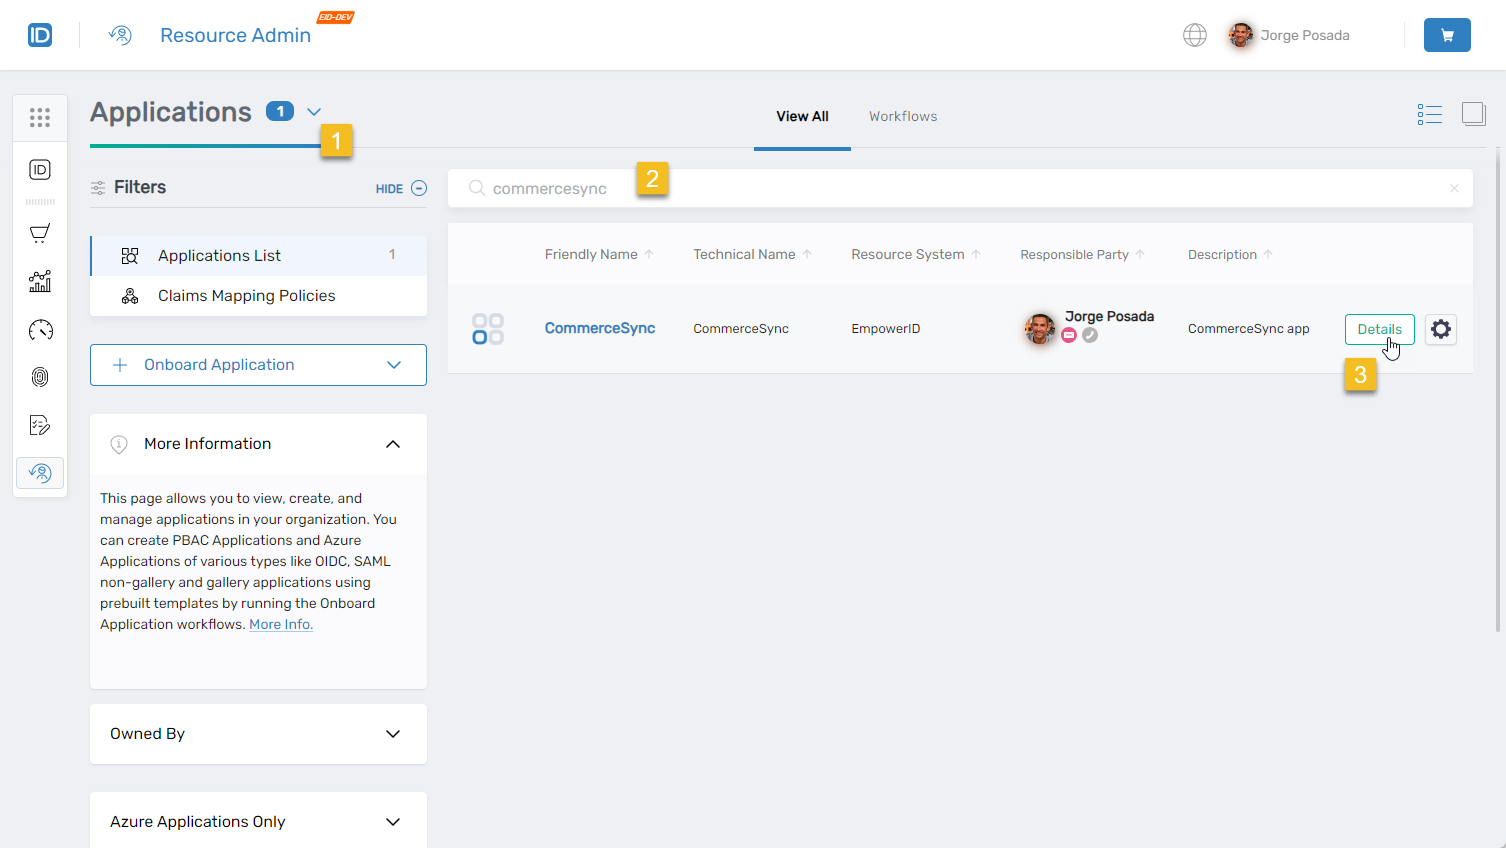
The application Overview page opens.
-
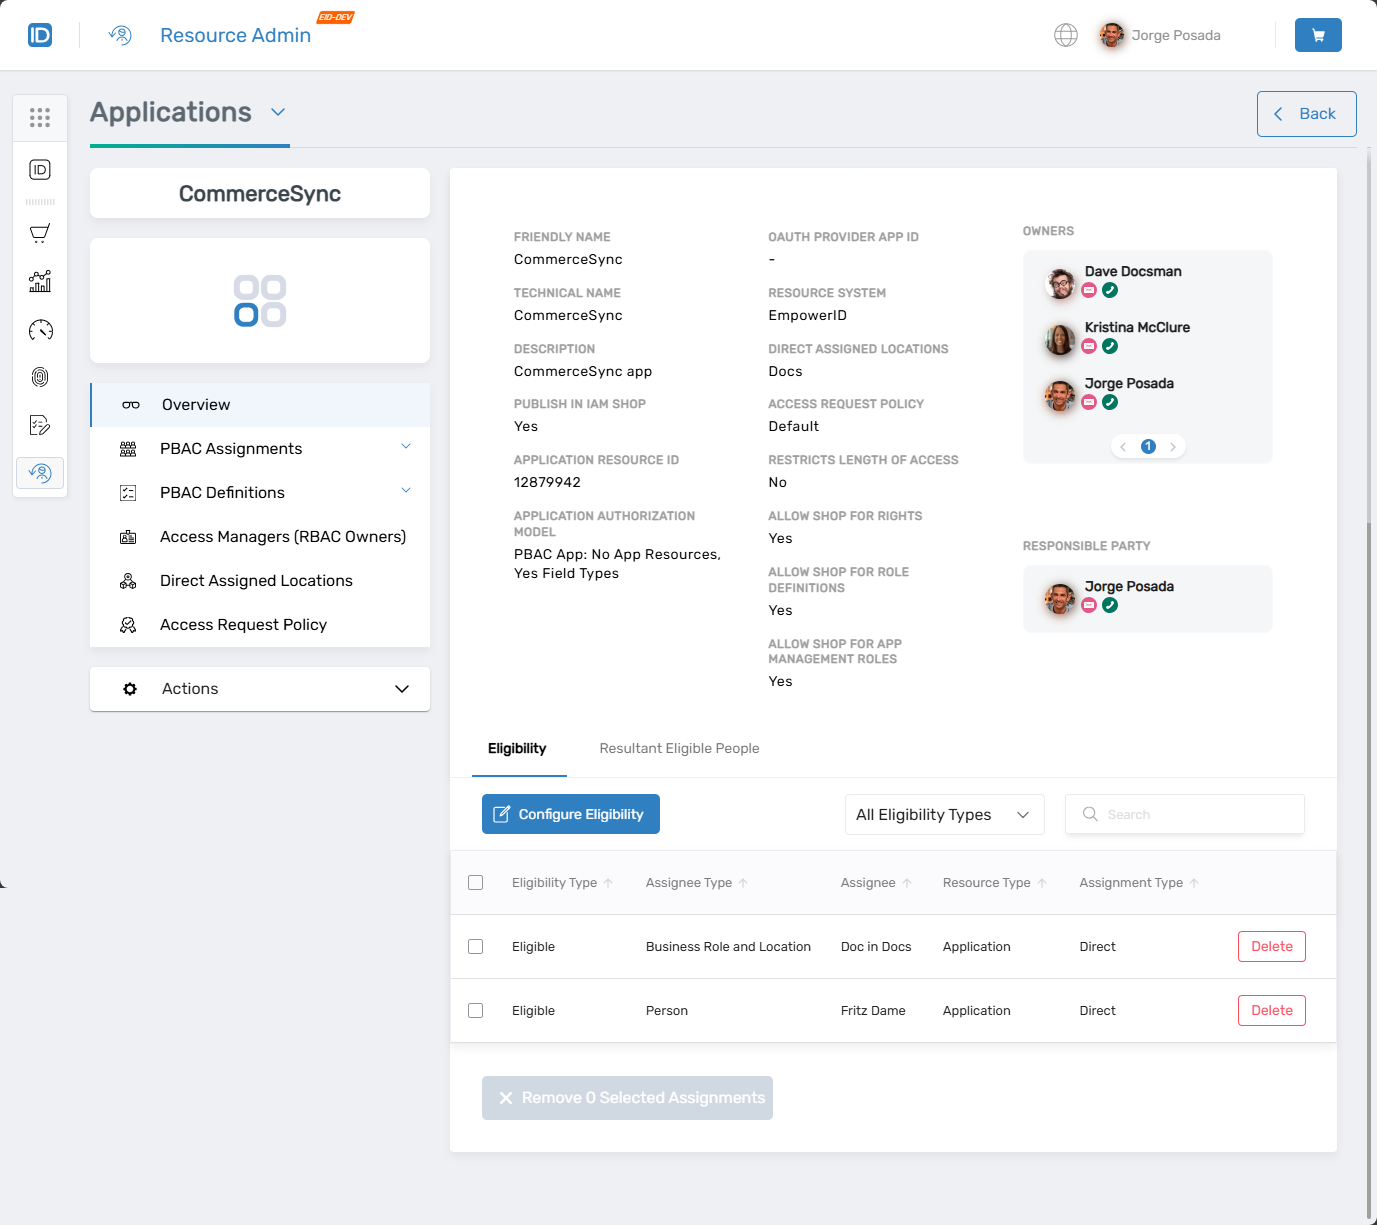
Navigate to PBAC Assignments > App Rights Assignments.
-
Click the dropdown arrow on the Assign App Right button and select the appropriate Assignee Type:
Assignee Type Description Person The selected person receives the app right. Management Role All people in the Management Role receive the app right. Group All people in the group receive the app right. Business Role and Location All people in the Business Role and Location receive the app right. Set Group All people in the Set Group (Query-Based Collection) receive the app right. -
Search for and select the assignee.

-
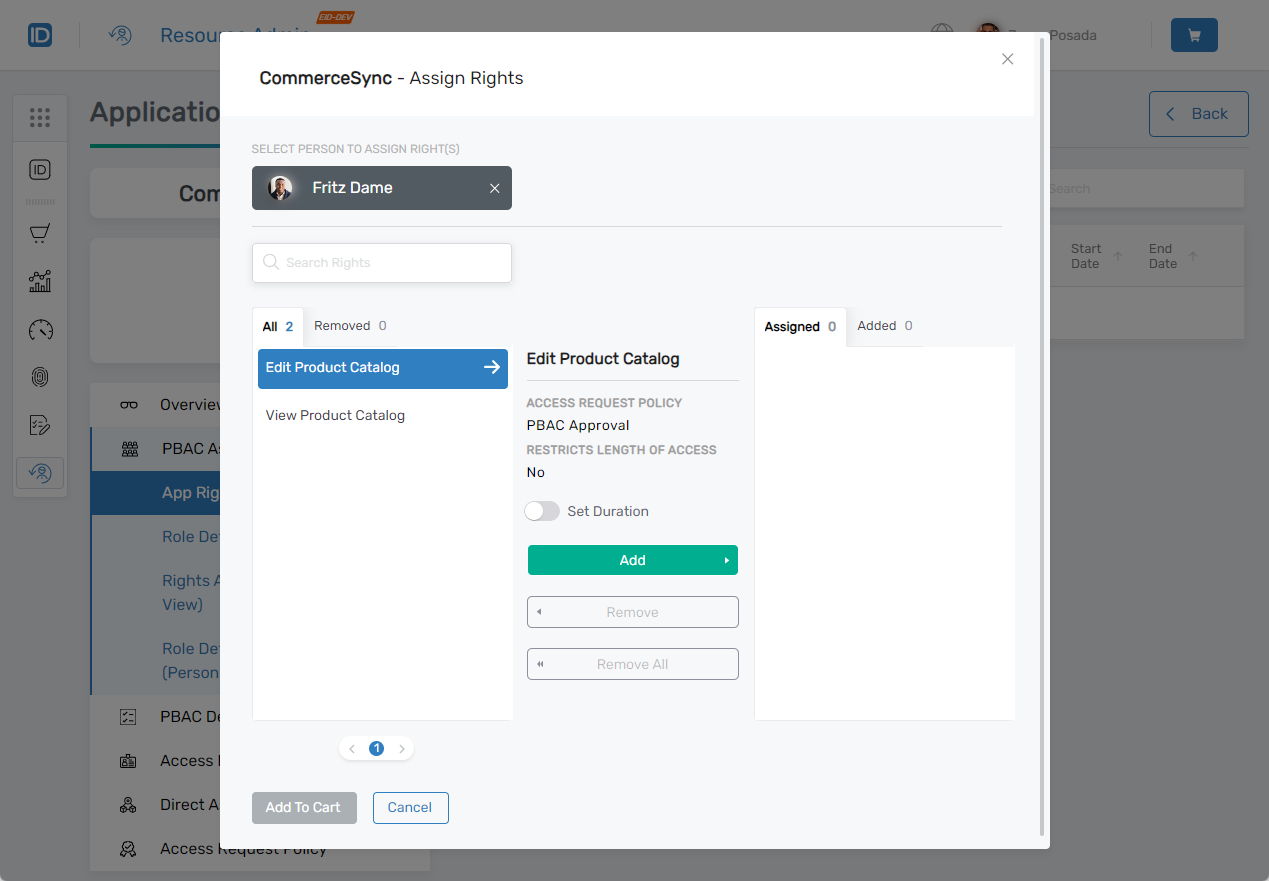
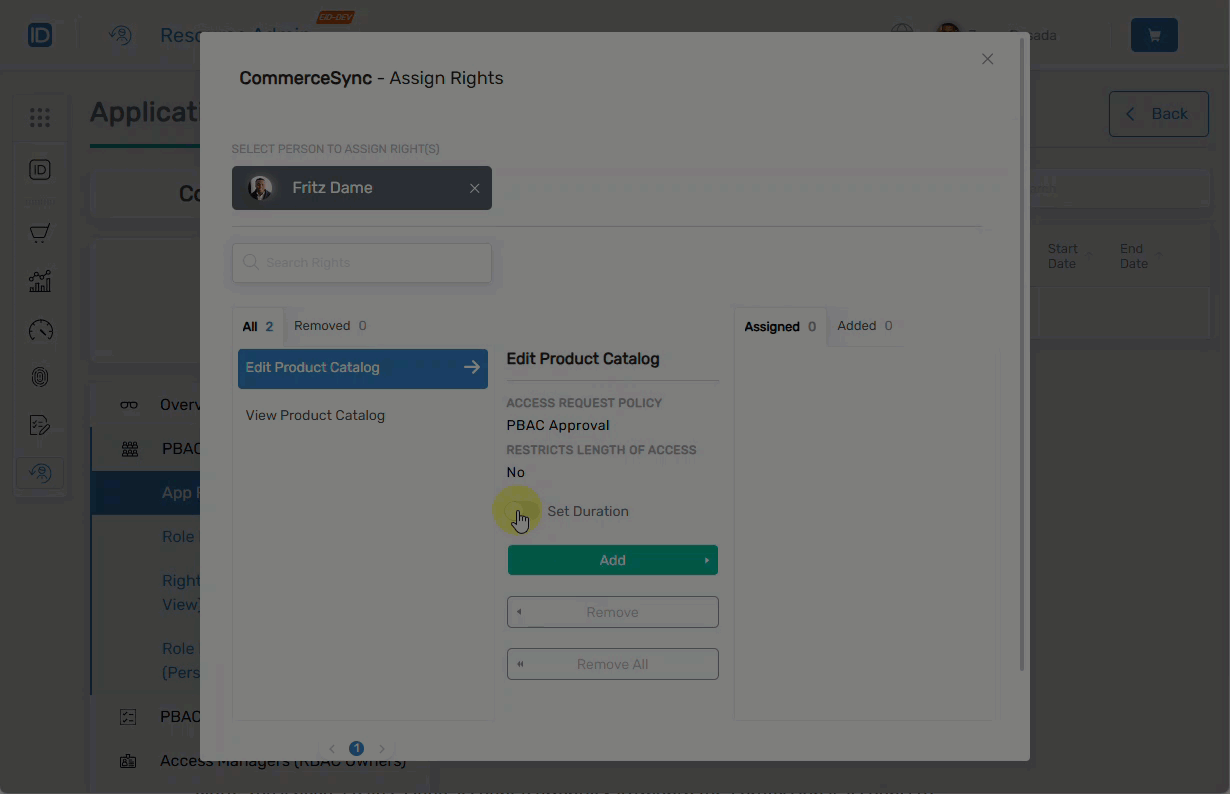
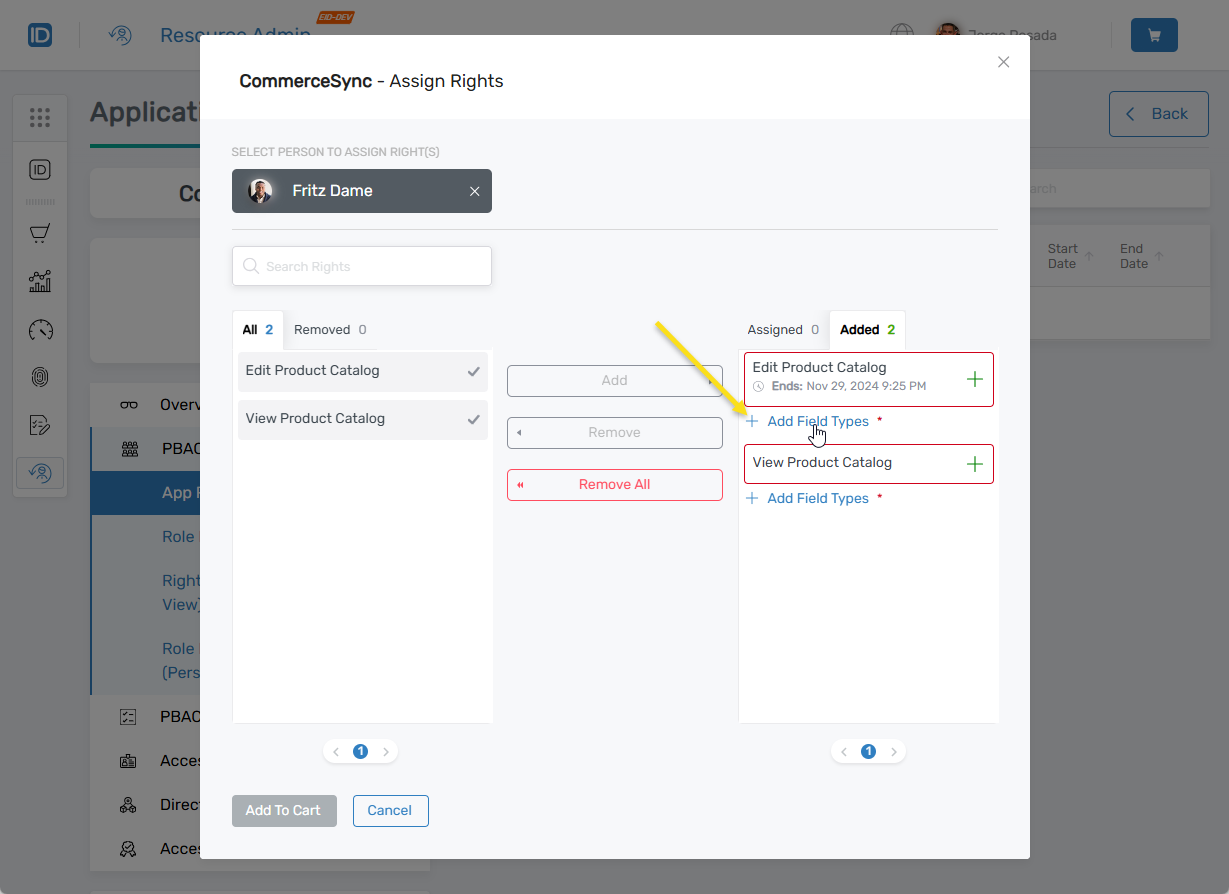
In the Assign Rights modal, select one or more app rights from the All panel.
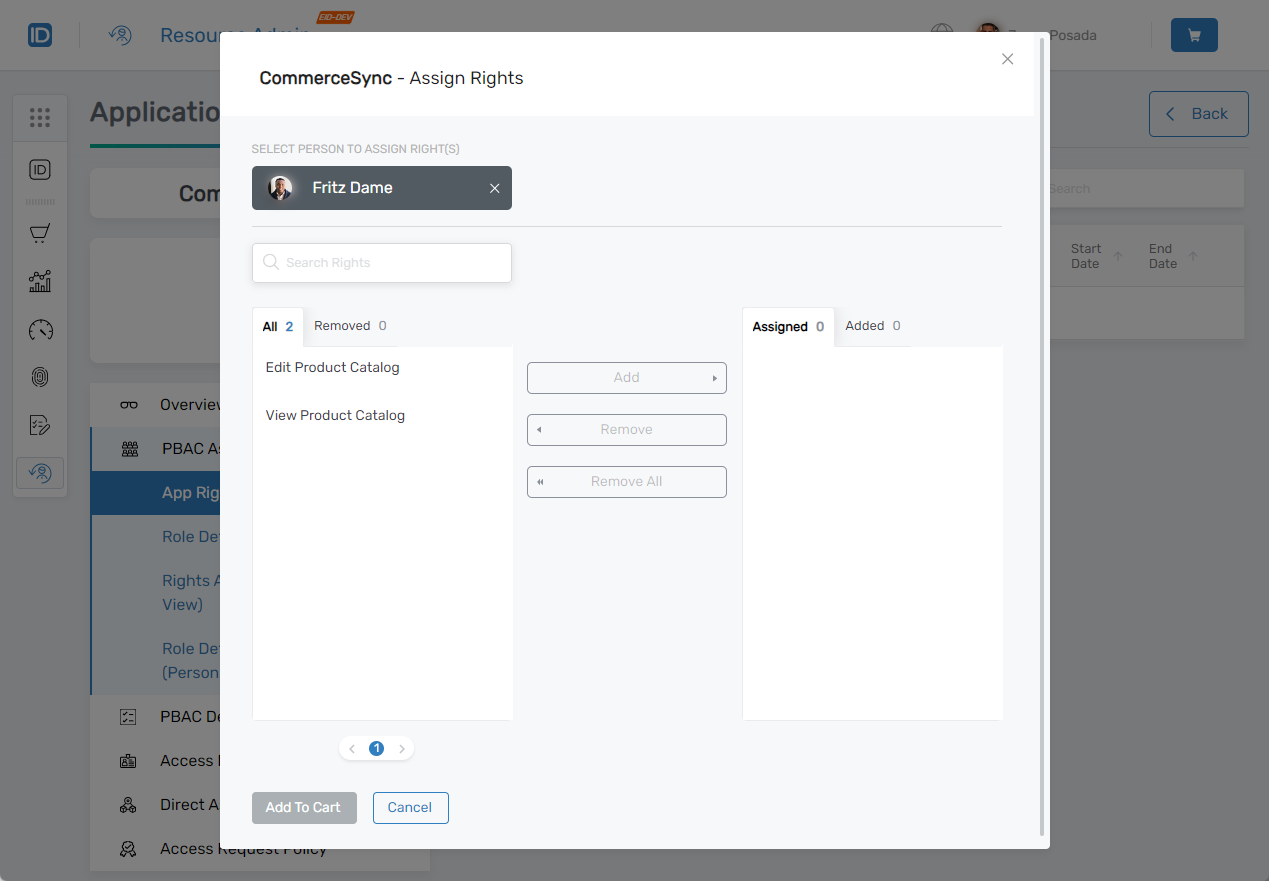 When you select an app right, an arrow indicates the applicable Access Request Policy and the Add button becomes enabled.
-
(Optional) Configure a duration limit:
-
Toggle the Set Duration button.
-
Click the End Date Time field and choose a date.
-
Set duration interaction (GIF):
-
End date confirmed in UI:
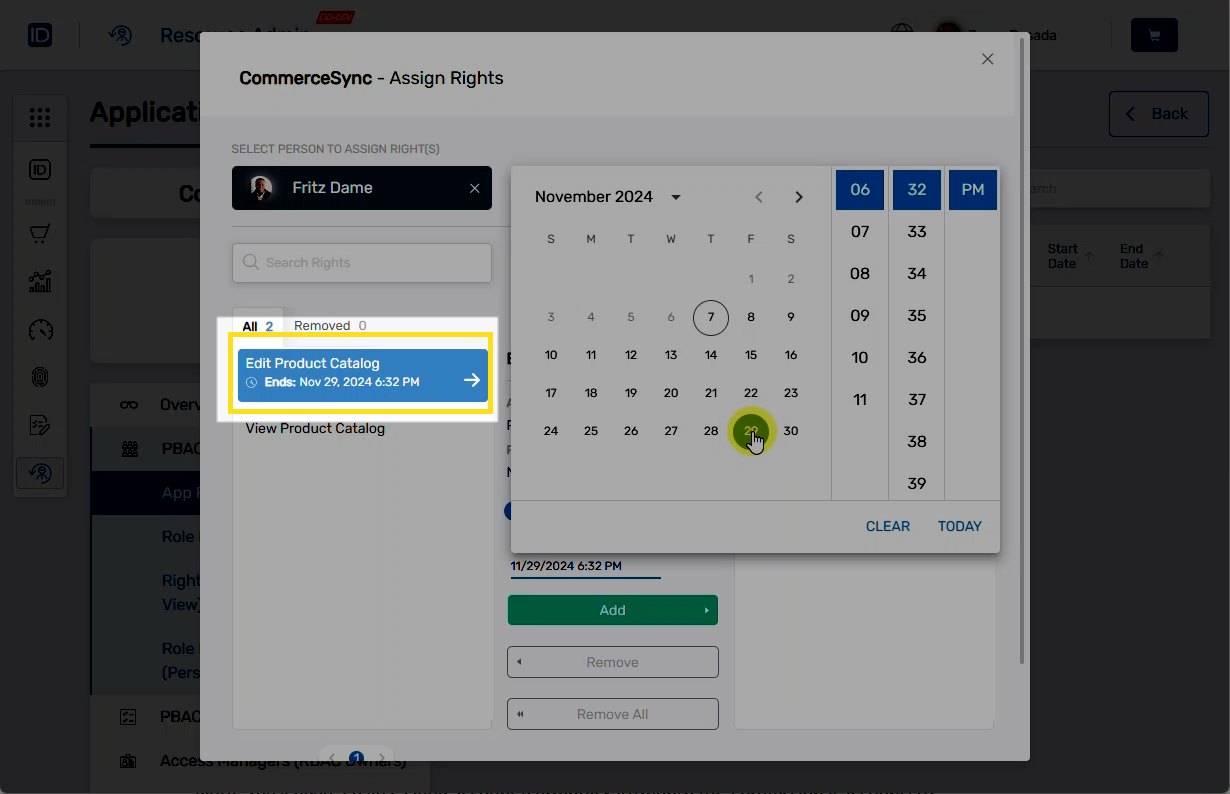 Calendar Behavior
If you navigate away from the calendar without clicking Add, the date is still saved.
-
-
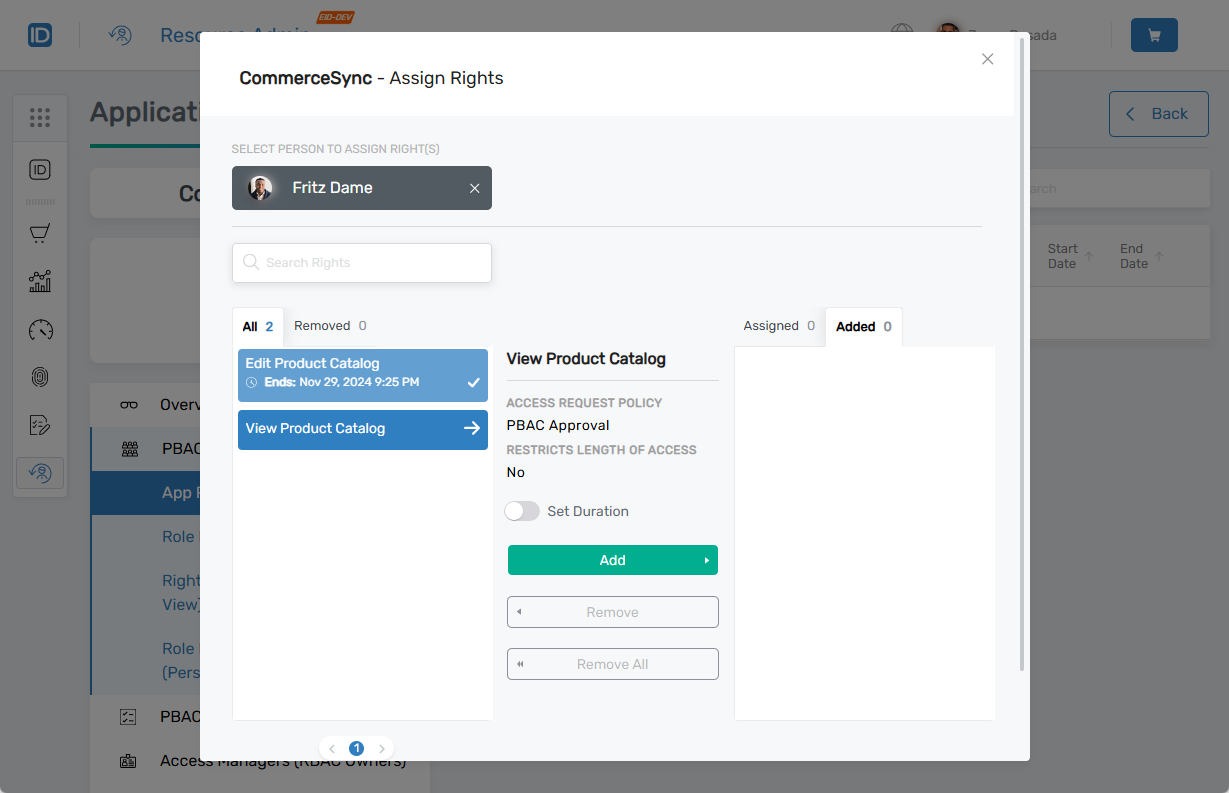
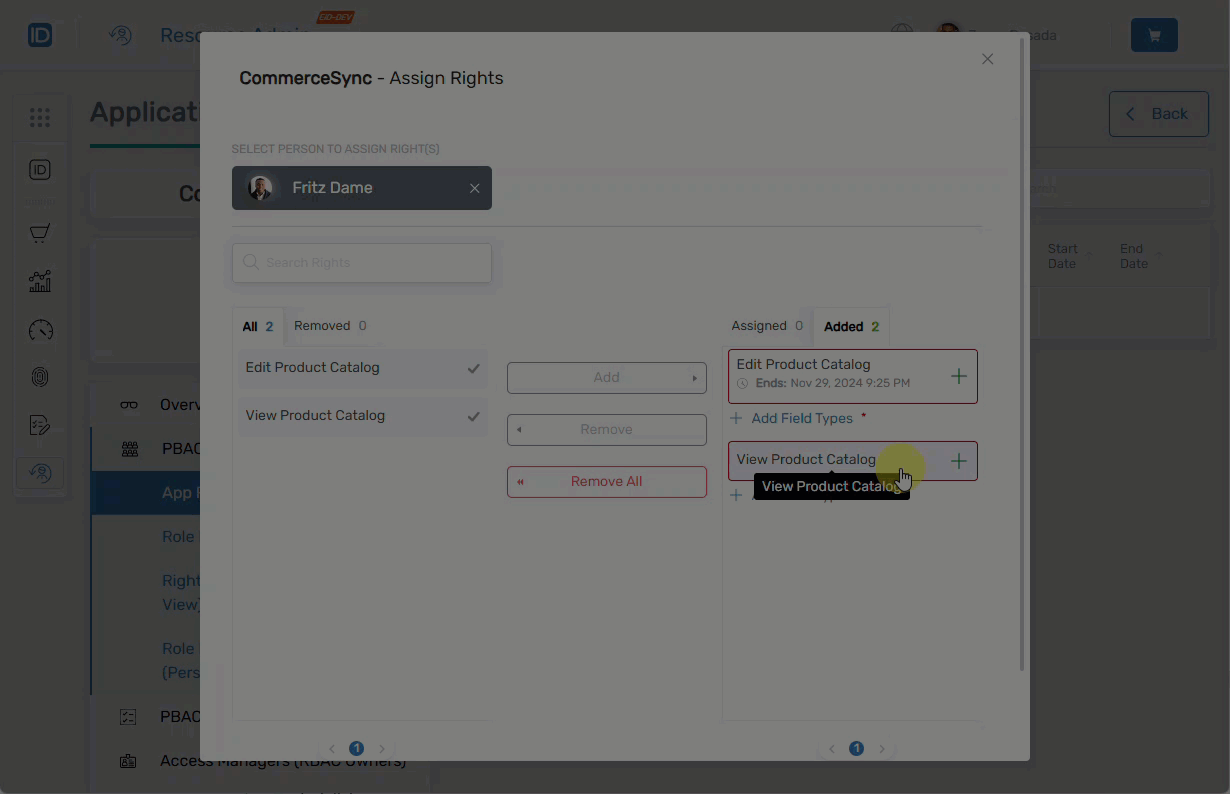
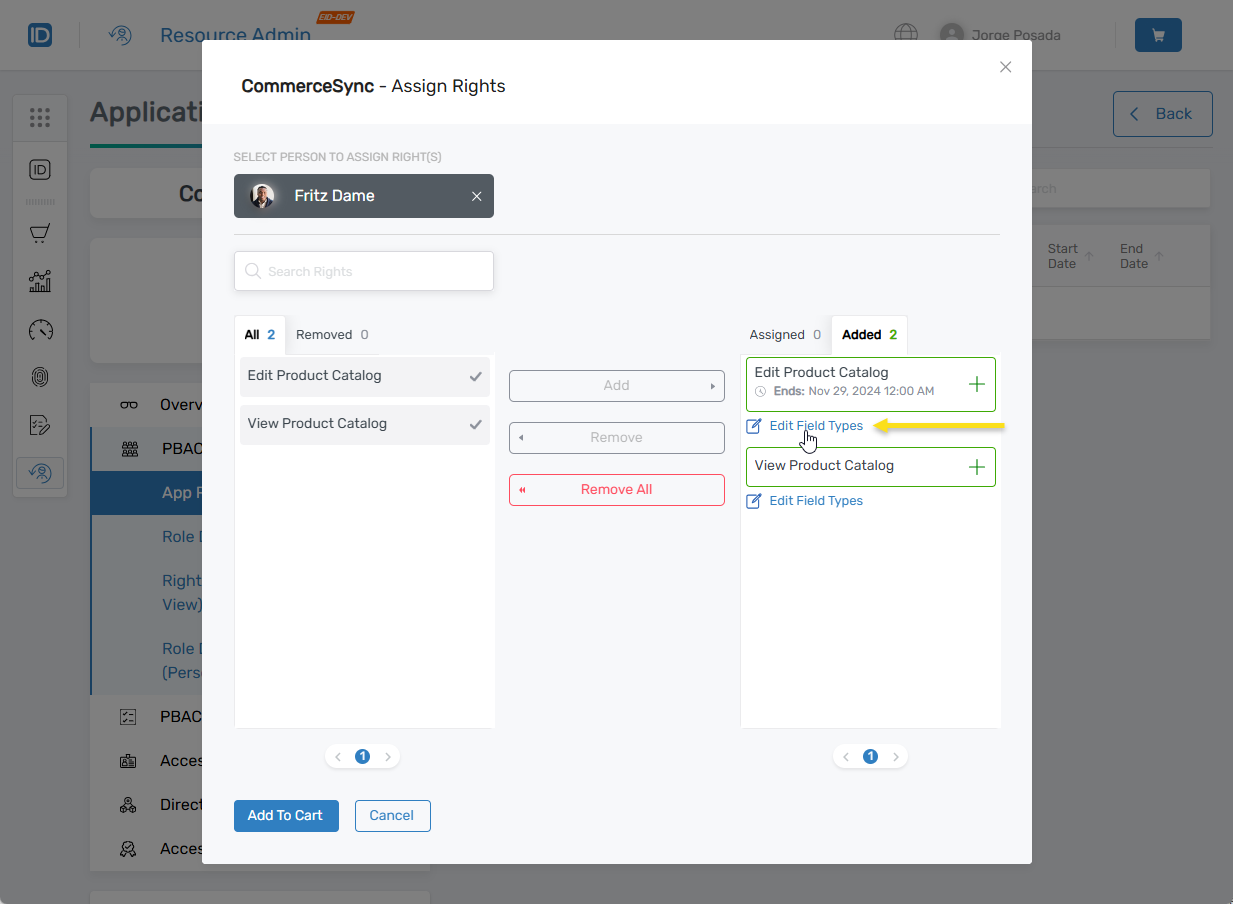
Click Add to move the right to the Added column.
-
App right in Added column after selection:
 Managing Duration
To remove a duration constraint before submission, toggle Set Duration off.
-
-
Repeat for each right. Each one is configured individually even if submitted in the same cart.
-
App right with duration restriction:
-
App right without duration restriction:
 Removing Rights
To remove a right from the Added column, select it and click Remove.
-
Remove button interaction (GIF):
-
-
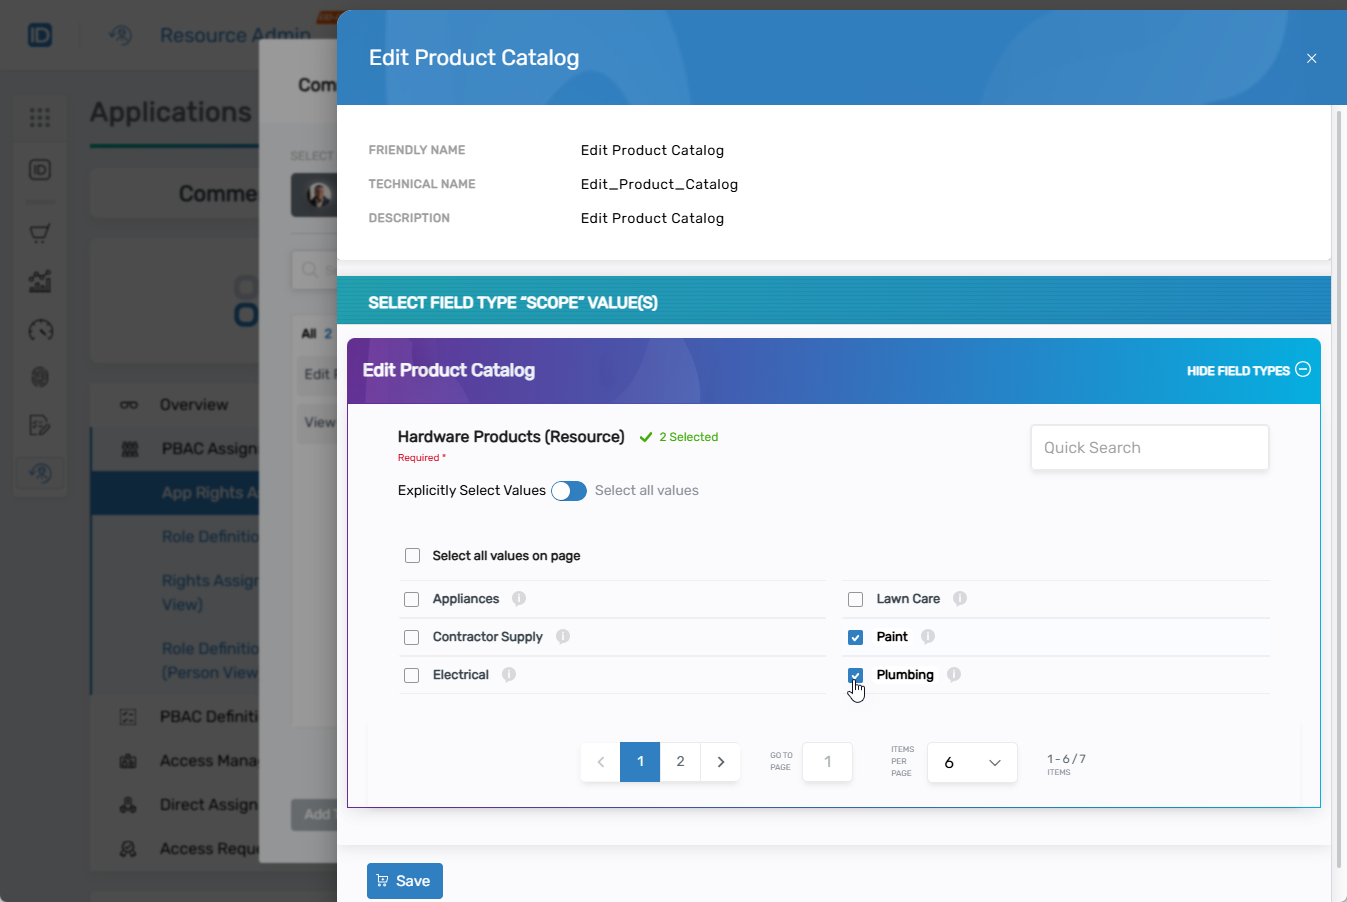
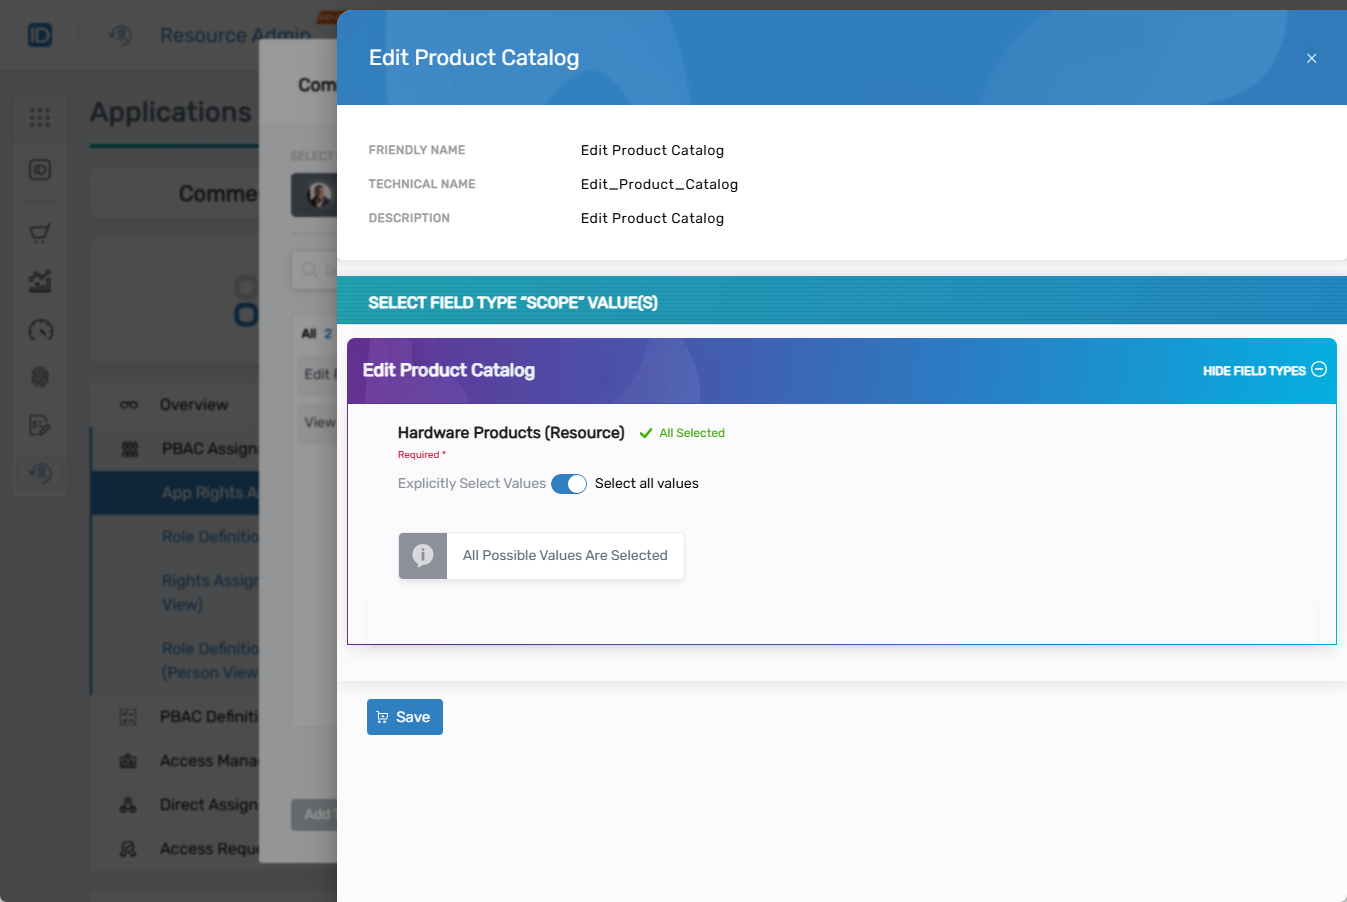
(Optional) If the app right requires or allows field type scoping, click Add Field Types.
 Required Field Types
A red asterisk indicates field type selection is required. Hovering over Add To Cart displays a tooltip if mandatory fields are incomplete.
-
In the Field Types drawer, choose how to select values:
-
Explicitly Select Values - Select specific field type values individually
-
Select All Values on Page - Select all values visible on the current page
-
Select All Values - Select all available values for the field type
 Preserving Selections
If you toggle Select All Values and then switch back to Explicitly Select Values, your original selections are retained.
-
-
Click Save to apply the field type selections.
-
Repeat for other app rights as needed.
Editing Field TypesTo modify previously selected field types, click Edit Field Types.
-
Click Add To Cart to move the configured app rights to your shopping cart.

-
Click the cart icon to open the shopping cart. If multiple items exist, use the dropdown to select items.
-
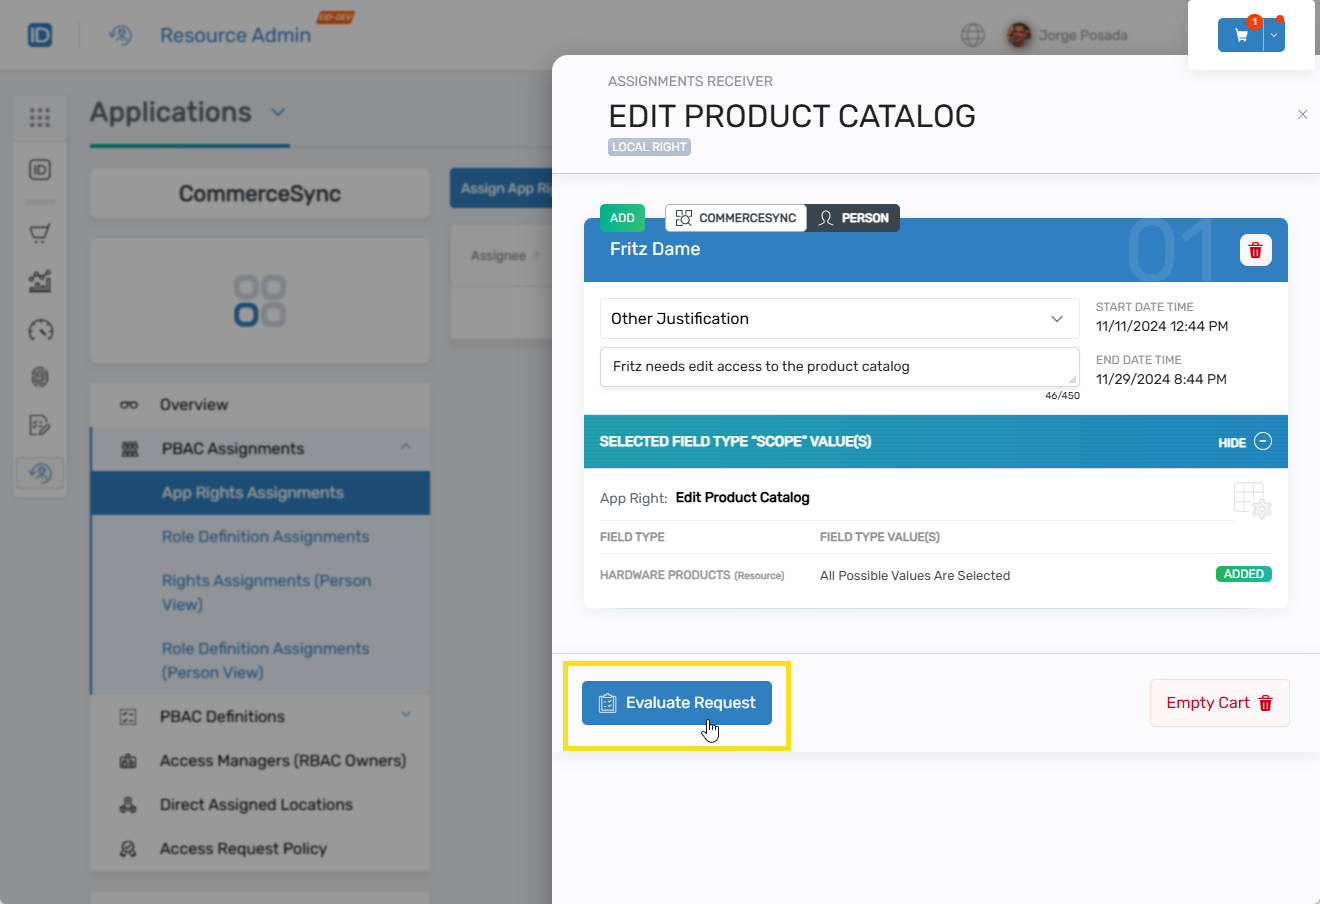
Select a Justification from the dropdown. If you choose "Other Justification," enter a comment.
- Justification dropdown:
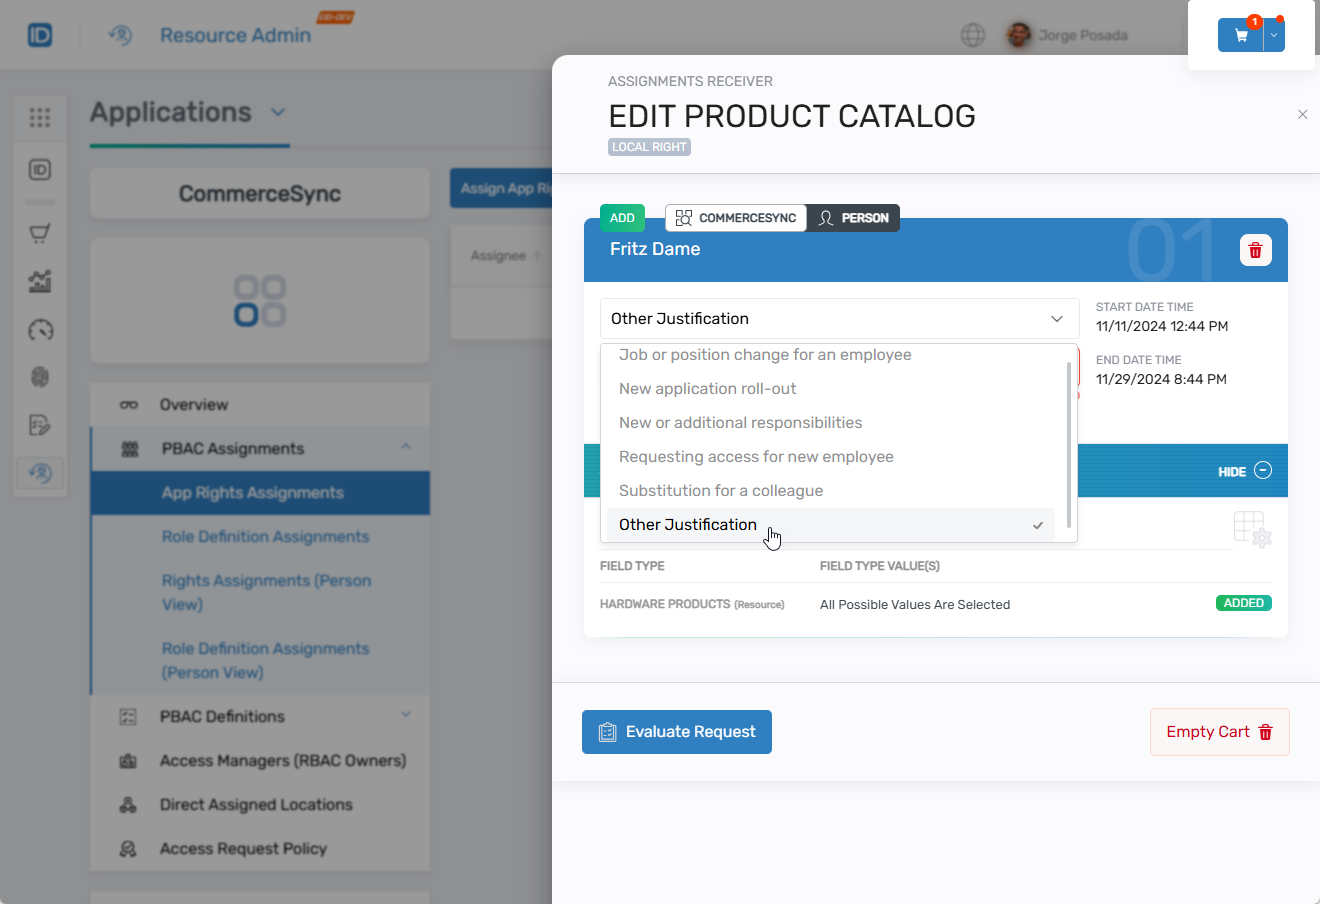
- Comment field for "Other Justification":

-
Click Evaluate Request. EmpowerID validates the request for conflicts or policy violations.
-
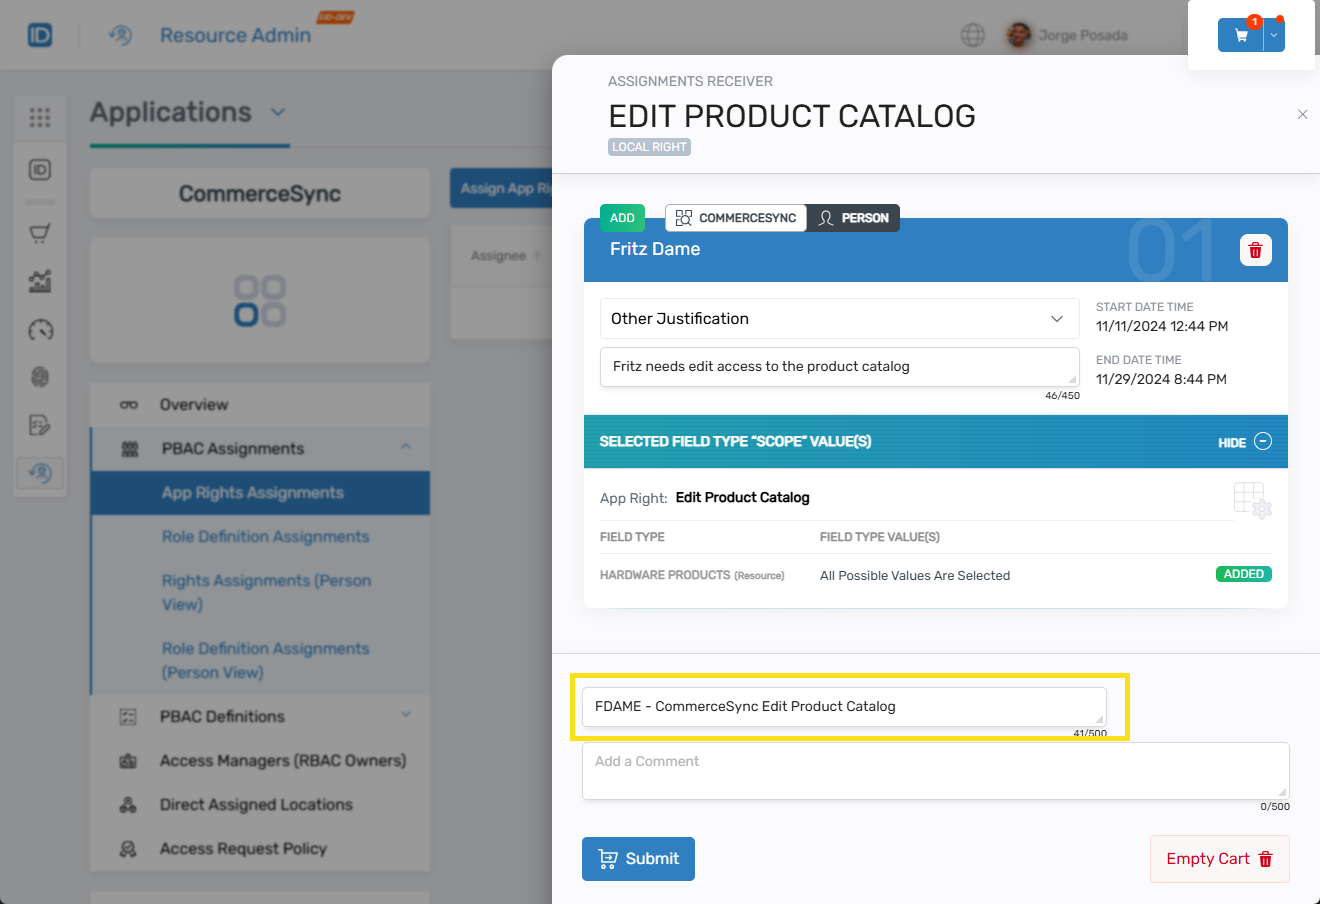
Enter a Business Request Name and optional comment.
-
Click Submit to finalize the request.
 Approval Routing
If approval is not required, the right is granted immediately and appears in the assignments grid. If approval is required, a request tracking link displays and the request routes to approvers.
-
Repeat the cart process for each pending app right if needed.
Verify the Results
After submitting the assignment request:
If approval is not required:
- The app right appears immediately in the App Rights Assignments grid
- Users can access the application according to the assigned right
If approval is required:
- A task is created for approvers in My Tasks

- The request tracking link allows you to monitor approval status
- Access is granted after all required approvals are received
Only users with the Application RBAC Owner Management Role can assign app rights. All assignment actions are logged for audit purposes. Field type selections enforce data-scoped access control based on the configured PBAC policies.
Next Steps
After assigning app rights, verify that users can successfully access the application and that field type scoping functions as expected.