Assign IAM Shop Permission Levels to Computers
Assigning IAM Shop Permission Levels to computers enables users to request specific permissions when connecting through Privileged Session Management (PSM). Each permission level maps to a native system group, granting temporary access that is automatically revoked when the session ends.
Prerequisites
Before assigning IAM Shop Permission Levels:
-
Connect the computer as a Local Windows Server Account Store – This connection enables EmpowerID to inventory the computer's users and groups. See Connecting to Local Windows Servers as Account Stores for details.
-
Identify the native groups – Determine which local or domain groups on the computer correspond to the permissions you want to grant (e.g., local administrators, domain administrators).
EmpowerID includes default IAM Shop Permission Levels such as "Local Admin" and "Domain Admin." You can also create custom permission levels tailored to your organization's needs.
Assign Permission Levels to a Computer
-
Navigate to the computer's View page using Global Search or through Privileged Access > Computers.
-
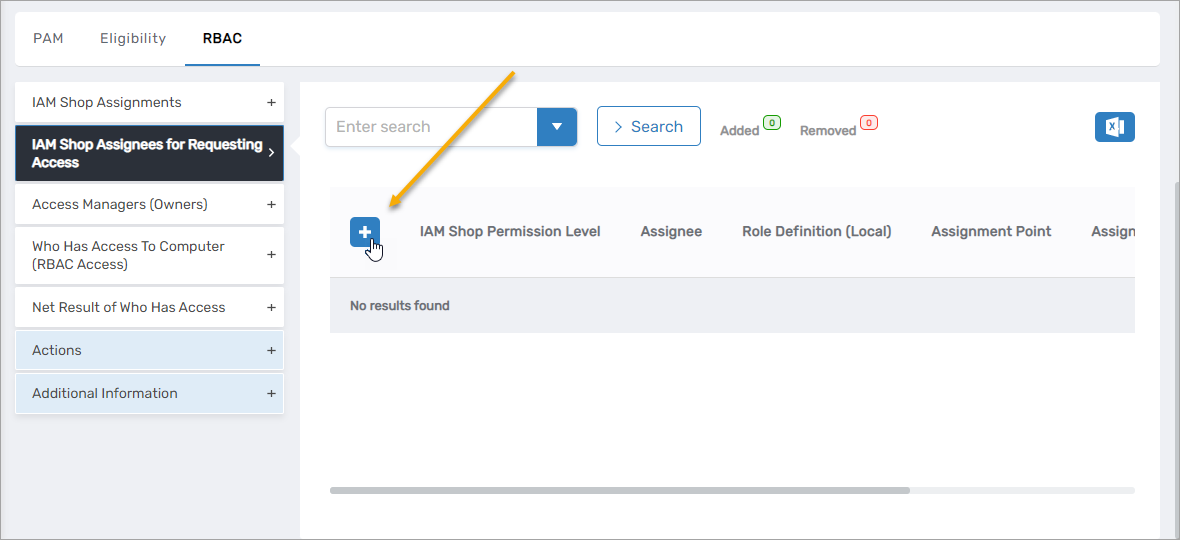
Click the RBAC subtab.
-
Expand the IAM Shop Assignees for Requesting Access accordion.
-
Click the Add New button.
-
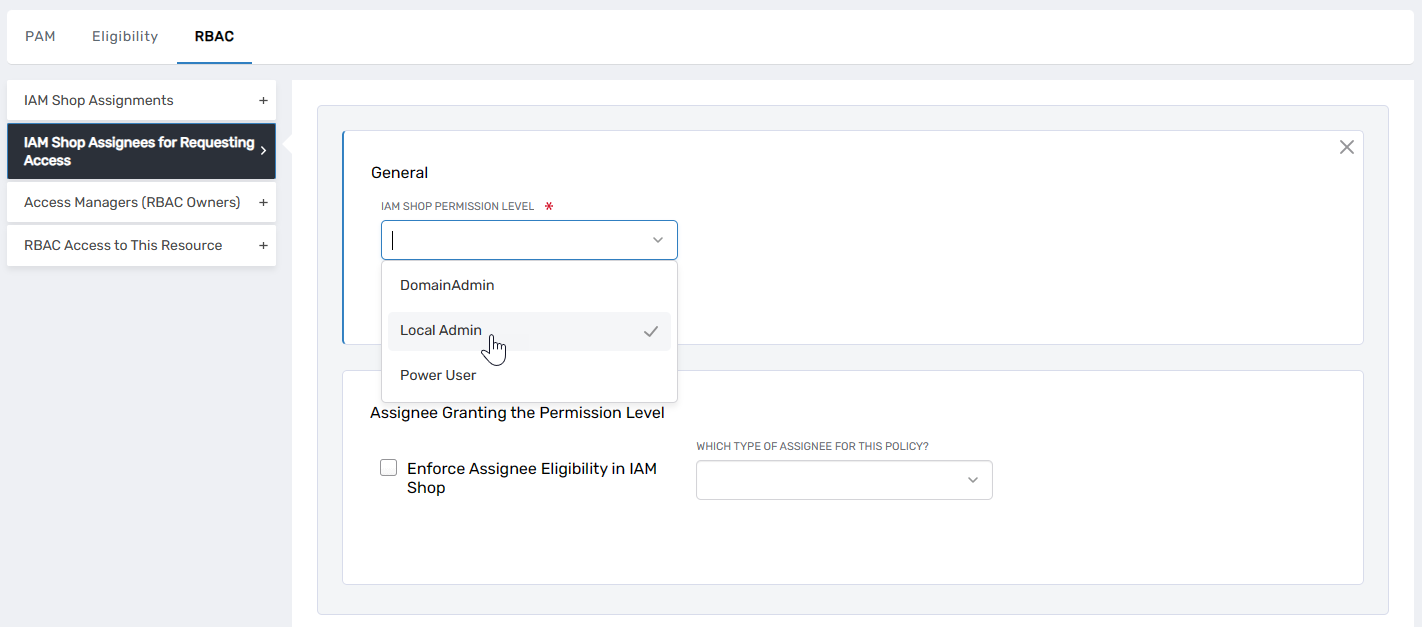
Under General, select the desired IAM Shop Permission Level from the dropdown.
-
Under Assignee Granting the Permission Level, configure:
- Enforce Assignee Eligibility in IAM Shop – When selected, users must meet eligibility requirements for the assignee to see and request this permission level. For example, if the assignee is a group, only users eligible for that group membership will see the permission level as an option. See Understanding IAM Shop Permission Levels for how eligibility enforcement affects permission level visibility.
- Which Type of Assignee For This Policy – Select the assignee type (Person, Group, Business Role, Location, etc.)
- Select
<Assignee>To Receive Policy – Search for and select the specific assignee that corresponds to the native system group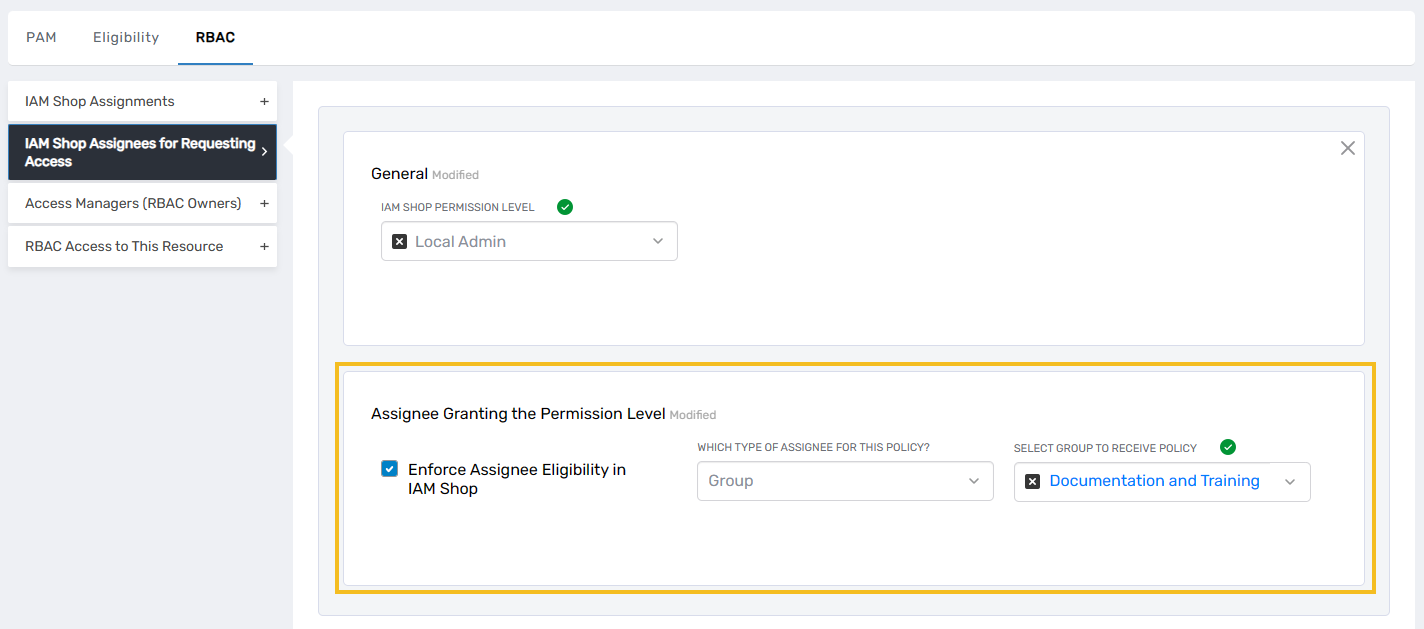
tipThe assignee typically represents the native group that grants the permissions. For example, to provide local administrator access, select the local administrators group on the computer as the assignee.
-
Click Save.
-
Repeat steps 4–7 to assign additional permission levels.
-
Map each assigned permission level to the corresponding native group on the computer. This mapping determines which permissions users receive during PSM sessions.
For example, to grant local administrator access, map the "Local Admin" permission level to the computer's local administrators group. Users who request "Local Admin" access will be added to that group for the duration of their session.
-
Click Submit to complete the configuration.
Results
After submitting:
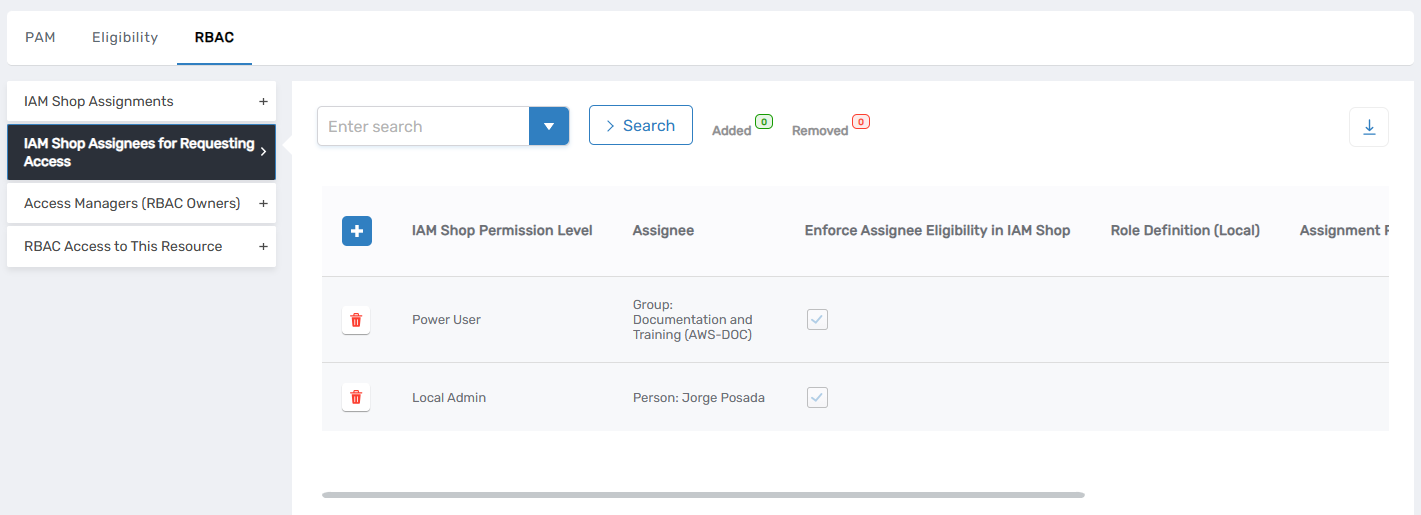
- The IAM Shop Permission Level is available for the computer
- Users can see the permission level as an option when requesting access through the IAM Shop (if they meet eligibility requirements)
- During PSM sessions, users who select this permission level receive the associated permissions
- Permissions are automatically revoked when the session ends
- The assignment appears in the IAM Shop Assignees for Requesting Access accordion
Related Topics
- Understanding IAM Shop Permission Levels – Overview of permission levels and their role in PSM
- Configure Computers for Just-In-Time Access – Enable automatic account provisioning for enhanced security
- Add IAM Shop Assignees for Requesting Access – Control who can request specific permission levels