Creating PBAC Membership Policies
Manual group and role assignments create administrative overhead and risk outdated permissions as people change departments, join projects, or transfer locations. PBAC Membership Policies automate these assignments by evaluating user attributes in real-time, ensuring that access remains current without manual intervention.
PBAC Membership Policies define the conditions under which actors (such as people or Business Roles and Locations) are added to roles, groups, or collections. These policies use attribute-based rules to dynamically assign membership based on Field Types and their values.
Creating a PBAC Membership Policy is a two-step process: first create the policy (this article), then add attribute conditions that define which actors qualify for membership. For conceptual background, see Overview of PBAC Membership Policies.
This article demonstrates how to create a PBAC Membership Policy using the Role Modeling Inbox.
Prerequisites
Before creating PBAC Membership Policies, ensure you have:
- Administrative access to EmpowerID
- PBAC Field Types already created with appropriate values
- A target group, role, or collection to which the policy will assign members
Understanding Policy Types
PBAC Membership Policies support four membership types that determine how the system handles matching actors:
| Policy Type | Behavior |
|---|---|
| Member | Grants membership automatically if Auto-Approve is enabled; otherwise generates Business Requests for approval |
| Eligible | Marks matching actors as eligible; they can request membership through the IAM Shop |
| Pre-Approved | Automatically adds matching actors as members without additional approval |
| Suggested | Displays membership as a suggestion in the IAM Shop for matching actors |
Choose the policy type based on your organization's approval requirements and risk tolerance for the target membership.
Procedure
-
Sign in to EmpowerID as an administrator.
-
Navigate to Role Management > Role Modeling Inbox.
-
Open the Attribute-Based Membership Policies tab and click the Add New button.
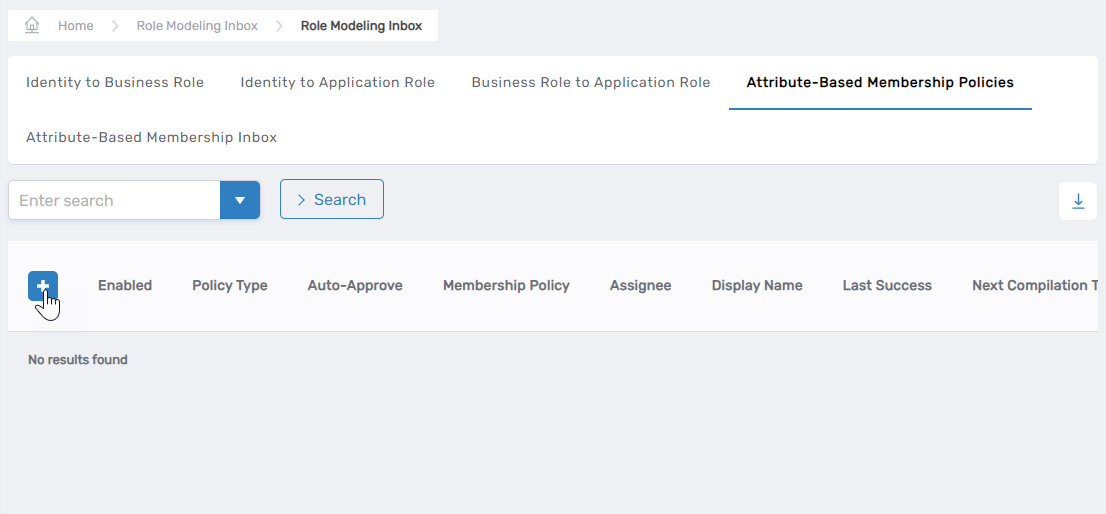 The Attribute-Based Membership Policy form opens.
-
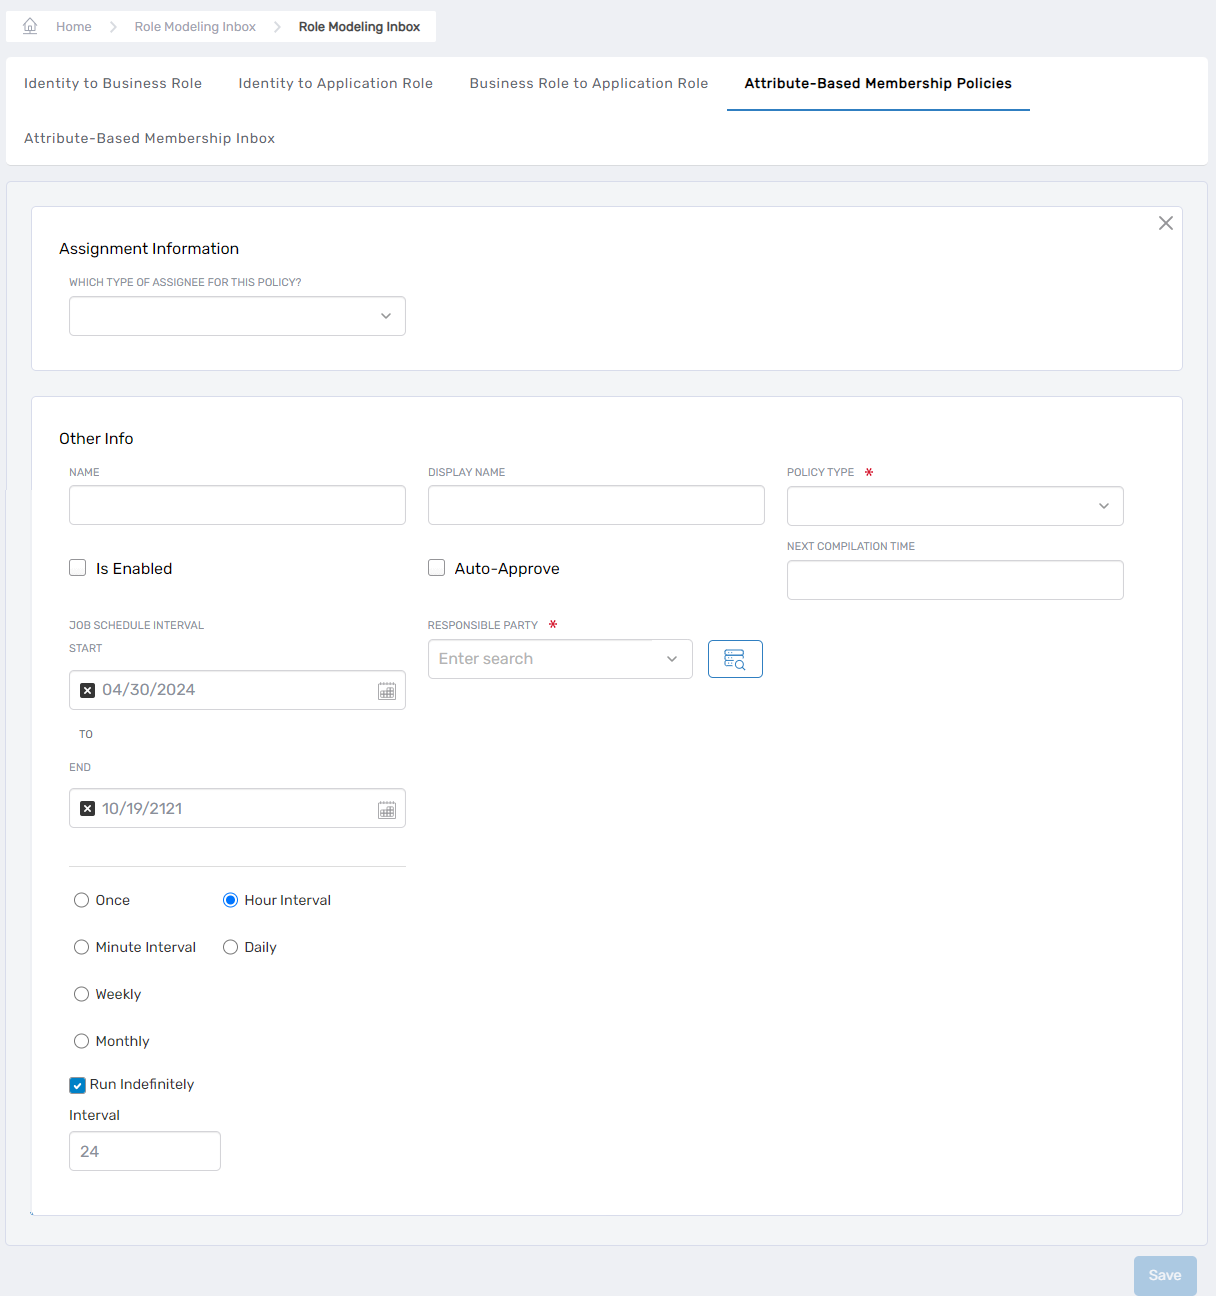
Under the Assignment Information section, configure the policy target:
-
Which Type of Assignee for this Policy?: Select the target type from the dropdown:
- Business Role and Location
- Management Role
- Management Role Definition
- Group
- Query-Based Collection
-
After selecting the type, choose the specific target. For example, if you select Management Role, choose a specific role like "Docs-SA." If you select Group, choose the specific group.

-
-
Complete the policy details under the Other Info section:
Field Description Action Name Unique internal name for the policy Enter a name without spaces. Display Name User-friendly name shown in EmpowerID Enter a display name. Policy Type Determines how matches are processed Select Member, Eligible, Pre-Approved, or Suggested (see table above). Is Enabled Controls whether the policy is active Enable to activate the policy. When disabled, the policy generates reviewable proposals without applying them. Auto-Approve Determines if matches are automatically approved Enable for automatic approval; disable to generate Business Requests requiring manual approval. Job Schedule Interval Defines when the policy runs Specify start/end dates and execution interval. Default is once every 24 hours. -
Click Save to create the policy.
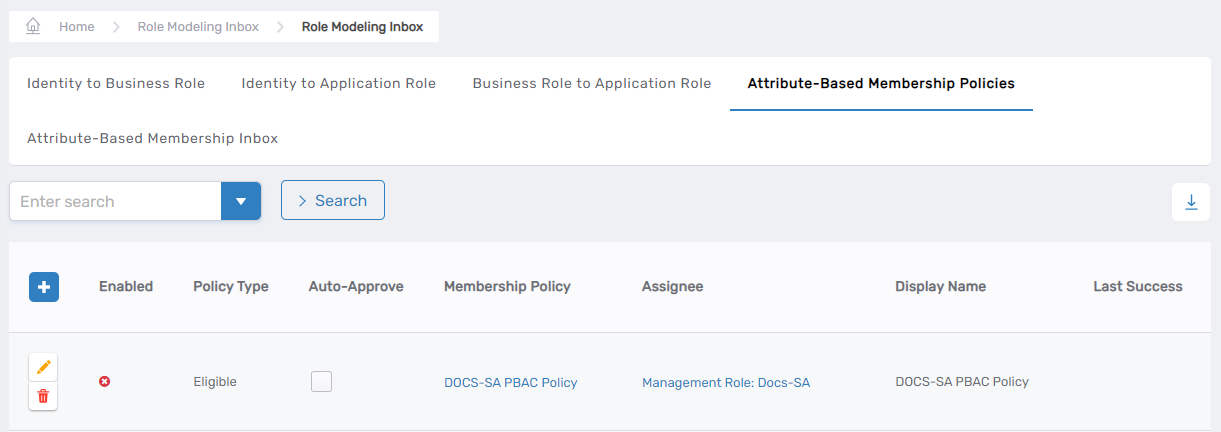
The newly created policy appears in the Attribute-Based Membership Policies grid.
Verify the Results
After creating the policy:
- Navigate to Role Management > Role Modeling Inbox > Attribute-Based Membership Policies tab.
- Search for your newly created policy by name or display name.
- Verify that the policy appears in the grid with the correct target type and policy type.
- Click the policy link to confirm all configuration details are accurate.
The policy you just created will not assign any members until you add attribute conditions that define which actors qualify for membership. Continue to the next step to complete the policy configuration.
Next Steps
Your PBAC Membership Policy is created but not yet functional. To complete the configuration:
- Add Attribute Conditions - Define which Field Types and values actors must have to qualify for membership
- Assign PBAC Attributes to users - Ensure actors have the attributes the policy will evaluate
- Monitor policy execution - The policy will run according to the configured Job Schedule Interval to evaluate and assign memberships