Onboard a Mailbox
The Onboard a Mailbox workflow provides a wizard-driven process for creating and configuring various types of mailboxes within your organization's email infrastructure.
Use this workflow when you need to establish new email capabilities for users, departments, or specialized functions. The wizard handles the complete process from initial creation through group assignment and access configuration.
Before You Start
Make sure you have the following information ready:
- The mailbox name and description
- Knowledge of what type of mailbox you need to create
- Understanding of any group memberships required
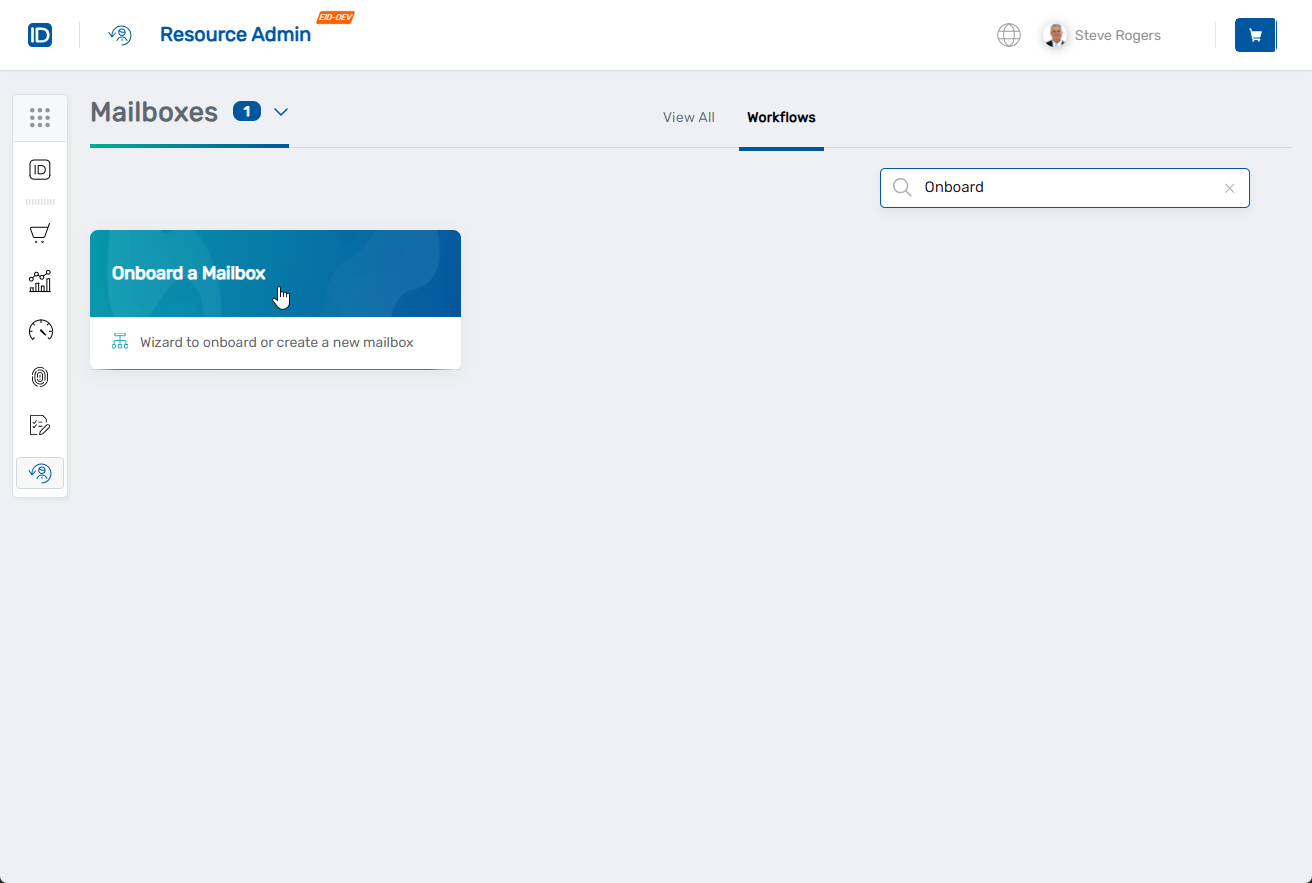
Get Started
- Navigate to the Resource Admin portal.
- Select Mailboxes from the resource type navigation.
- Click the Workflows tab.
- Find and click Onboard a Mailbox.
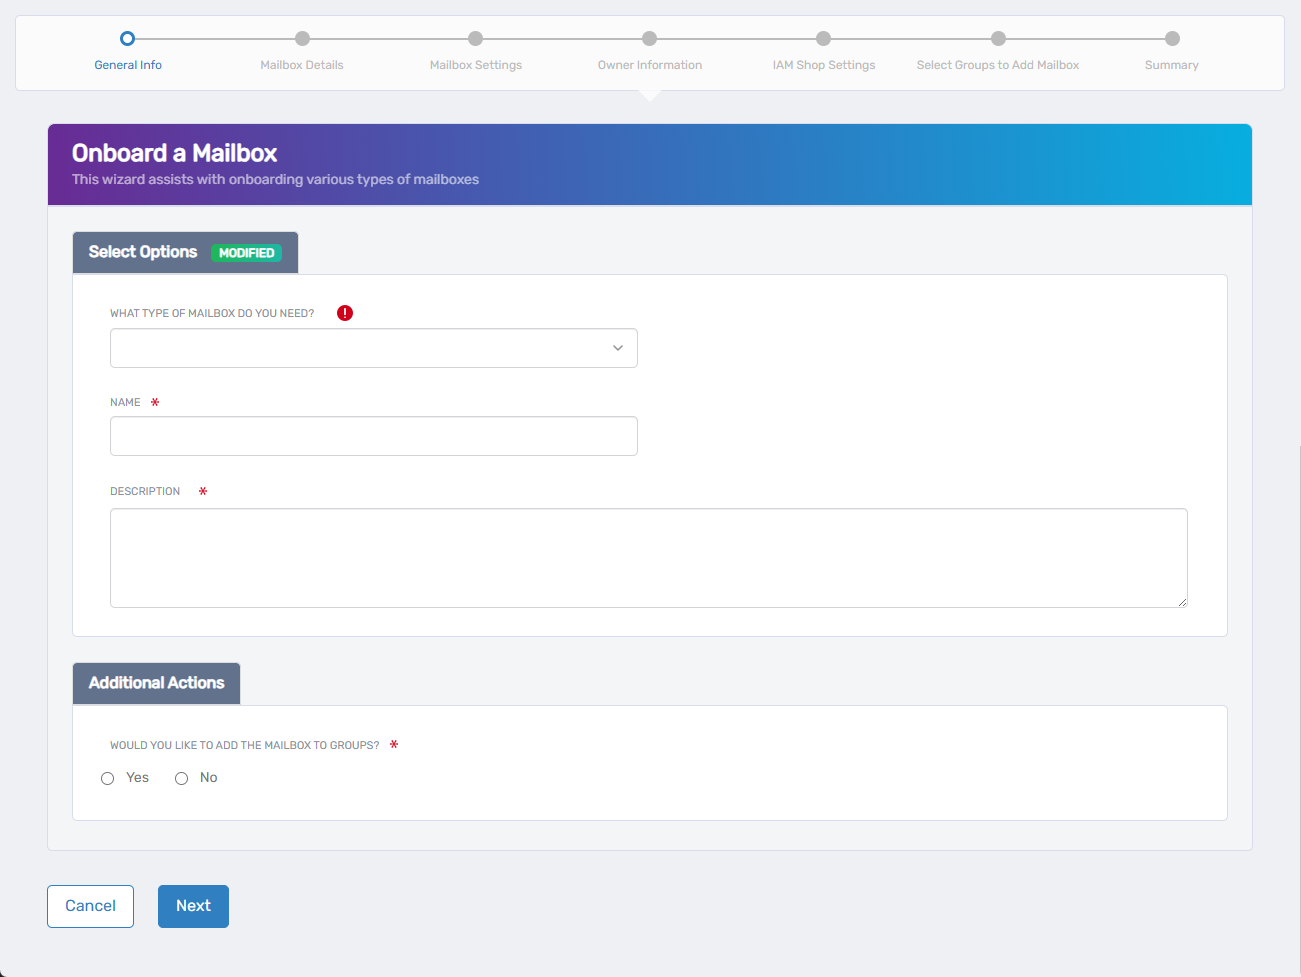
- The mailbox onboarding wizard opens with a progress indicator showing seven distinct phases: General Info, Mailbox Details, Mailbox Settings, Owner Information, IAM Shop Settings, Select Groups to Add Mailbox, and Summary.
Step 1: Configure General Information
Complete the basic mailbox configuration and options.
-
Complete the following fields:
- What type of mailbox do you need? - Select the appropriate type from the dropdown.
- Name - Enter a descriptive name.
- Description - Enter the mailbox's intended use and purpose.
- Would you like to add the mailbox to groups? - Select Yes or No.
-
Click Next to proceed.
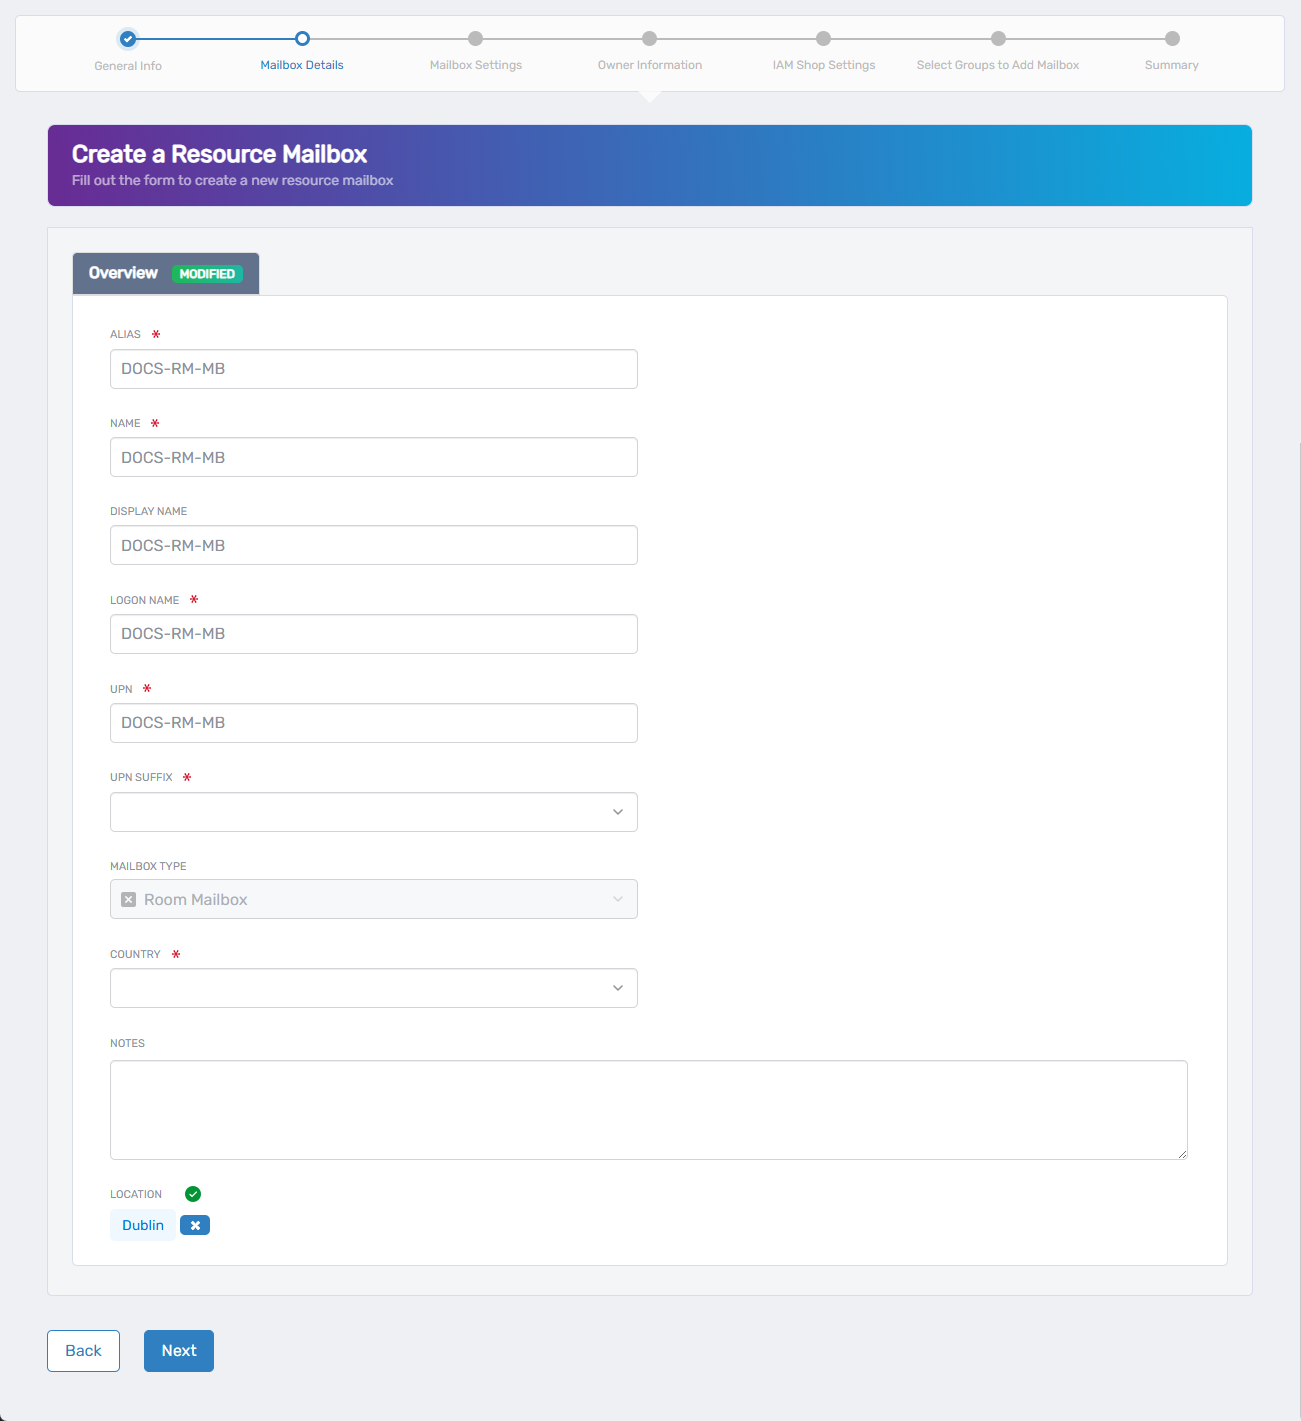
Step 2: Complete Mailbox Details
Fill out the resource mailbox configuration form. Several fields are automatically populated based on the Name you entered in Step 1.
-
Complete the following fields:
- ALIAS - Modify the auto-populated alias (derived from Step 1 Name) if needed.
- NAME - Modify the auto-populated name (derived from Step 1 Name) if needed.
- DISPLAY NAME - Modify the auto-populated display name (derived from Step 1 Name) if needed.
- LOGON NAME - Modify the auto-populated logon name (derived from Step 1 Name) if needed.
- UPN - Modify the auto-populated User Principal Name (derived from Step 1 Name) if needed.
- UPN SUFFIX - Select the appropriate domain suffix from the dropdown.
- MAILBOX TYPE - Review the type selected in Step 1 (field is read-only).
- COUNTRY - Select the appropriate country from the dropdown (you can type to search and narrow options).
- NOTES - Add any additional notes (optional).
- LOCATION - Select the appropriate location for RBAC control (determines who can see and manage this mailbox in EmpowerID):
- To change an existing location, click the X next to the current location to clear it.
- Click "Select a Location" to open the location selector.
- Search or browse for the desired location.
- Click on the location name to select it.
-
Click Next to continue.
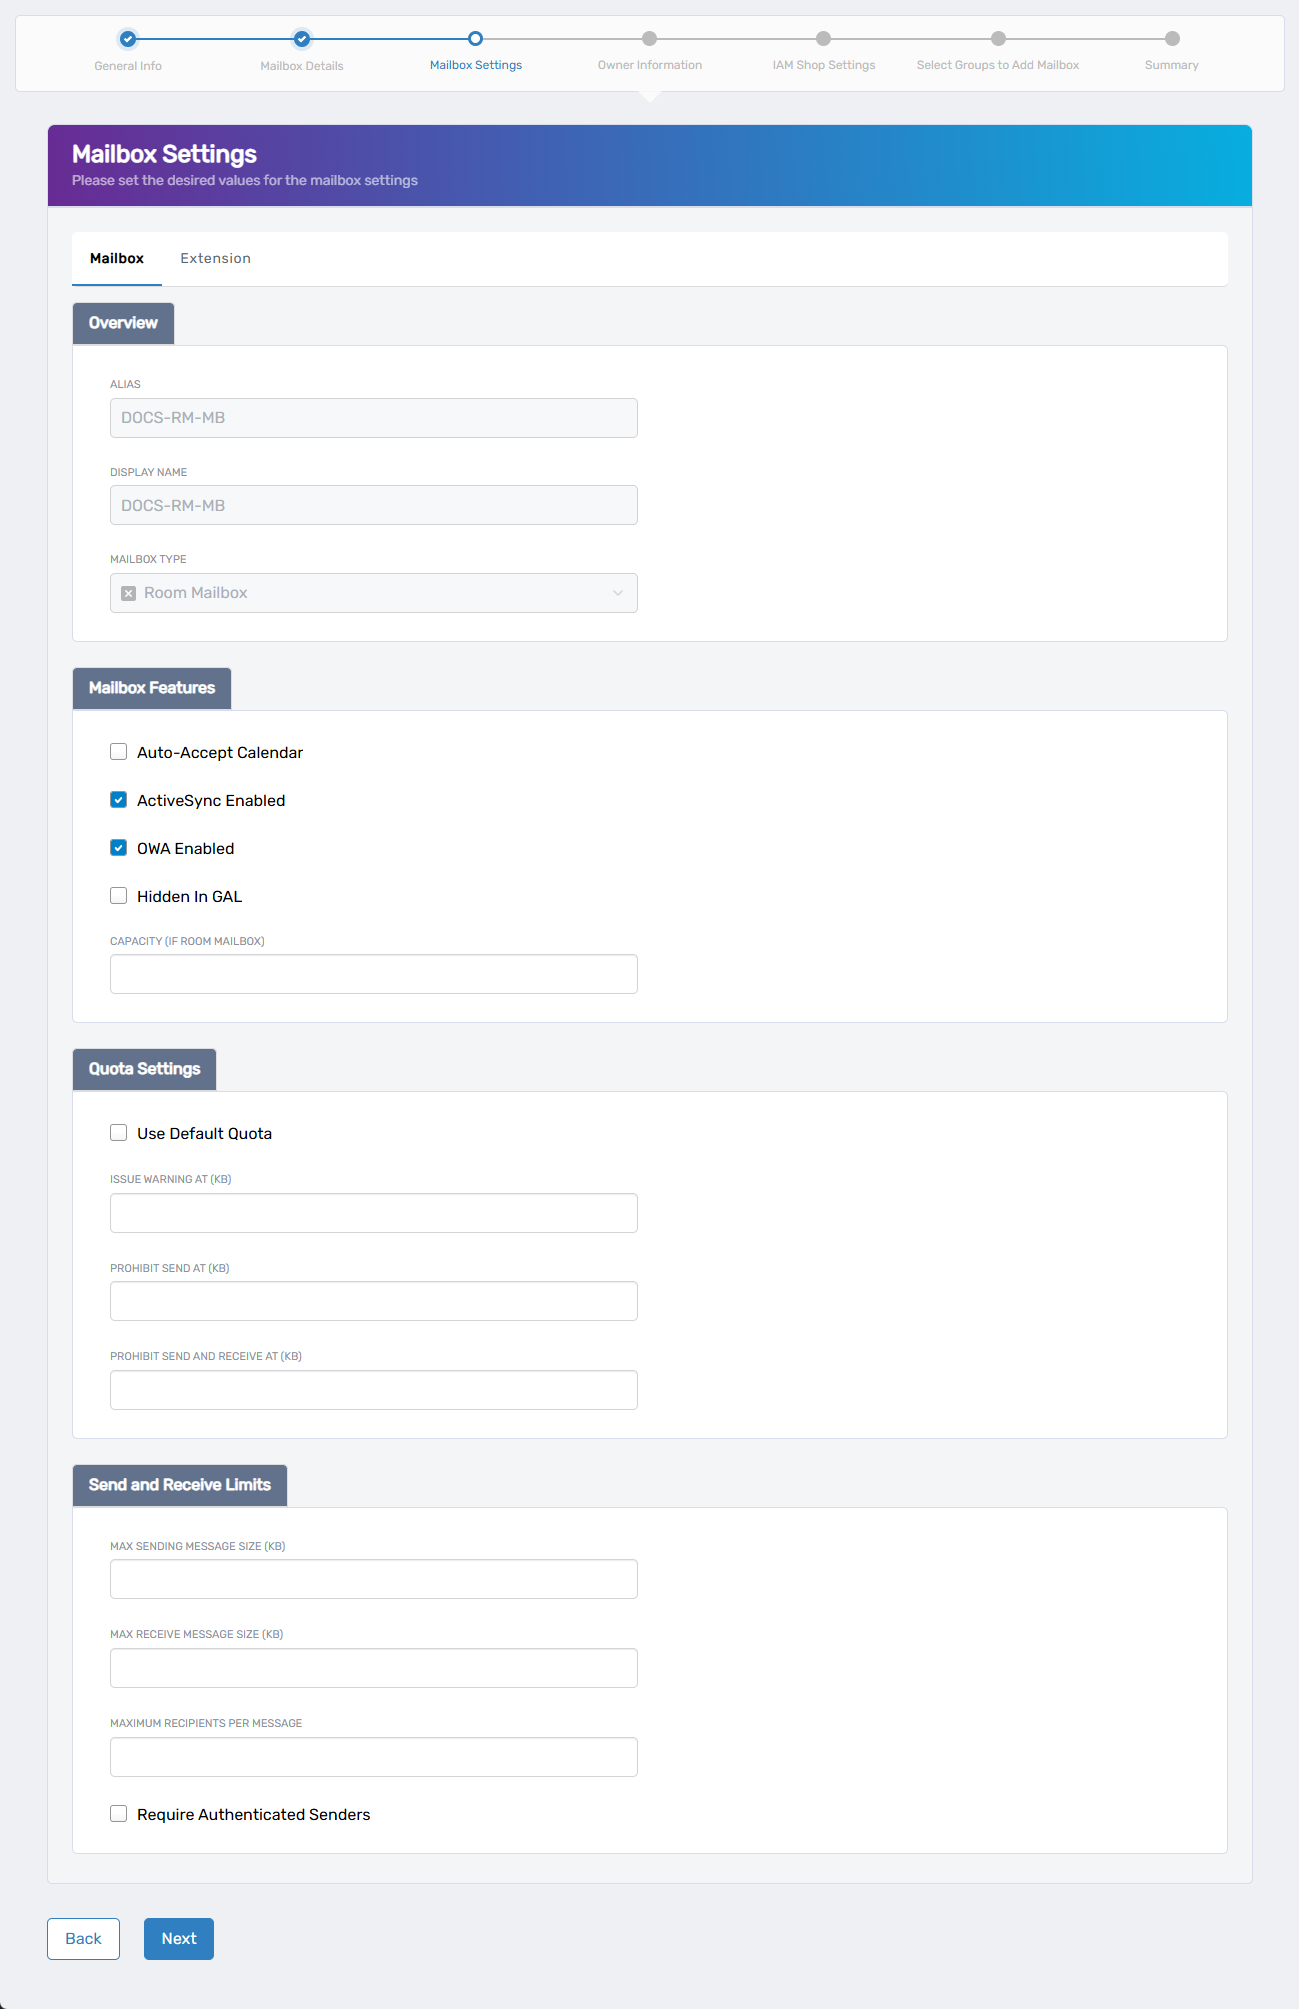
Step 3: Configure Mailbox Settings
Set up mailbox settings and policies using the available tabs.
-
Complete the Mailbox tab settings:
- Overview section:
- ALIAS - Review or modify the alias (auto-populated from previous steps).
- DISPLAY NAME - Review or modify the display name (auto-populated from previous steps).
- MAILBOX TYPE - Review the mailbox type (read-only, shows selection from Step 1).
- Mailbox Features section:
- Auto-Accept Calendar - Check to enable automatic calendar acceptance.
- ActiveSync Enabled - Check to enable mobile device synchronization (checked by default).
- OWA Enabled - Check to enable Outlook Web Access (checked by default).
- Hidden In GAL - Check to hide the mailbox from the Global Address List.
- CAPACITY OF ROOM MAILBOX - Enter the room capacity if applicable.
- Quota Settings section:
- Use Default Quota - Check to use system default quotas.
- ISSUE WARNING AT (KB) - Enter storage warning threshold.
- PROHIBIT SEND AT (KB) - Enter storage limit for sending messages.
- PROHIBIT SEND AND RECEIVE AT (KB) - Enter storage limit for all mail operations.
- Send and Receive Limits section:
- MAX SENDING MESSAGE SIZE (KB) - Enter maximum outbound message size.
- MAX RECEIVE MESSAGE SIZE (KB) - Enter maximum inbound message size.
- MAXIMUM RECIPIENTS PER MESSAGE - Enter recipient limit per message.
- Require Authenticated Senders - Check to require sender authentication.
- Overview section:
-
Complete the Extension tab if needed:
- Extension Attributes section:
- EXTENSION ATTRIBUTE 1-15 - Enter custom attribute values as required by your organization.
- Extension Attributes section:
-
Click Next to proceed.
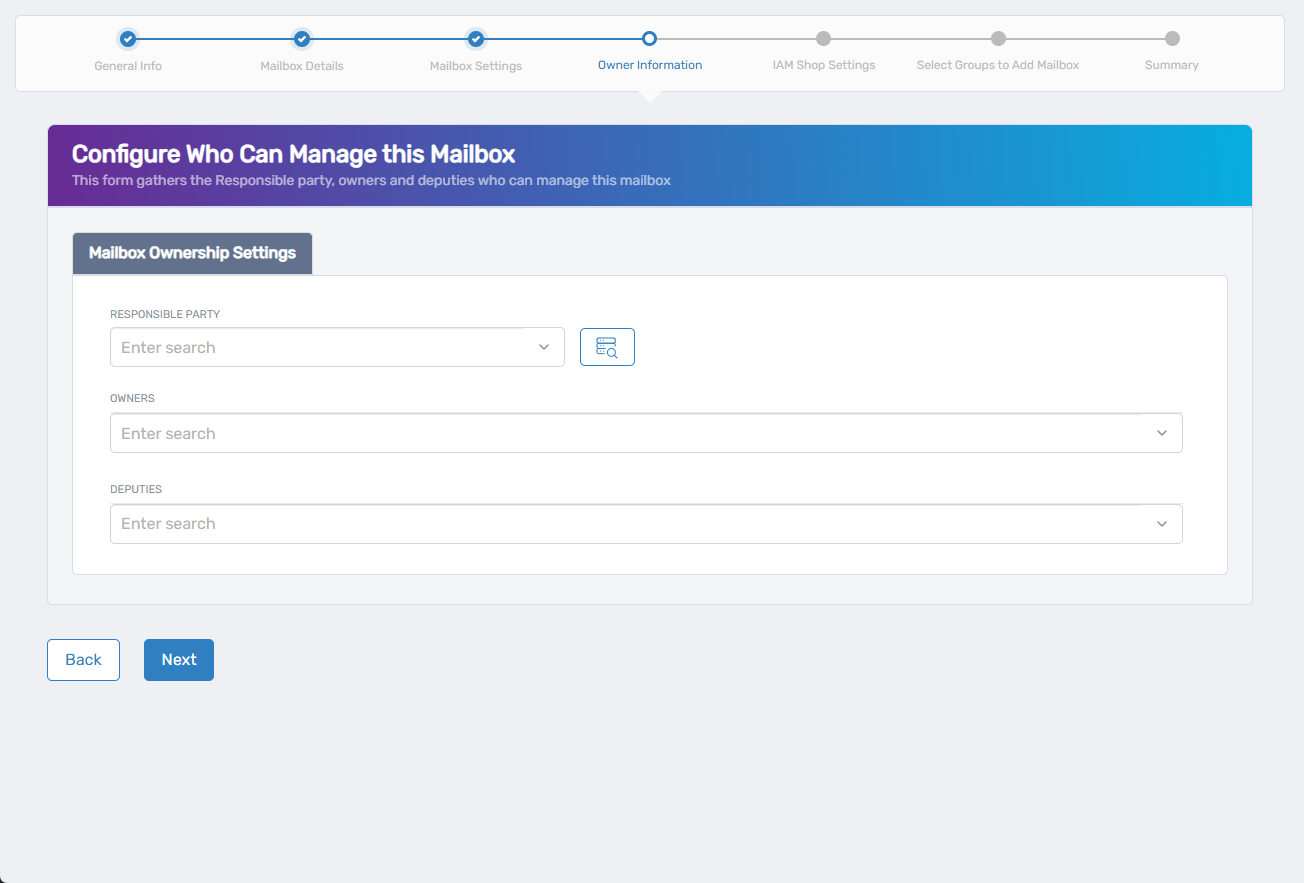
Step 4: Set Owner Information
Configure who can manage this mailbox by assigning responsible party, owners, and deputies.
-
Complete the mailbox ownership settings:
- RESPONSIBLE PARTY - Search for and select the person responsible for this mailbox (optional).
- OWNERS - Search for and select users who will have ownership rights to manage the mailbox.
- DEPUTIES - Search for and select users who will have deputy access to assist with mailbox management.
-
Click Next to continue.
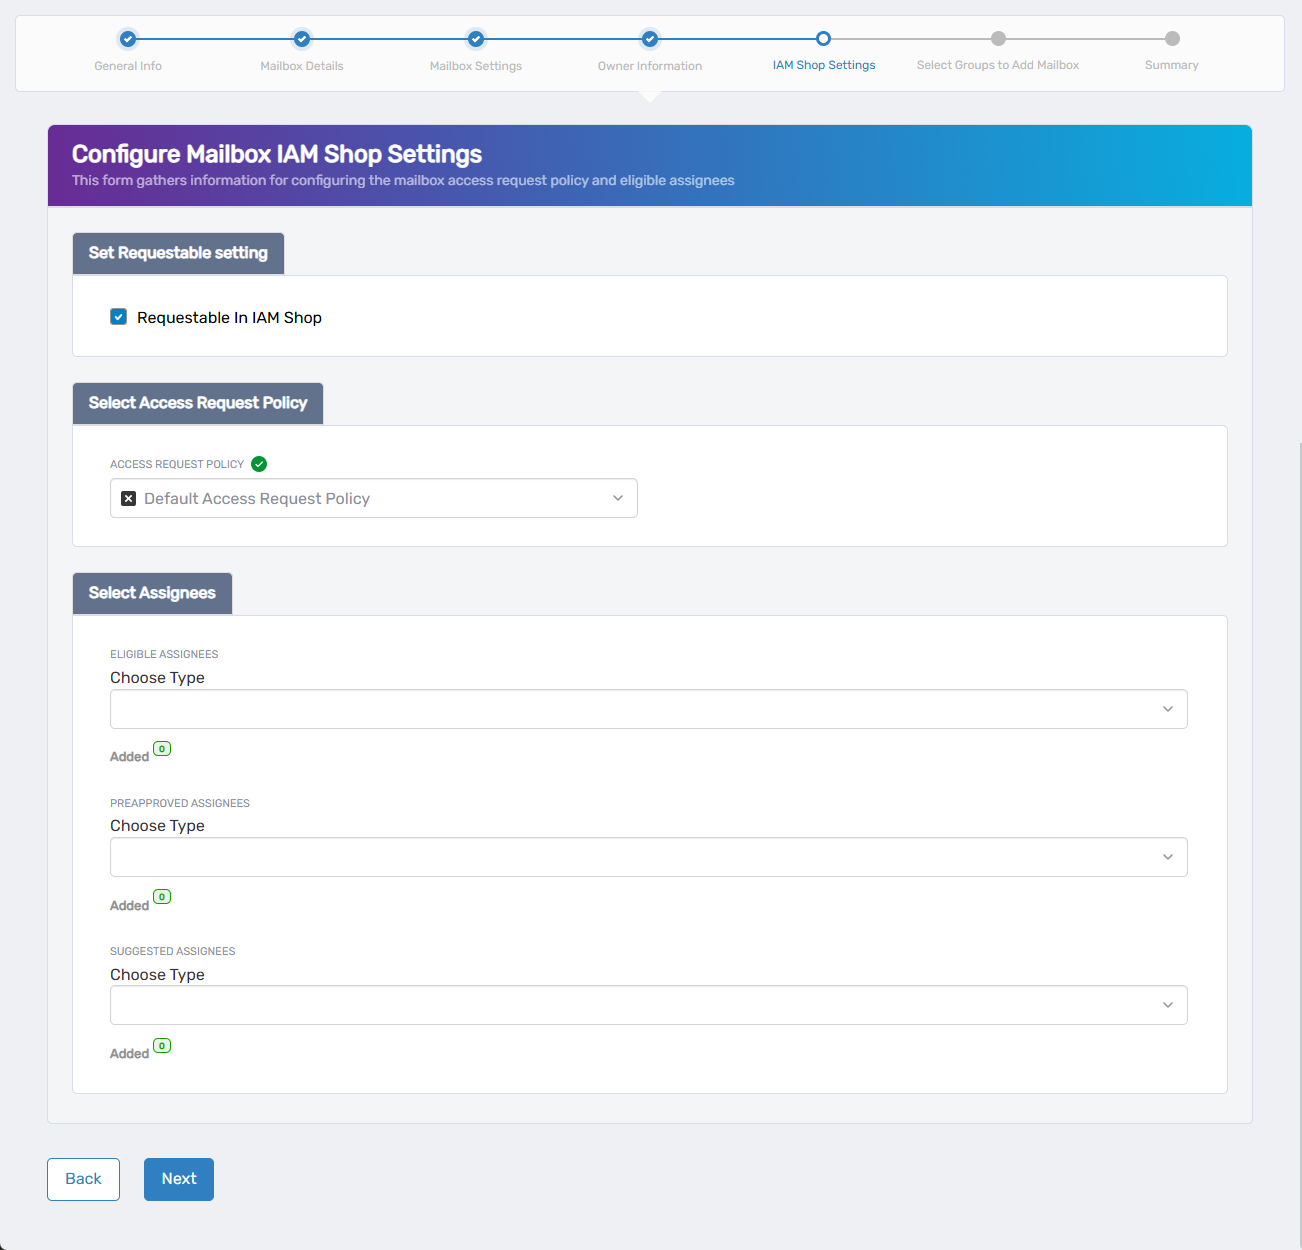
Step 5: Configure IAM Shop Settings
Configure how the mailbox appears and behaves in the IAM Shop self-service portal.
-
Configure availability for self-service requests if desired:
- Requestable in IAM Shop - Check this box if users should be able to request access to this mailbox in the IAM Shop.
-
If you enable requestable, complete the additional settings:
- Select Access Request Policy - Choose the policy that defines how access requests for this mailbox are handled, including approval workflows, time-bound restrictions, and fulfillment behaviors.
- Select Assignees - Configure who can request access to this mailbox:
- Eligible Assignees - Users who can request access to the mailbox:
- Select a type from the Choose Type dropdown (Person, Group, SetGroup, Management Role, Business Role, or Location).
- Search for and select the specific person, group, or role.
- Repeat as needed to add multiple criteria.
- Use the Added counter to view or remove selections.
- Preapproved Assignees - Users who are automatically granted access without needing approval:
- Select a type from the Choose Type dropdown (Person, Group, SetGroup, Management Role, Business Role, or Location).
- Search for and select the specific person, group, or role.
- Repeat as needed to add multiple criteria.
- Use the Added counter to view or remove selections.
- Suggested Assignees - Users who see this mailbox as suggested in the IAM Shop. Like eligible assignees, their requests generate business requests and follow approval routing:
- Select a type from the Choose Type dropdown (Person, Group, SetGroup, Management Role, Business Role, or Location).
- Search for and select the specific person, group, or role.
- Repeat as needed to add multiple criteria.
- Use the Added counter to view or remove selections.
- Eligible Assignees - Users who can request access to the mailbox:
-
Click Next to proceed.
Step 6: Select Groups (if applicable)
If you selected "Yes" for group membership in Step 1:
- Select the appropriate groups for the mailbox.
- Click Next to continue.
Step 7: Review and Submit
Review all configurations before finalizing the mailbox creation.
- Review the configuration summary and verify all settings are correct.
- Click Submit.
Complete the Workflow
- Review the Operation Execution Summary to confirm the mailbox was created successfully.
- Click Submit.
What Happens Next
After successful submission:
- The mailbox is created according to your configuration.
- Users can access the mailbox through standard email clients.
- The mailbox becomes available for ongoing management in Resource Admin.
Related Actions
For ongoing mailbox management, use the related workflows:
- Modify mailbox settings and configurations
- Configure mailbox delegation and access rights
- Remove mailboxes when no longer needed