Create Code-Based Sets
Create code-based Sets using custom C# code in Workflow Studio when SQL queries cannot meet your requirements. Code-based Sets use a Set Runtime class that implements the EmpowerID API to return collections of people or other resource types based on custom logic.
Prerequisites
Before creating code-based Sets, ensure you have:
- Access to Workflow Studio with permissions to create class libraries
- Access to Visual Studio for building .NET Framework projects
- Access to publish Workflow Studio items in EmpowerID
- The Set Compiler Job is enabled on at least one EmpowerID Server with the Worker Role service
Procedure
Phase 1: Create the Set Runtime Class
-
Log into Workflow Studio.
-
In Solution Explorer, select the
Workspacenode. -
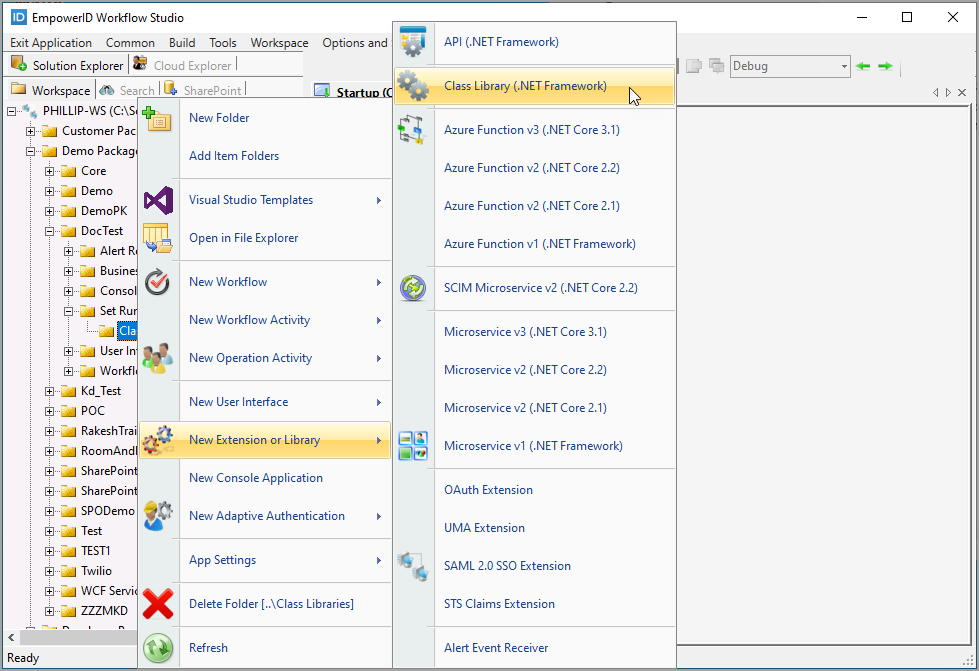
Right-click a folder and select New Extension or Library > Class Library (.NET Framework).
-
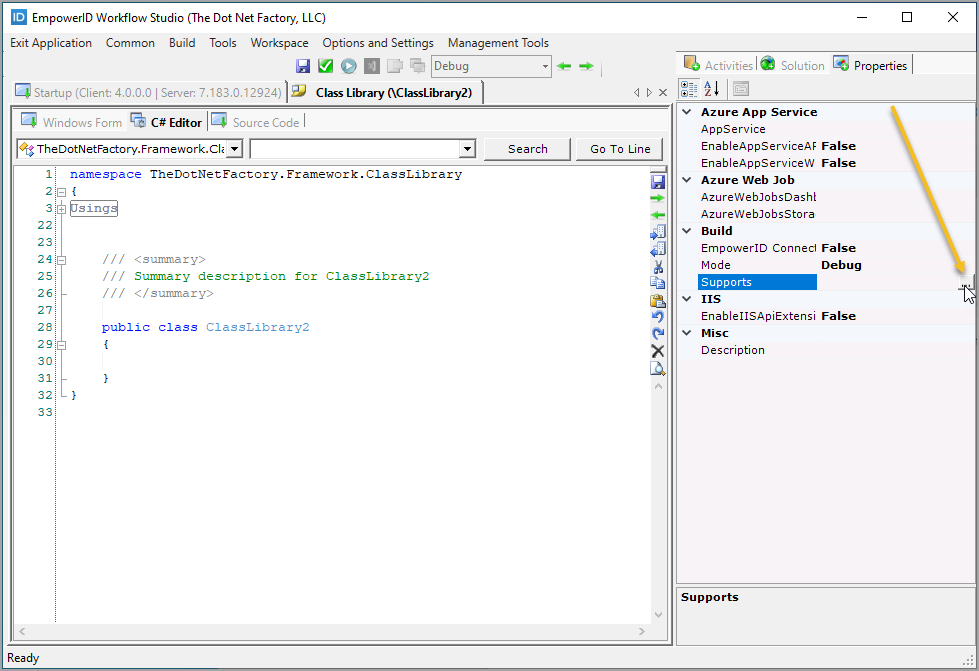
In the Properties tab (right of the C# Editor), click the Supports button (
…).
-
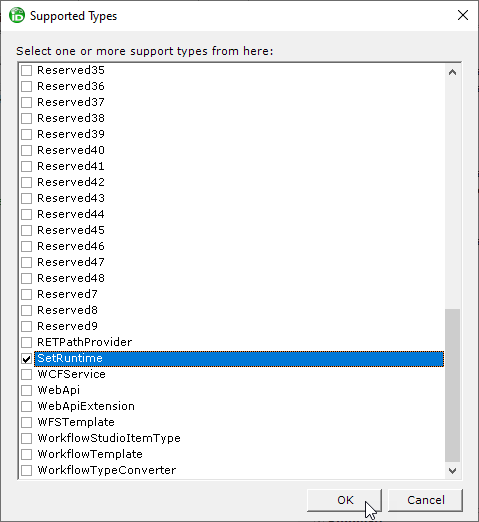
In the Supports dialog, select SetRuntime and click OK.
-
In the toolbar above the C# Editor, click Save.
-
Enter a descriptive name for the class (e.g.,
HelpDeskTechniciansSetRuntime) and click Save.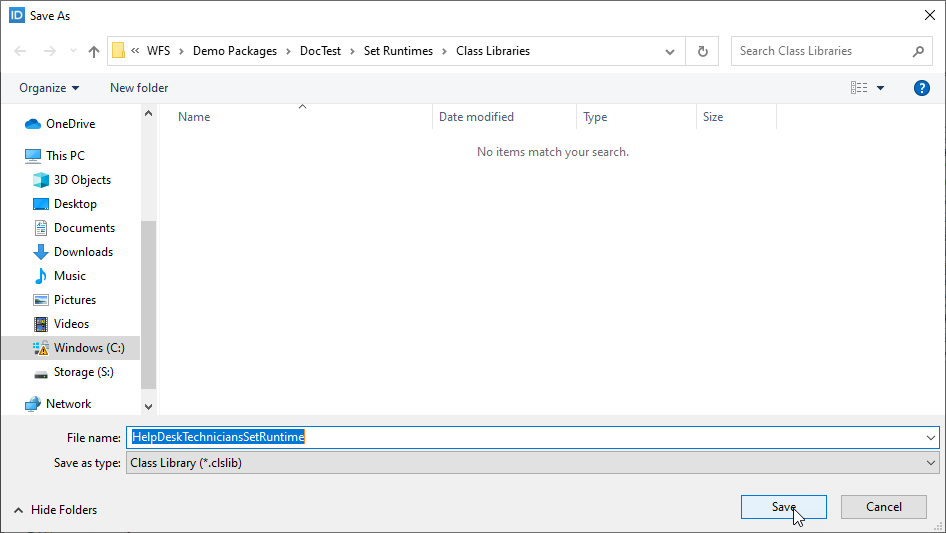
-
In the C# Editor, implement the
ISetRuntimeinterface:- Set the base class to
ISetRuntime - Implement the
GetResults()method using the EmpowerID API
Example implementation that returns all people with the title "Helpdesk Technician":
  public class HelpDeskTechniciansSetRuntime : ISetRuntime
  {
      public E.TList<SetCompilation> GetResults()
      {
          int totalCount = -1;
          E.TList<Person> people = Person.Find(
              "Title = Helpdesk Technician", 0, int.MaxValue, out totalCount);

          E.TList<SetCompilation> results = new E.TList<SetCompilation>();

          foreach (Person p in people)
          {
              results.Add(new SetCompilation()
              {
                  SystemIdentifier = p.PersonGUID.ToString(),
                  DisplayName = p.FriendlyName
              });
          }

          return results;
      }
} - Set the base class to
-
Click Save and close the
.csfile.
Phase 2: Build and Publish the Set Runtime
-
In Workflow Studio, locate the class library in the source control tree.
-
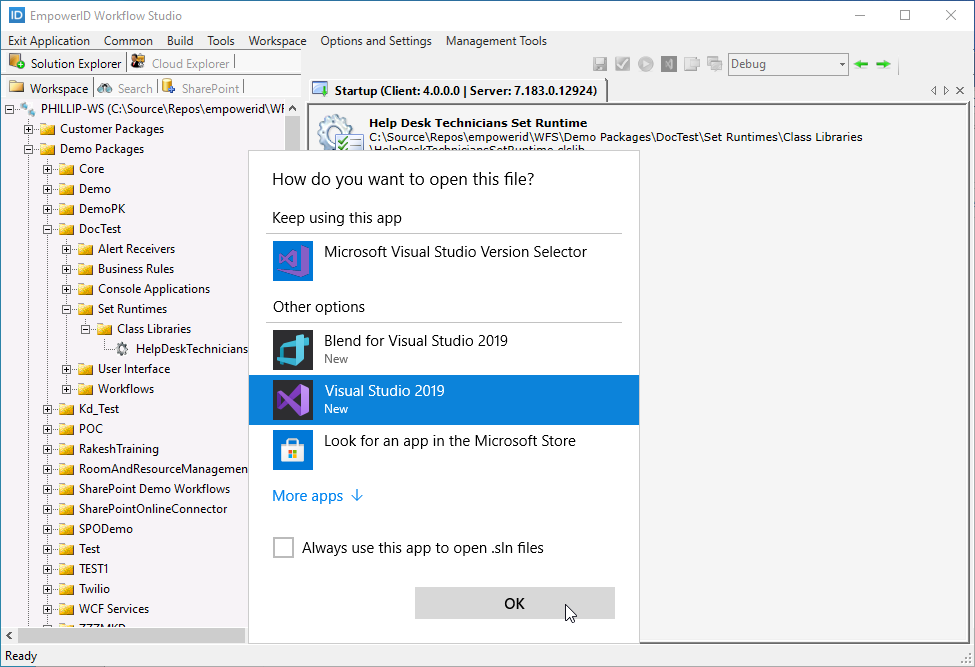
Double-click the class library to open it in Visual Studio.
Note: The first time you do this, select Visual Studio as the default application.
-
In Visual Studio, build the solution (Build > Build Solution or Ctrl+Shift+B).
-
After a successful build, verify the
.pubfile was generated in theWFS > _PublishedItemsfolder on your local file system.
-
Log into the EmpowerID web application as a user with permissions to publish Workflow Studio items.
-
Navigate to the publishing workflow by entering this URL in your browser:
https://<YourEmpowerIDServer>/UI/#w/PublishWorkflowStudioItem
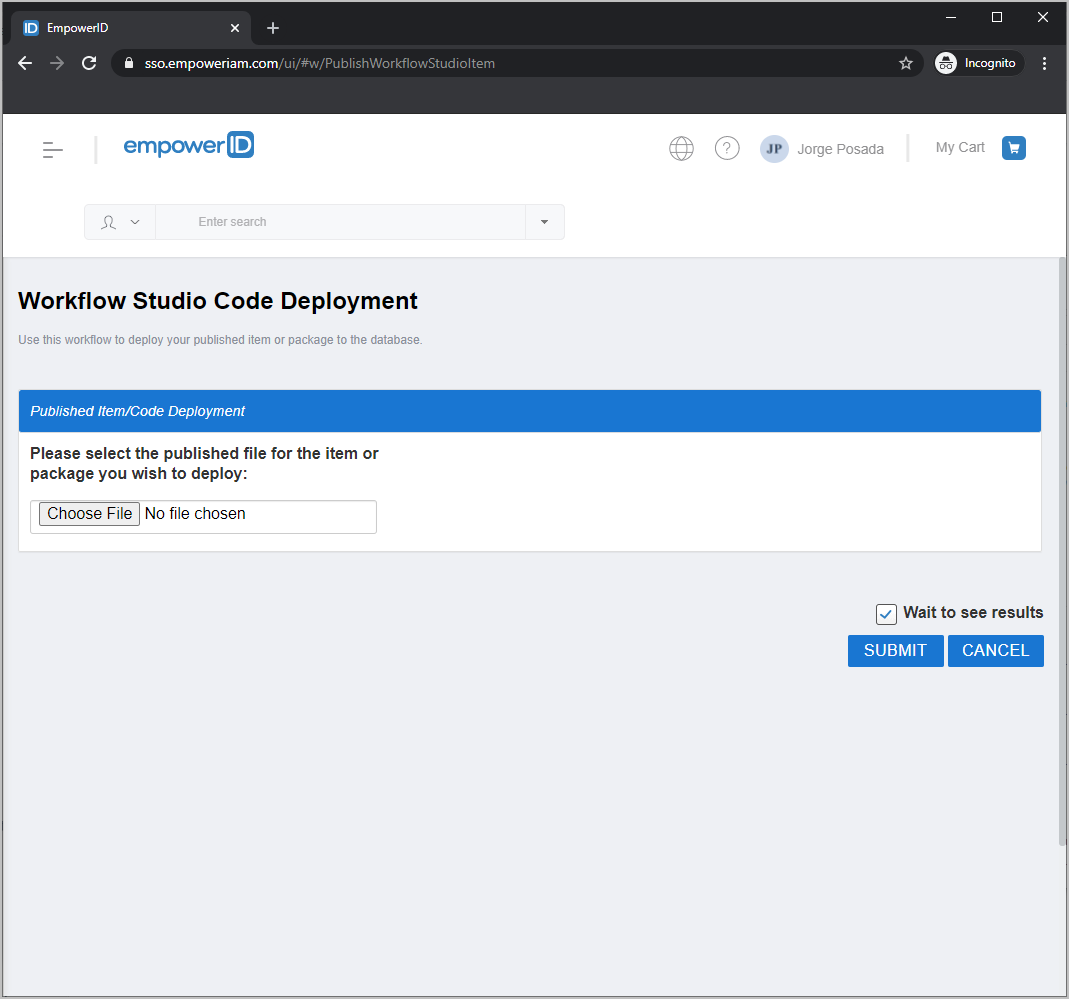
-
Click Choose File, browse to the
_PublishedItemsfolder, and select the.pubfile you generated. -
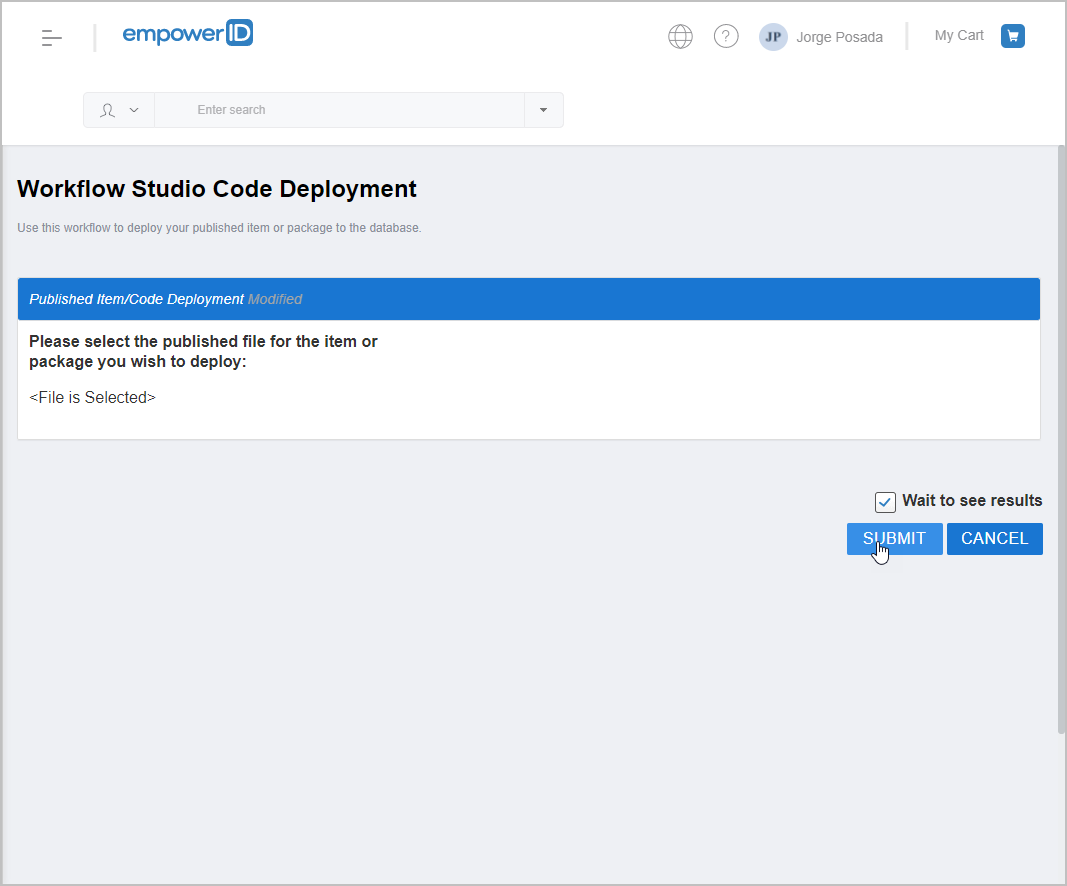
Click Submit.
Phase 3: Create a Query-Based Collection and Associate the Set
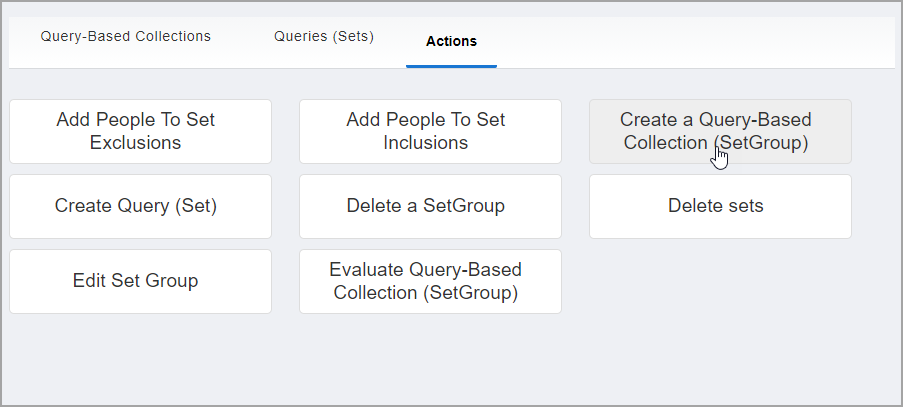
- In the EmpowerID web application, navigate to Role Management > Query-Based Collections (SetGroup).
- Select the Actions tab.
- Click Create a Query-Based Collection (SetGroup).
- In the Create Query-Based Collection form, configure the collection:
- Name: Enter the internal name for the collection
- Display Name: Enter the user-friendly name
- Description: Enter a description of the collection's purpose
- Is a collection of person objects: Select if the Set returns person objects
- Location: Select a location or use the default
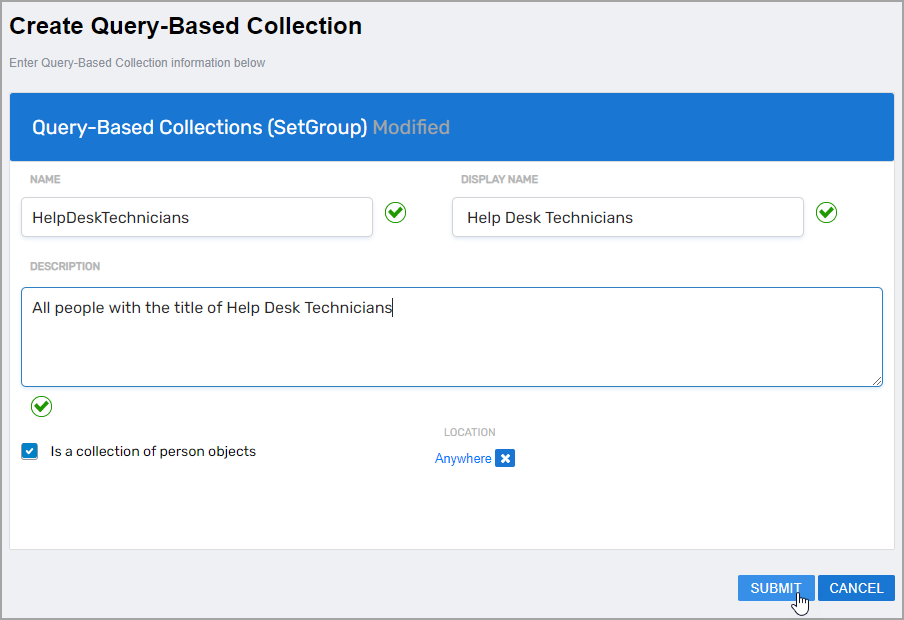
- Click Submit.
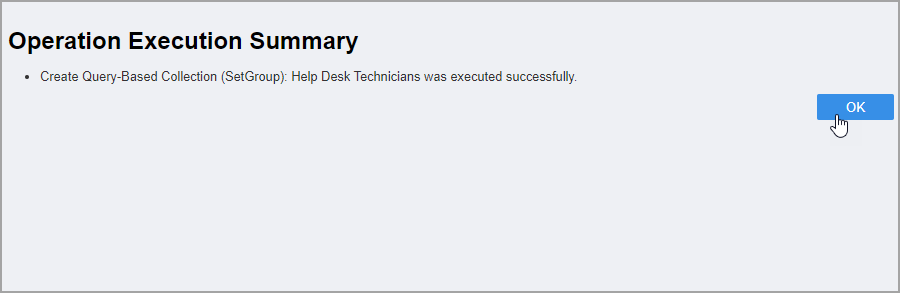
- Click OK to close the Operation Execution Summary.
- In the Select Queries lookup dialog that appears automatically:
- Search for the Set Runtime you published by name
- Select the checkbox for your Set Runtime
- Click Submit to associate it with the Query-Based Collection
- Click OK to close the final Operation Execution Summary.
Verify the Results
After creating and publishing the code-based Set:
- Navigate to Role Management > Query-Based Collections (SetGroup) and select the Queries tab.
- Search for your Set Runtime by name to verify it appears in the list.
- Click the Set Runtime name to open its details and confirm the configuration is correct.
- Navigate to the Query-Based Collections tab and search for the collection you created.
- Click the collection name to open its details and verify the Set Runtime is associated with it.
- (Optional) Wait for the Set Compiler Job to run and verify that members appear in the Set based on your code logic.
Related Topics
- Create SQL Sets — Create Sets using SQL queries instead of code
- Create Query-Based Collections — Create collections to group Sets
- About Query-Based Collections — Understand Query-Based Collection concepts