Assigning Custom Security Attributes
This guide explains how to assign Custom Security Attributes to users and service principals in EmpowerID. Assignments associate custom metadata with directory objects according to organizational policies and approval workflows.
Custom Security Attributes can only be assigned to Microsoft Entra users and service principals. Group assignments are not supported.
Prerequisites
Before assigning attributes, ensure:
- Eligibility has been configured for the attributes
- Attributes are active and available for assignment
- The Microsoft Entra account store connection is active
Assign Attributes to an Account
-
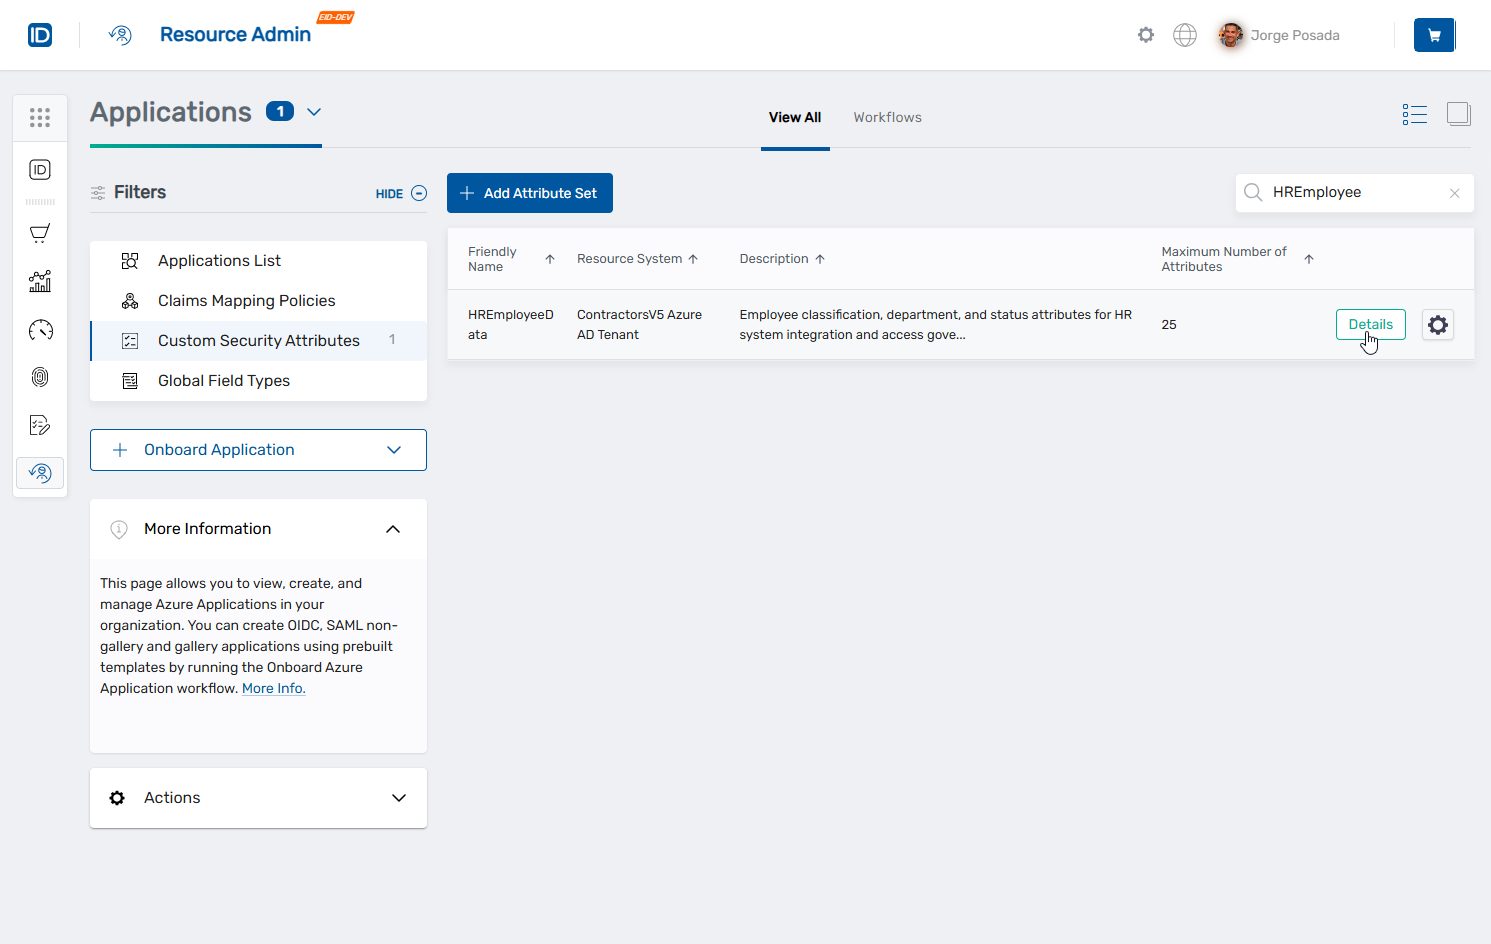
Navigate to Resource Admin → Applications → Custom Security Attributes.
-
Search for and click the Details button for the desired attribute set.
-
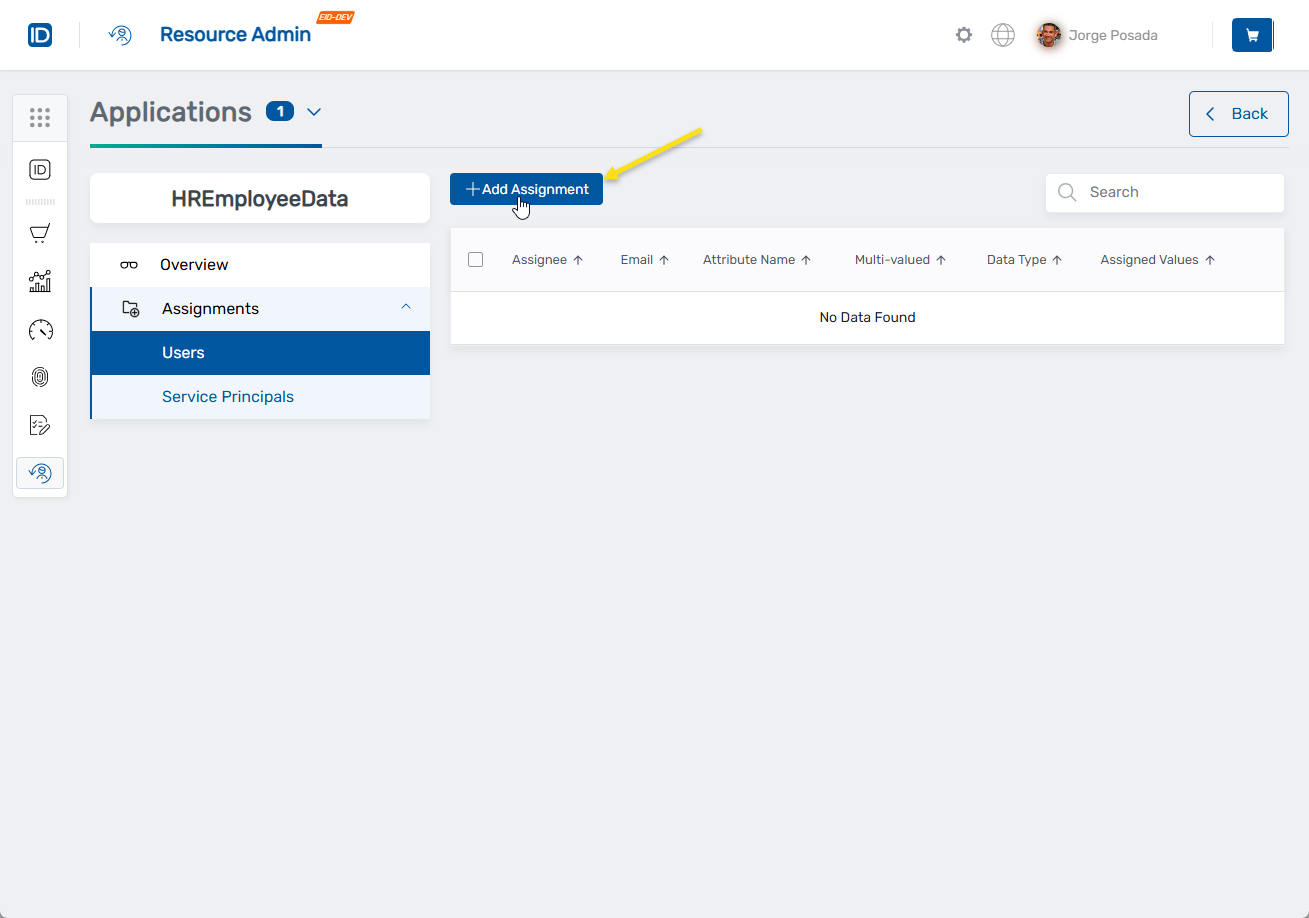
Click Assignments on the Attribute menu.
-
Click Users or Service Principals, depending on the type of account you are assigning to the attribute.
-
Click the Add Assignment button.
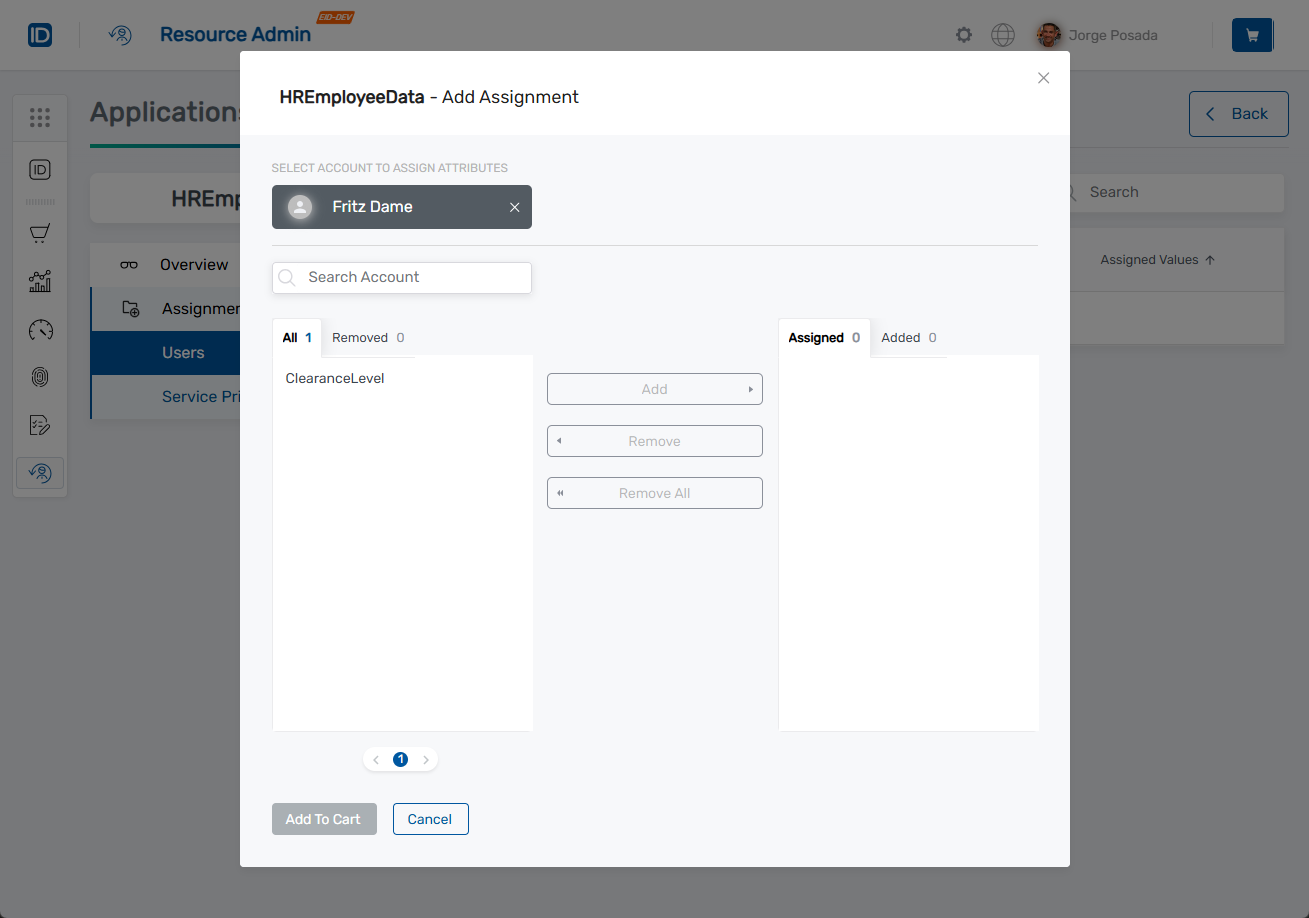
 This opens the Add Assignment search.
 -
In the Add Assignment search, click the Select a Account field.
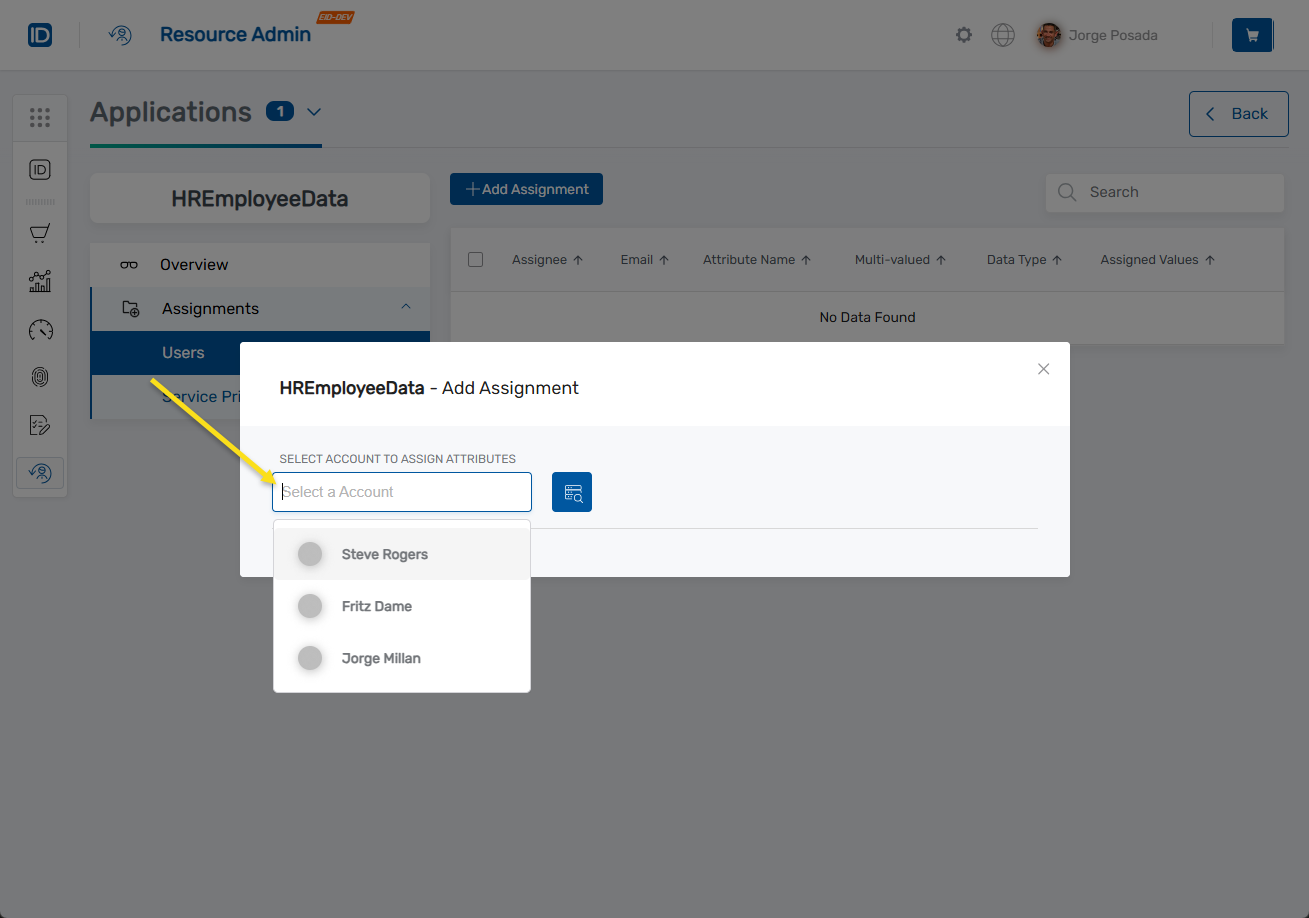 This displays eligible accounts.
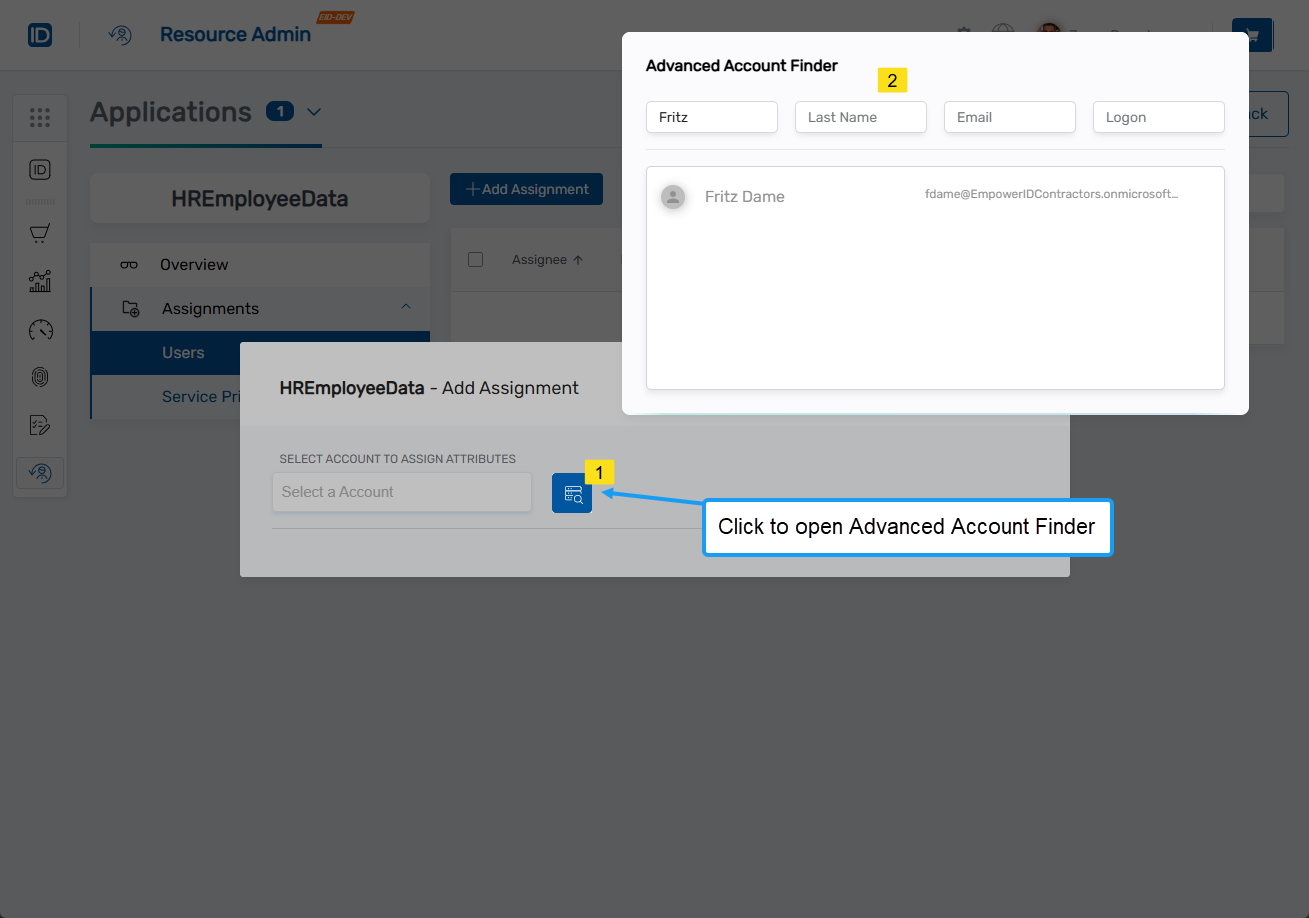
To search by specific fields (Last Name, Logon, etc.), click Advanced Search and enter the search criteria.
This displays eligible accounts.
To search by specific fields (Last Name, Logon, etc.), click Advanced Search and enter the search criteria.
-
Click the account record to select it. This opens the Add Assignment modal for the selected account.
-
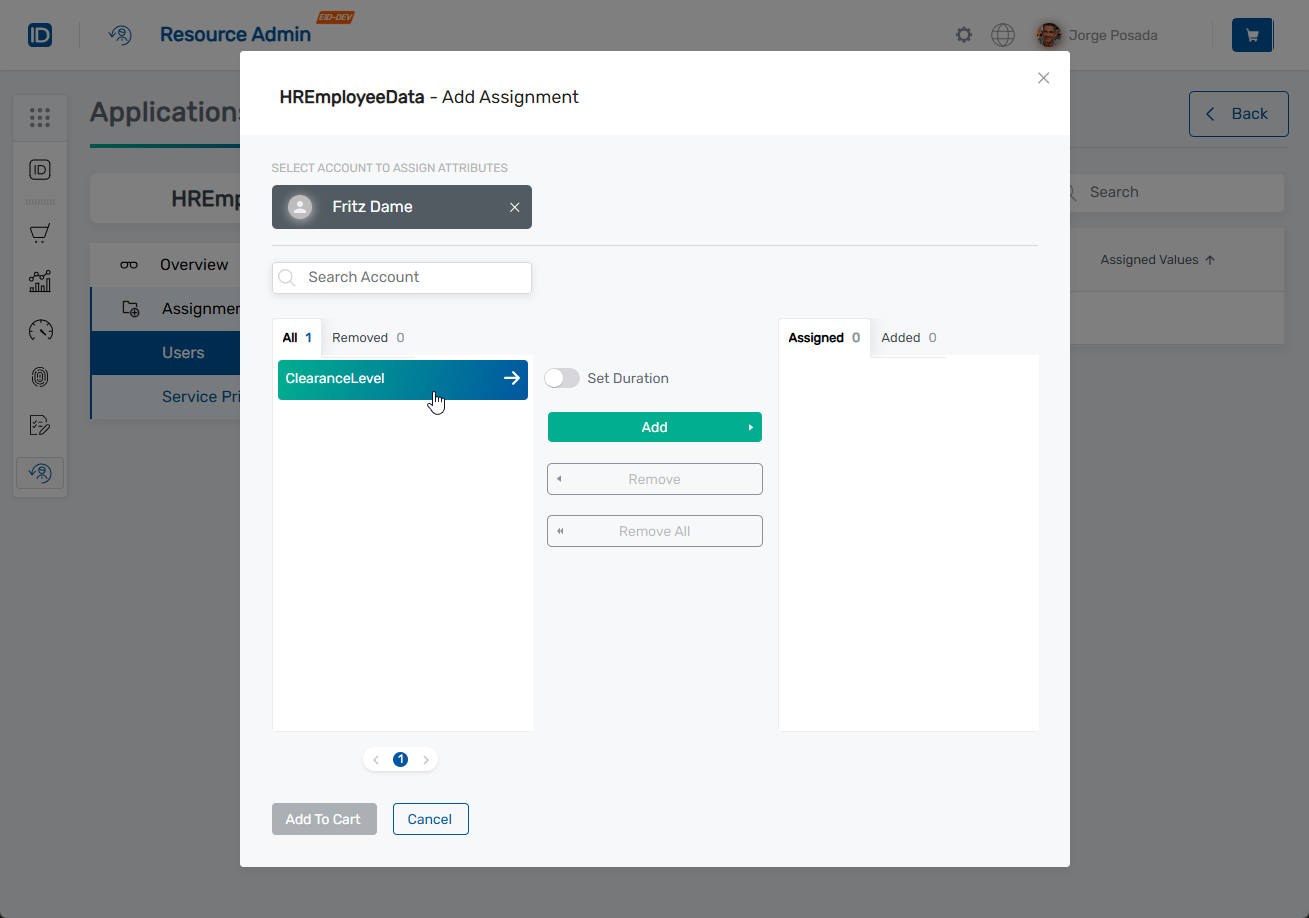
In the left pane of the modal, search for and select one or more attributes to be assigned. The pane only shows attributes the user is eligible to receive.
-
(Optional) If setting a duration for the assignment, toggle the Set Duration switch and configure the expiration date.
-
Click the Add button to move selected attributes to the assignment queue.

-
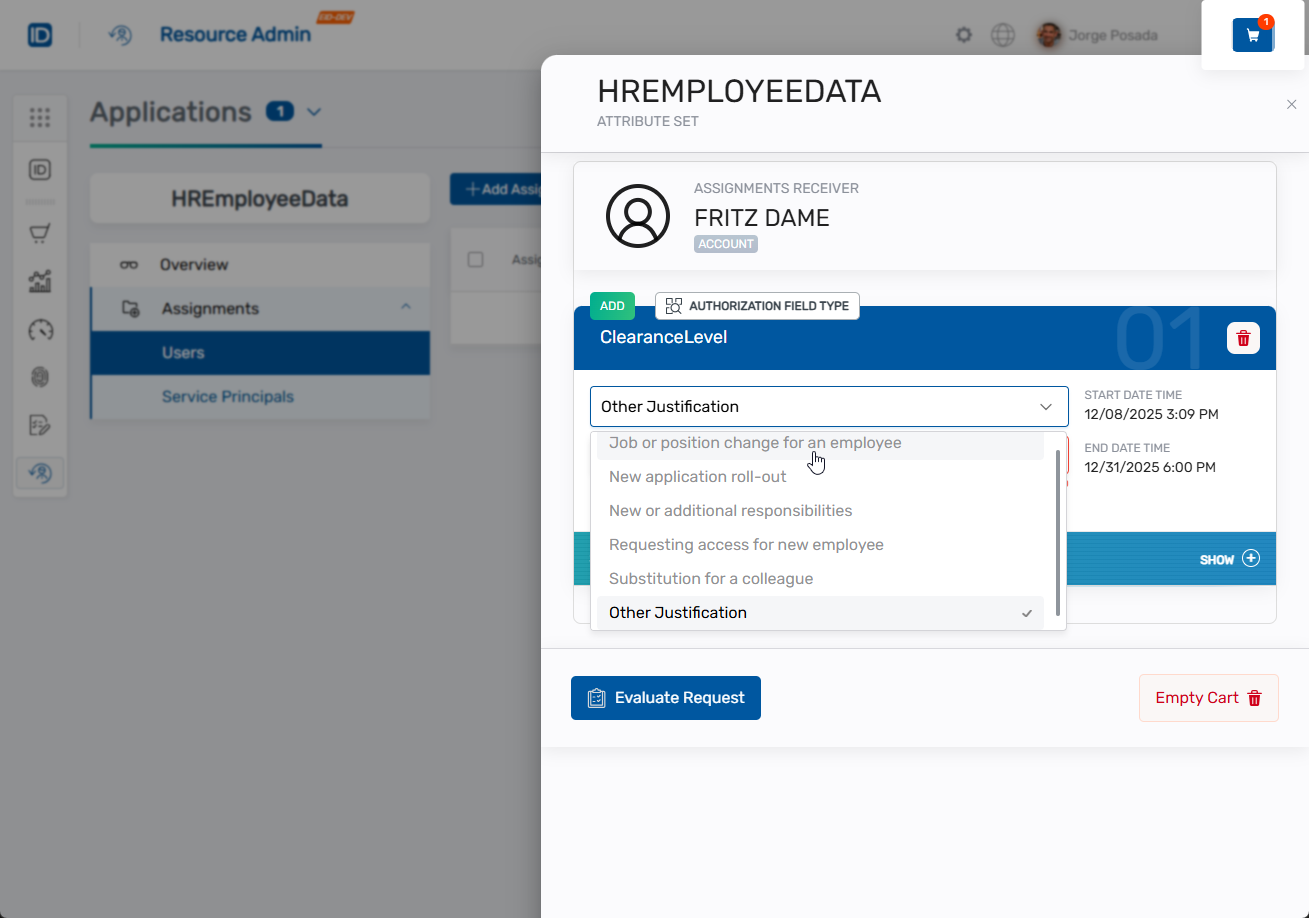
(Optional) To set specific attribute values before adding the assignment to the cart, click Edit value(s) next to an attribute and configure based on attribute type:
For Multi-Predefined attributes:
- Click the checkbox next to each value you want to assign
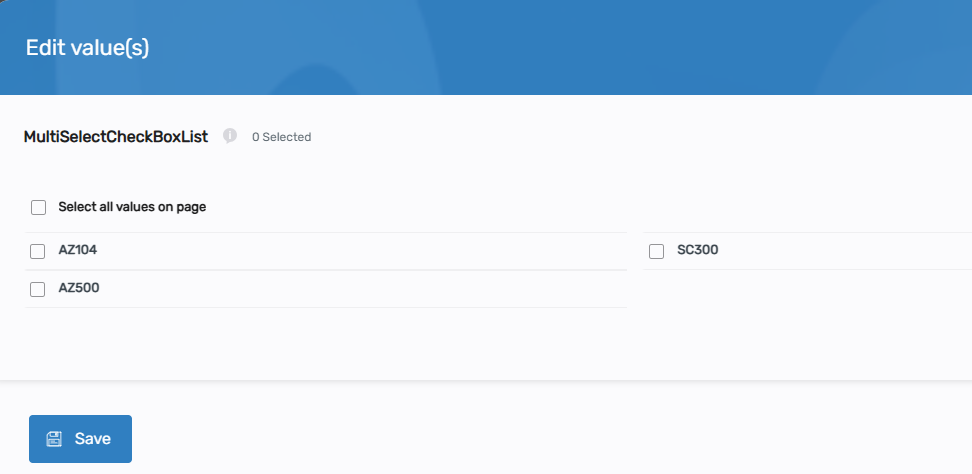
- Click Select all values on page to select all available values
- Click Save
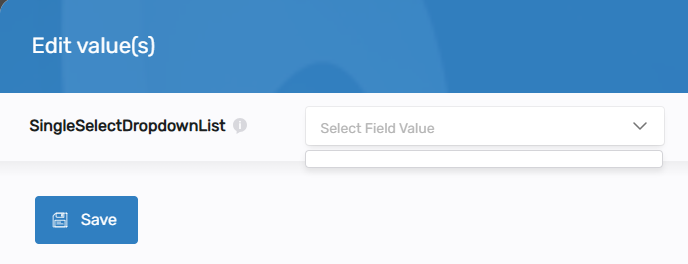
For Single-Predefined attributes:
- Click the dropdown field and select one value
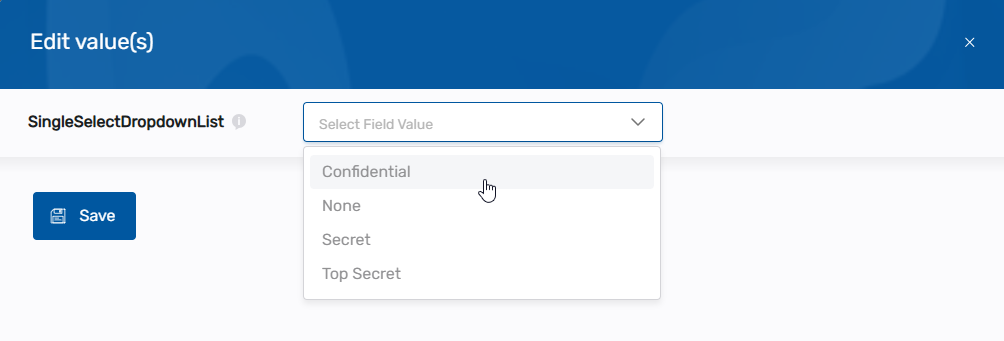
- Click Save
For Boolean attributes:
- Click the dropdown field and select True or False
- Click Save
For Multi-Free Text attributes:
- Enter a value in the text field
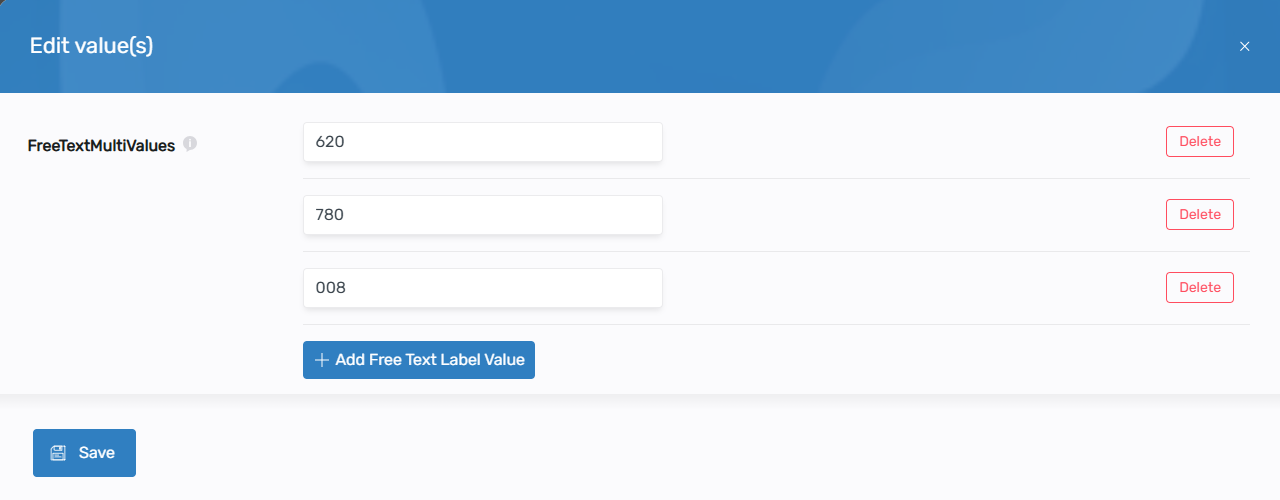
- Click + Add Free Text Label Value to add additional values
- Click the Delete button next to any value to remove it
- Click Save
For Single-Free Text attributes:
- Enter the desired value in the text field
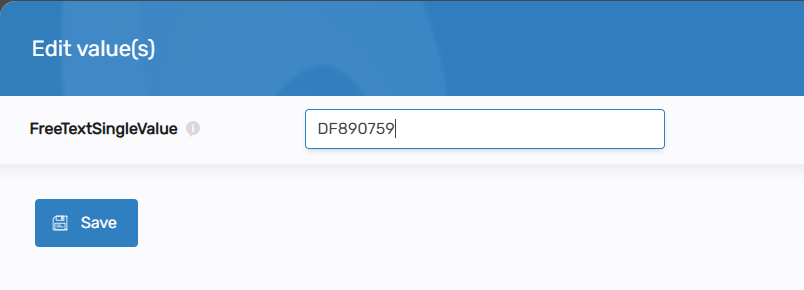
- Click Save
- Click the checkbox next to each value you want to assign
-
Click Add To Cart.
-
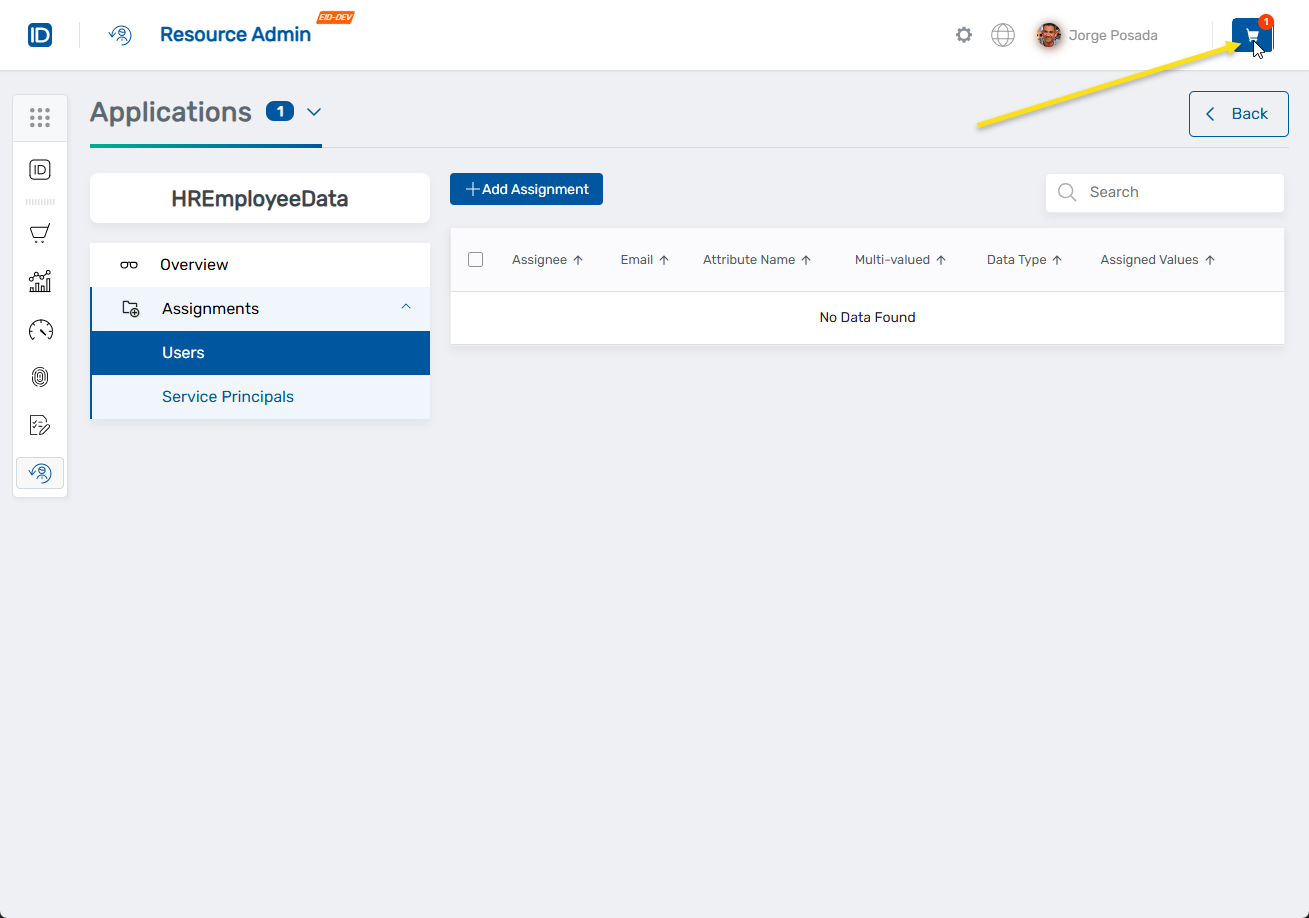
After configuring all attribute eligibility assignments, click the cart to open it.
-
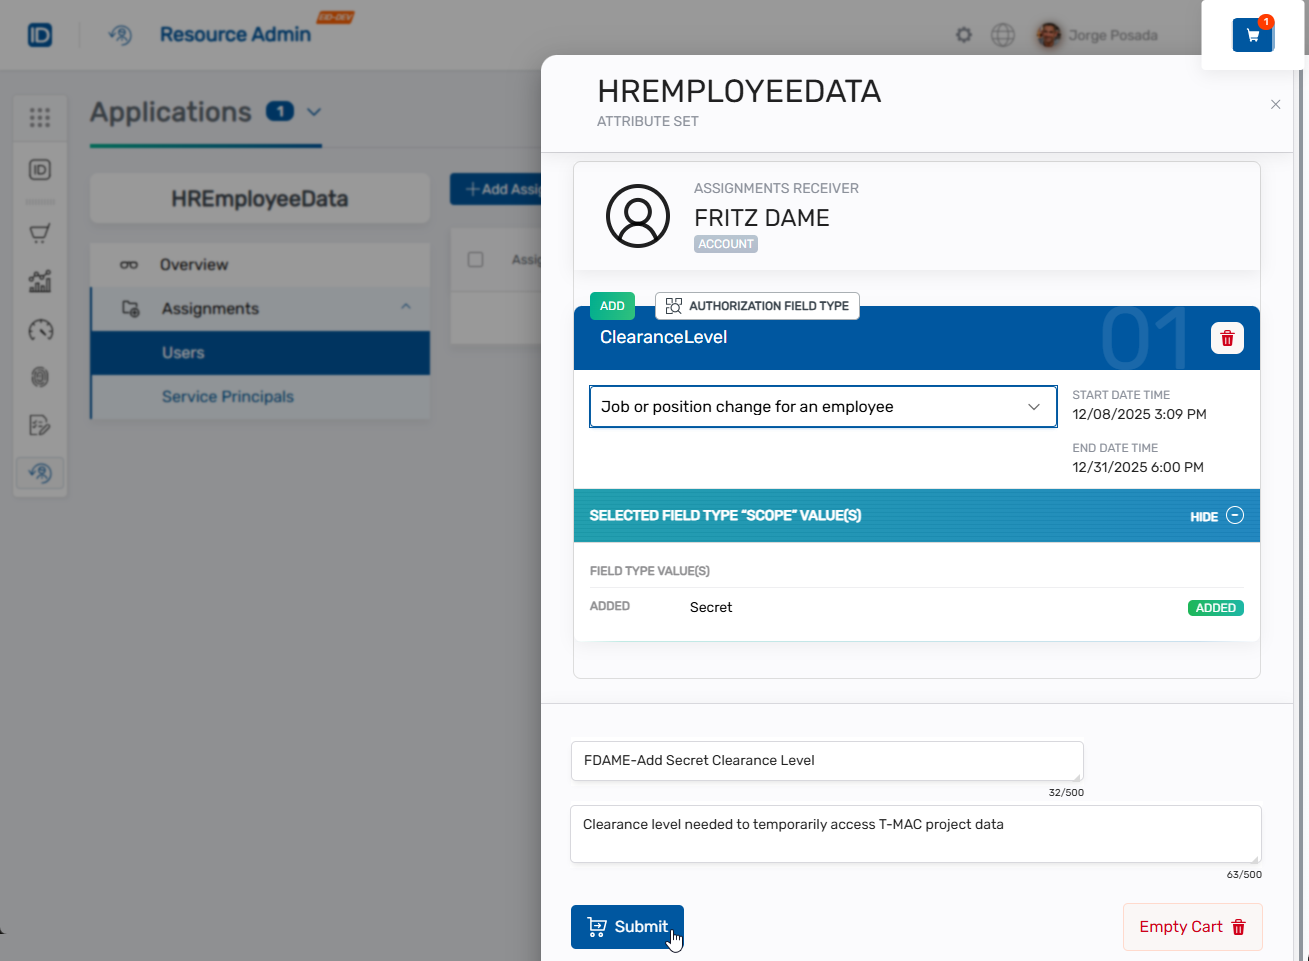
Select a justification for the request. If you select Other Justification, you must enter a comment.
-
Verify all details of the request and click Evaluate Request to initiate risk analysis.

-
After evaluation completes, enter:
- Business Request Name - Descriptive name for the request (maximum 500 characters)
- Comment - Additional notes or justification as needed (maximum 500 characters)
-
Click Submit.
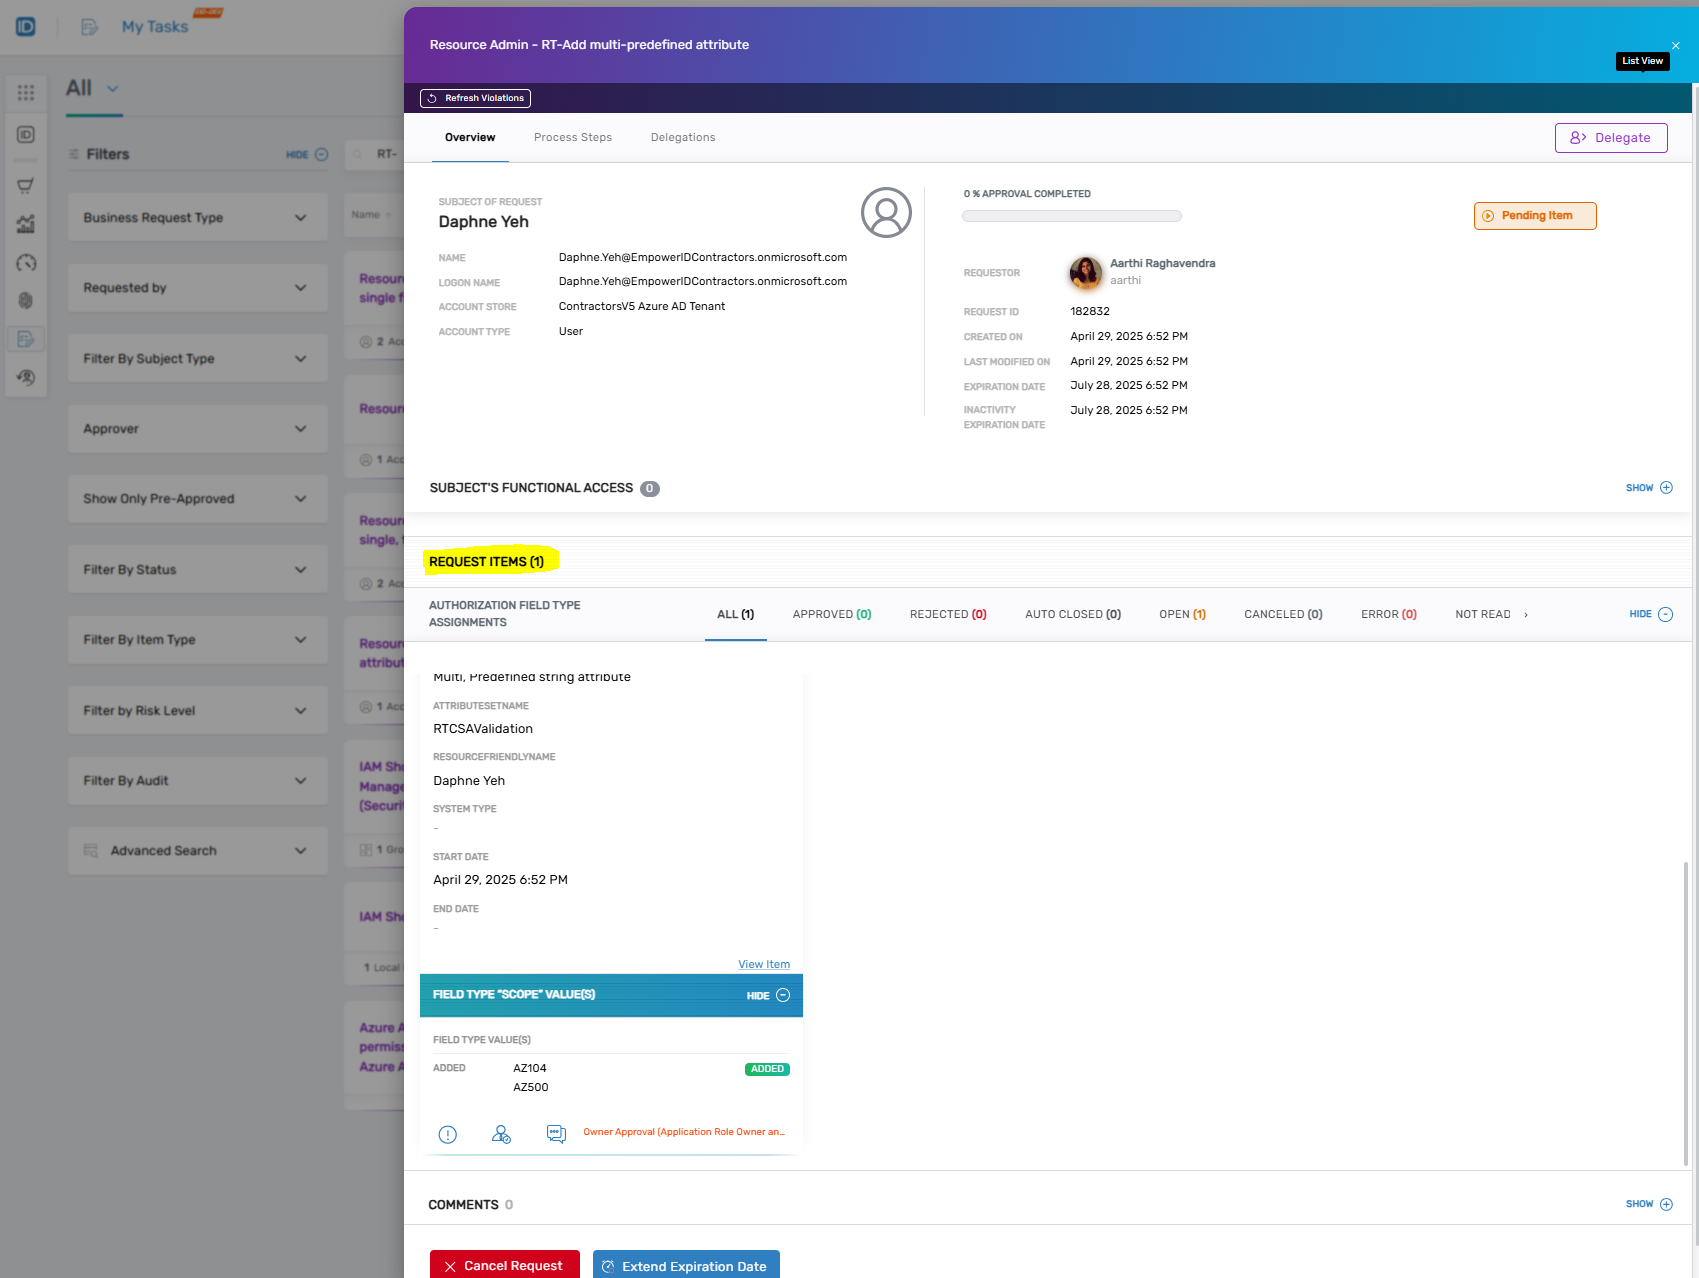
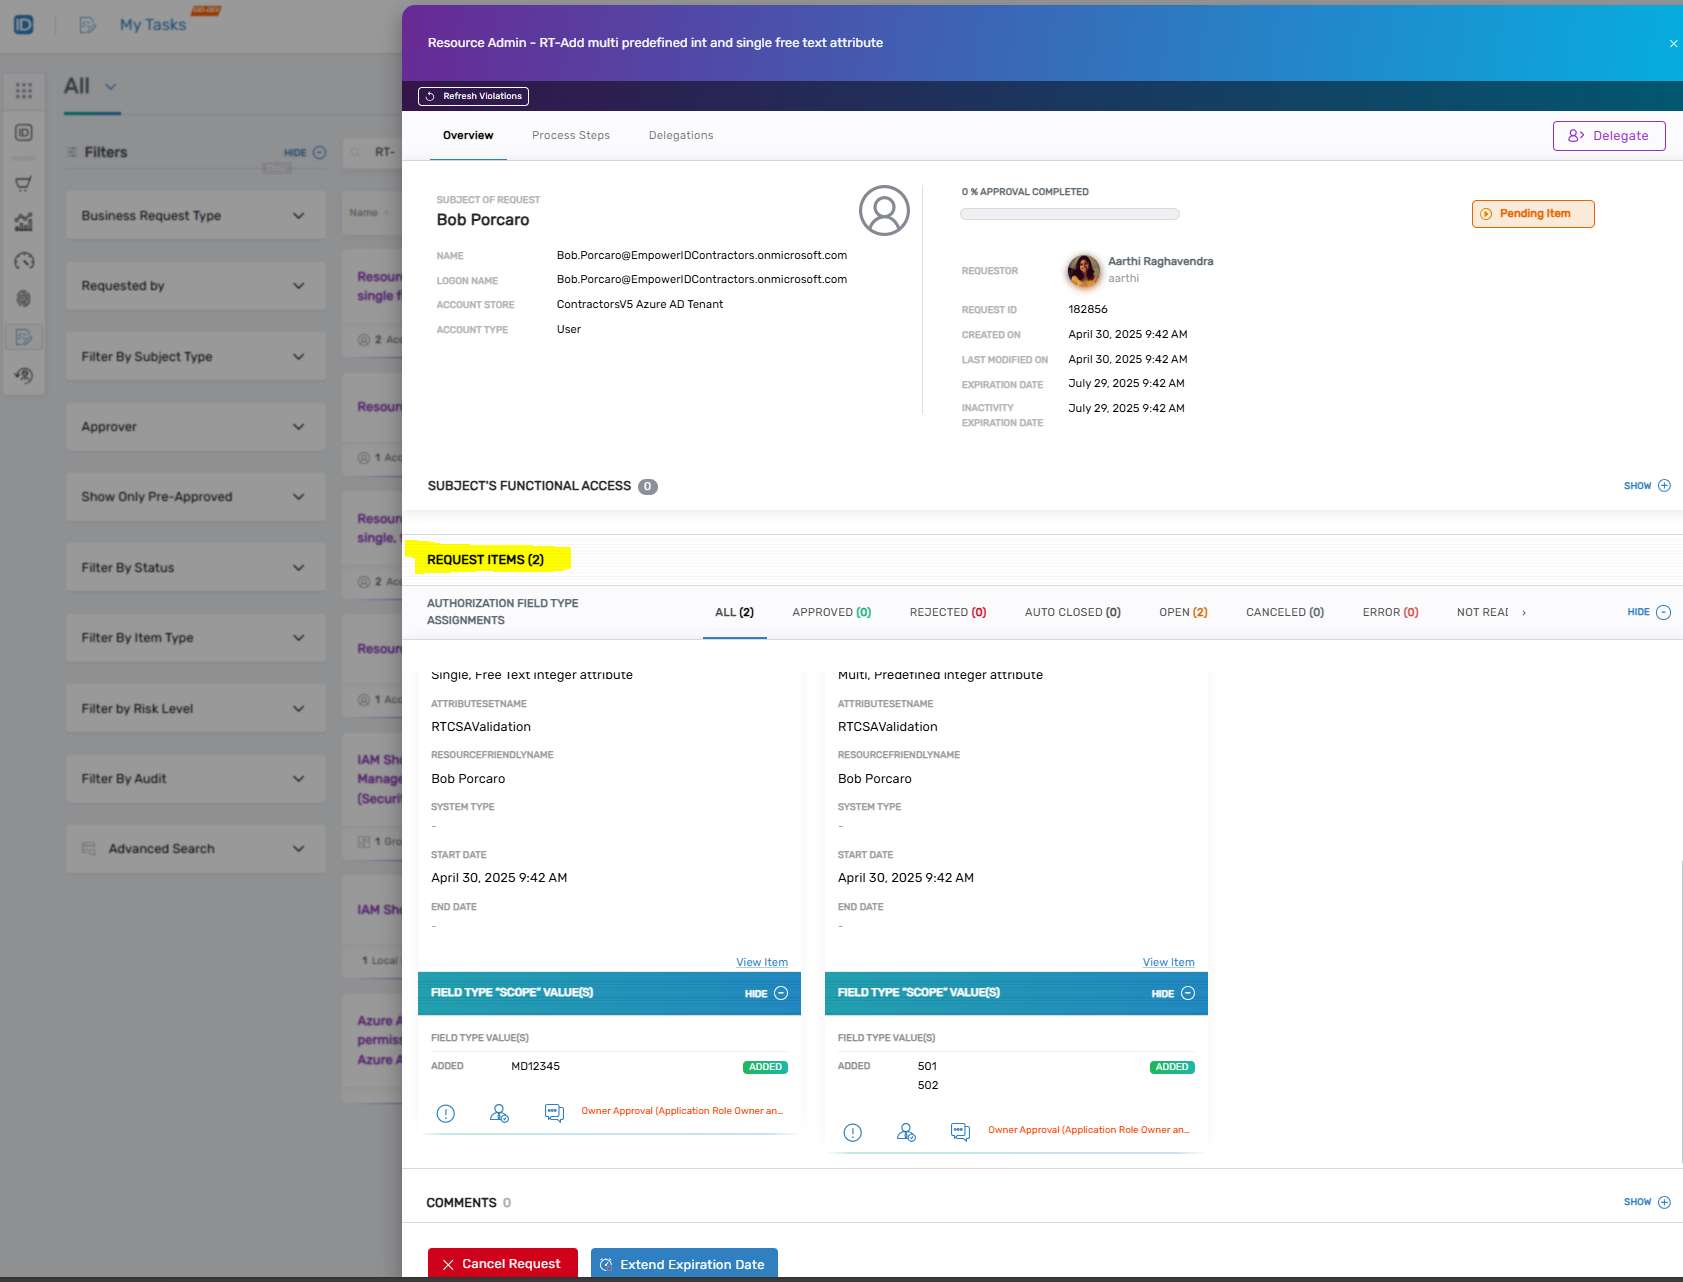
A Business Request is created and routed to the appropriate approvers based on the configured Access Request Policy.
You should see the request in My Tasks.
The Empty Cart option is available throughout the process if you need to start over.
Track Assignment Status
After submitting an assignment, track its progress through the approval and fulfillment process.
-
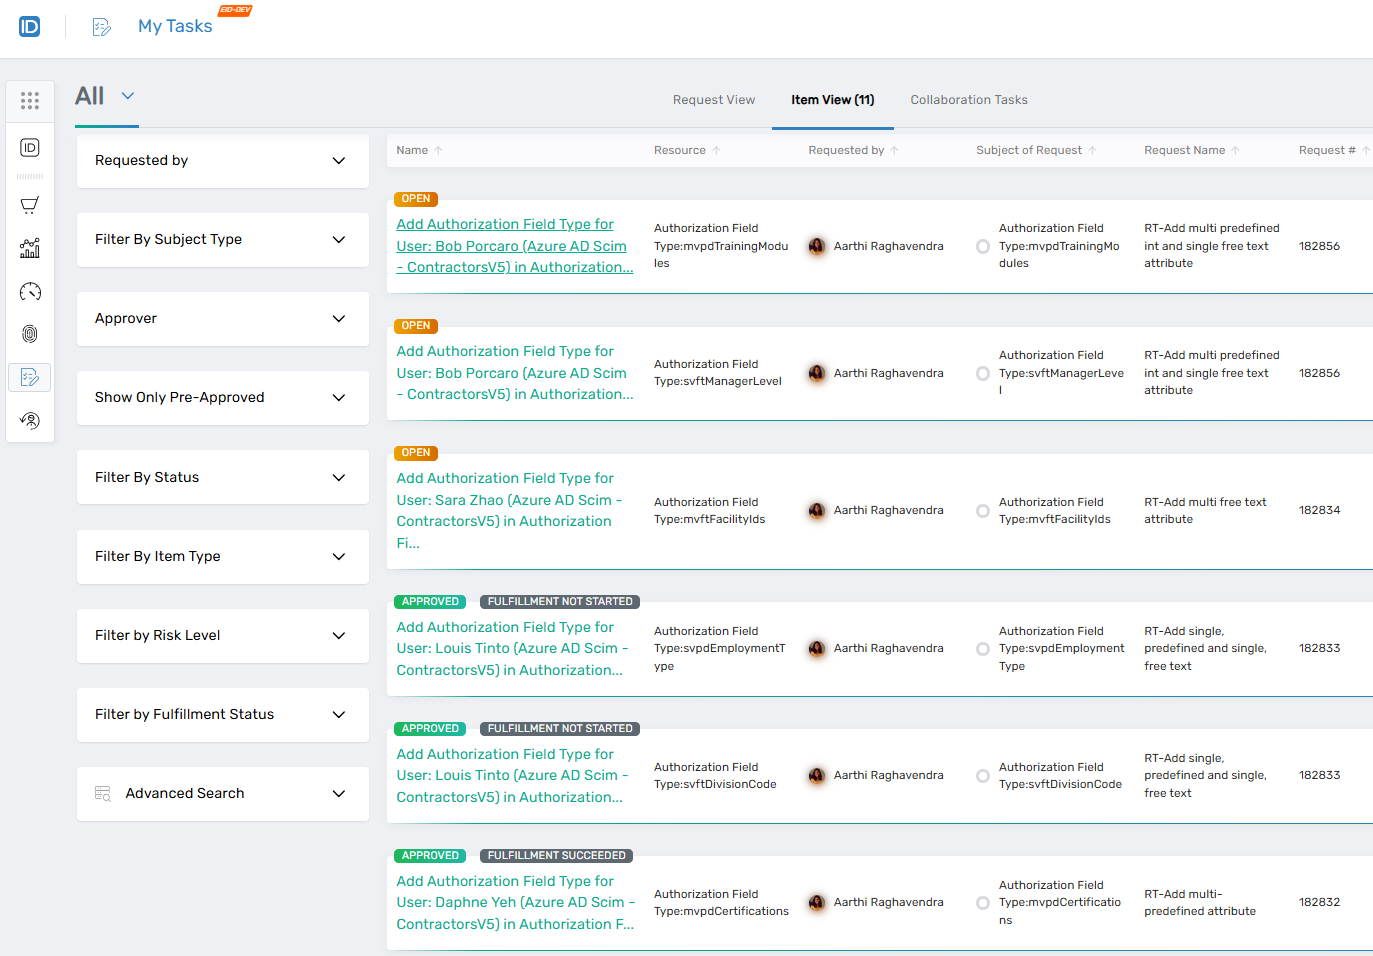
Navigate to My Tasks to view your pending requests.
-
Locate the assignment request in the list. For single attribute assignments:
 For multiple attribute assignments:
-
To view approvers and approval flow, select the Process Steps tab.
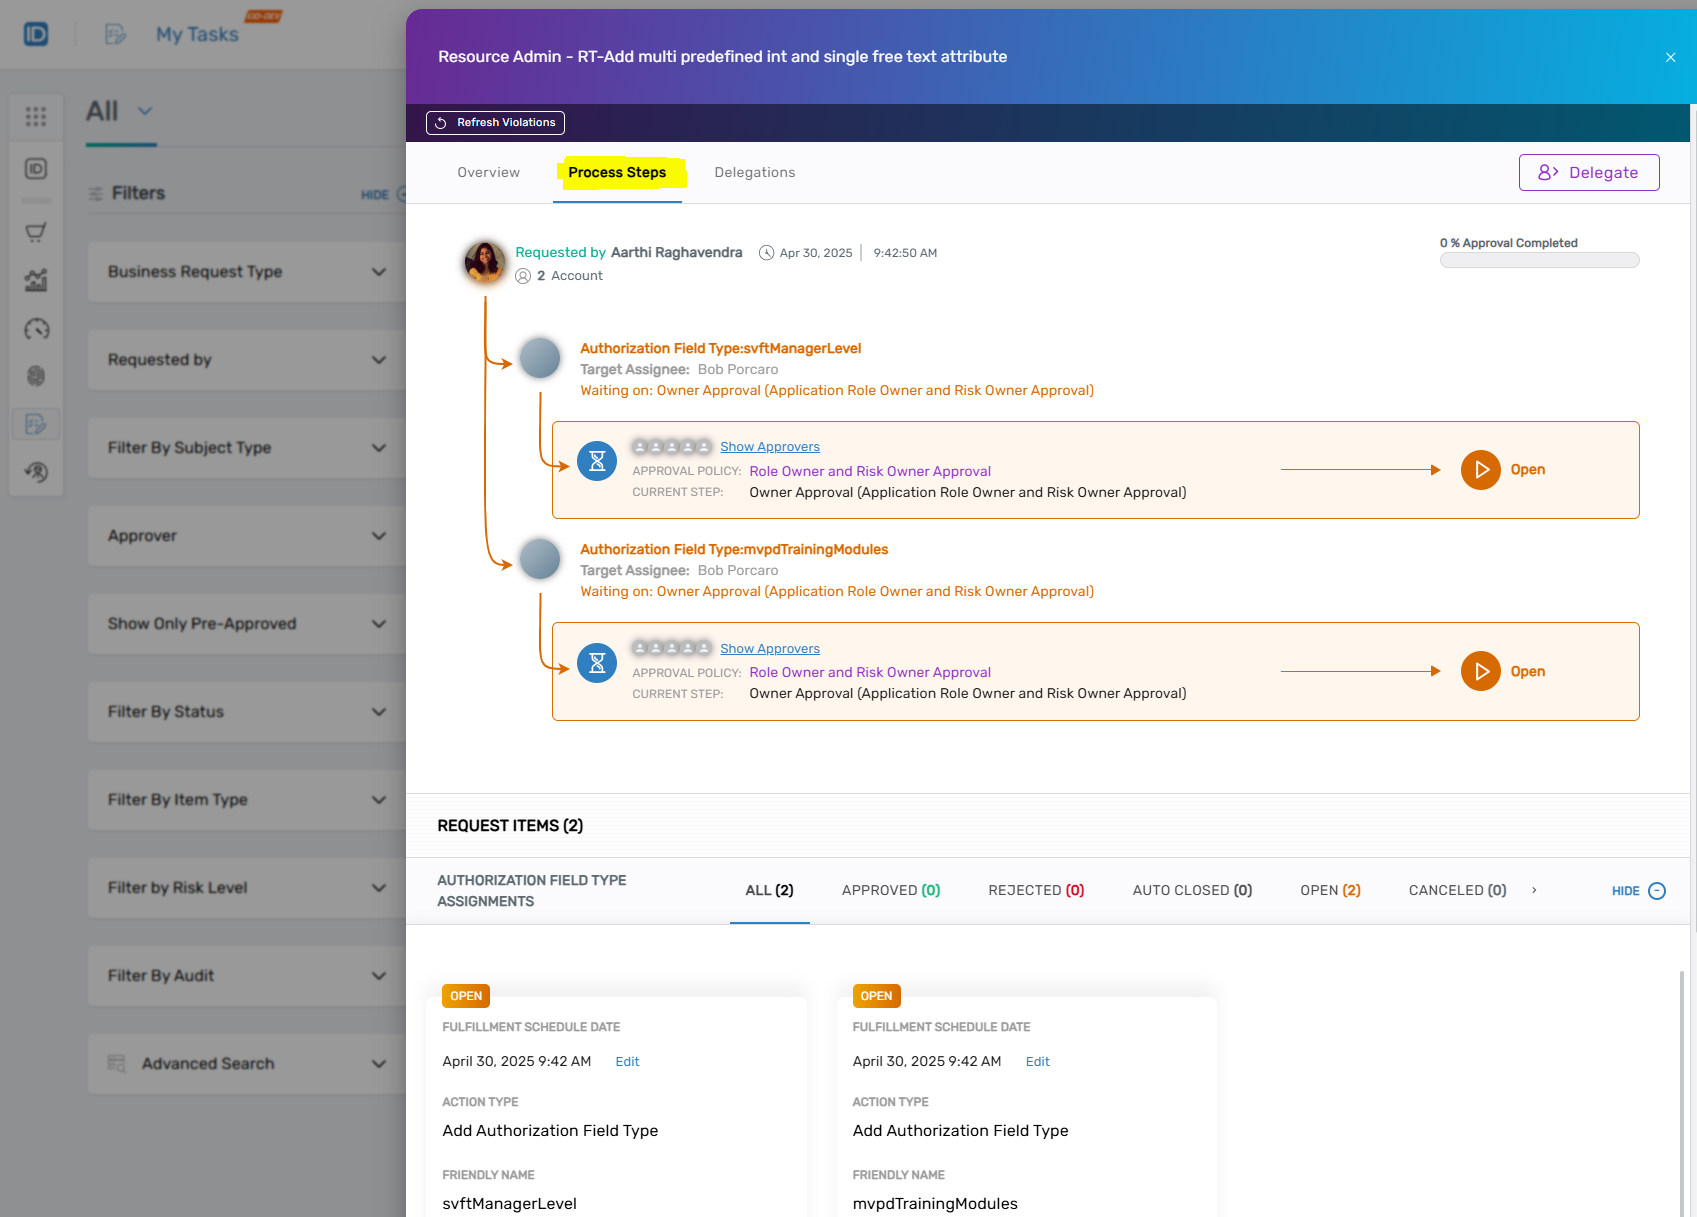
-
Once approved, navigate to the Item View to check fulfillment status.
Status options:
- Open - Pending approval or action
- Approved - Fulfillment Not Started - Approved but fulfillment has not begun
- Approved - Fulfillment Succeeded - Approved and fulfillment completed successfully
Verify Assignment Completion
After fulfillment succeeds, verify the assignment:
-
Navigate to Resource Admin → Applications → Custom Security Attributes.
-
Search for and click the Details button for the attribute set.
-
Select the Assignments tab.
-
Verify the assignment appears in the appropriate view (Users or Service Principals).
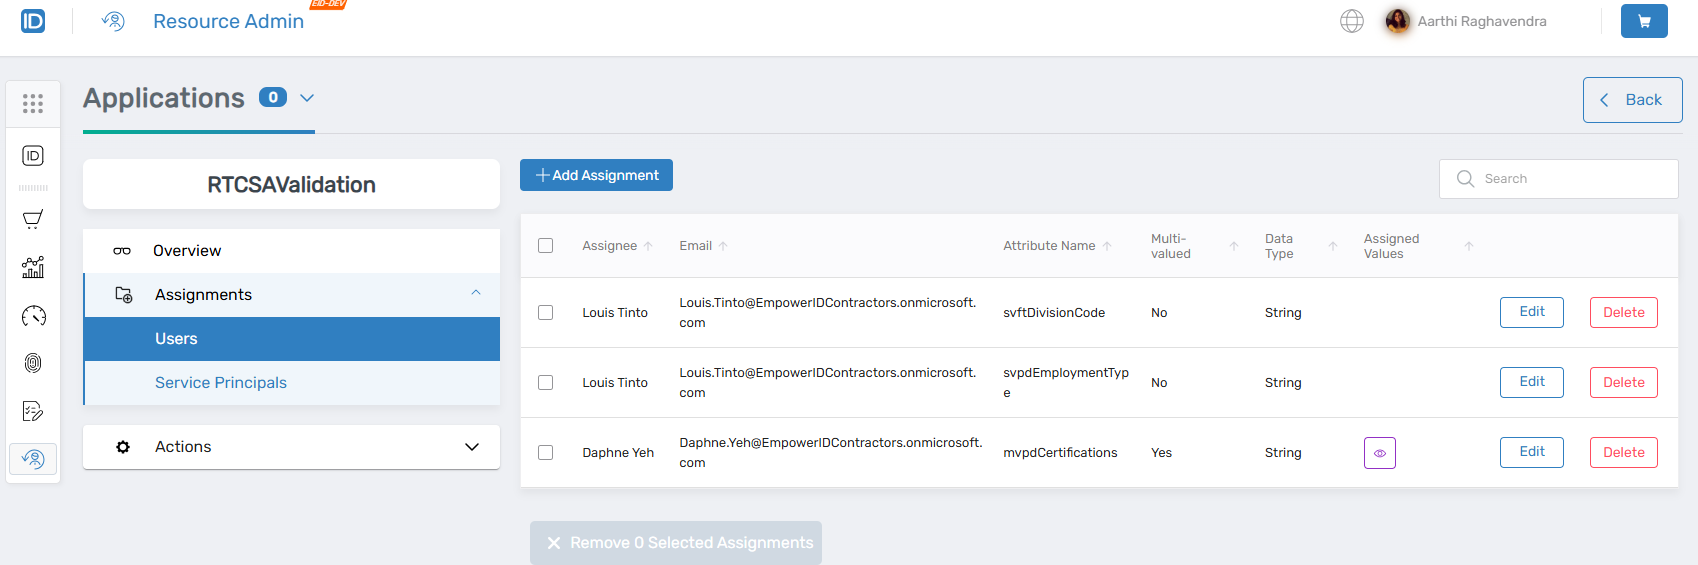
-
Confirm:
- Assignee name and email address
- Attribute name and multi-valued status
- Data type
- Assigned values
The assignment can now be edited or deleted as needed from the Actions column.
Next Steps
After assigning attributes:
- Monitor Business Requests for pending assignments requiring approval
- Review the Configuring Attribute Eligibility article to modify access controls
- Review the overview documentation for conceptual information about Custom Security Attributes