Creating Attributes
This guide provides step-by-step instructions for creating Custom Security Attributes within an attribute set in EmpowerID. Attributes define the specific metadata fields that can be assigned to users and service principals.
Prerequisites
Before creating an attribute, ensure:
- An attribute set has been created
- The Microsoft Entra account store connection is active
Create an Attribute
-
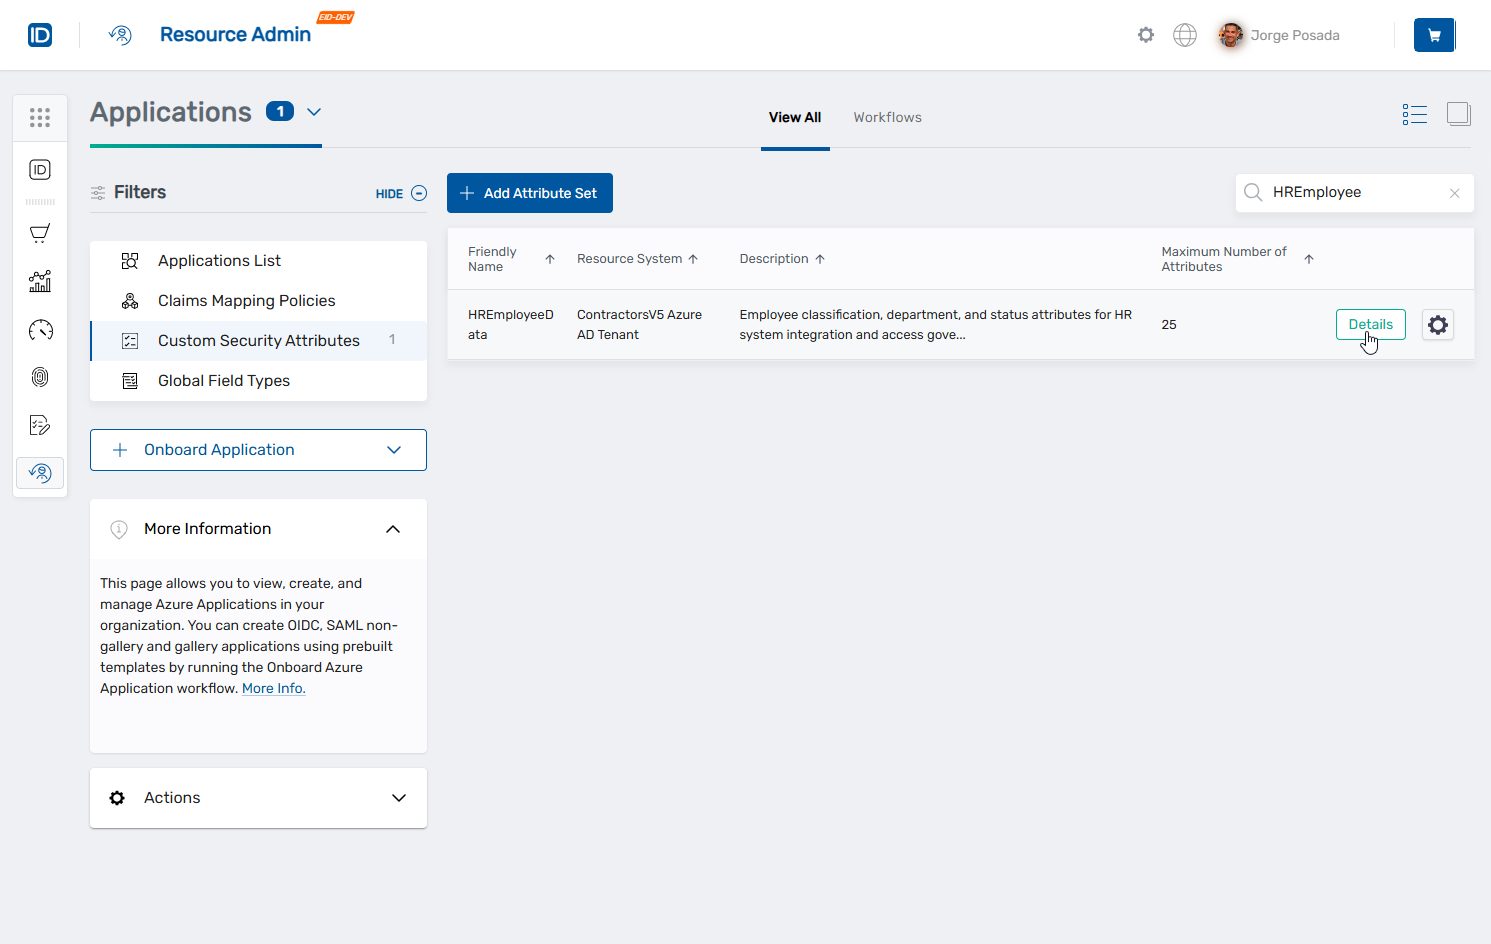
Navigate to Resource Admin → Applications → Custom Security Attributes.
-
Search for and click the Details button for the desired attribute set.
-
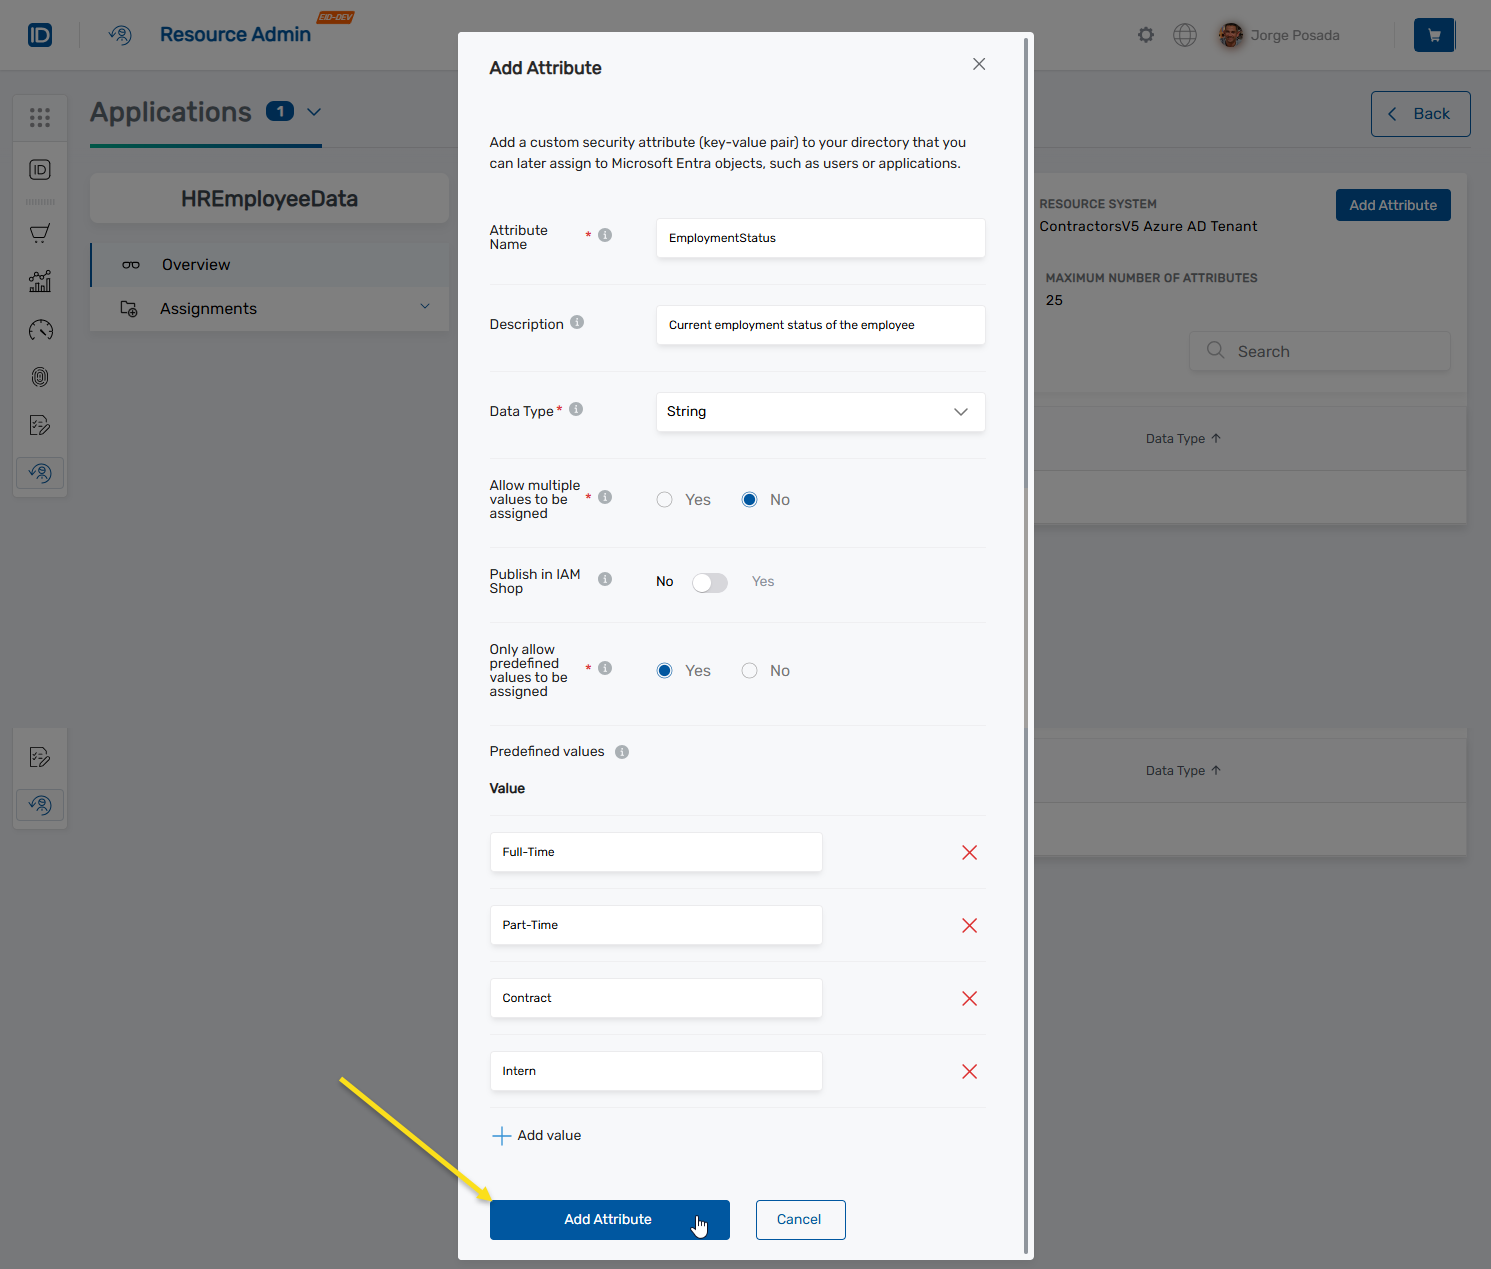
Click Add Attribute in the top-right corner.
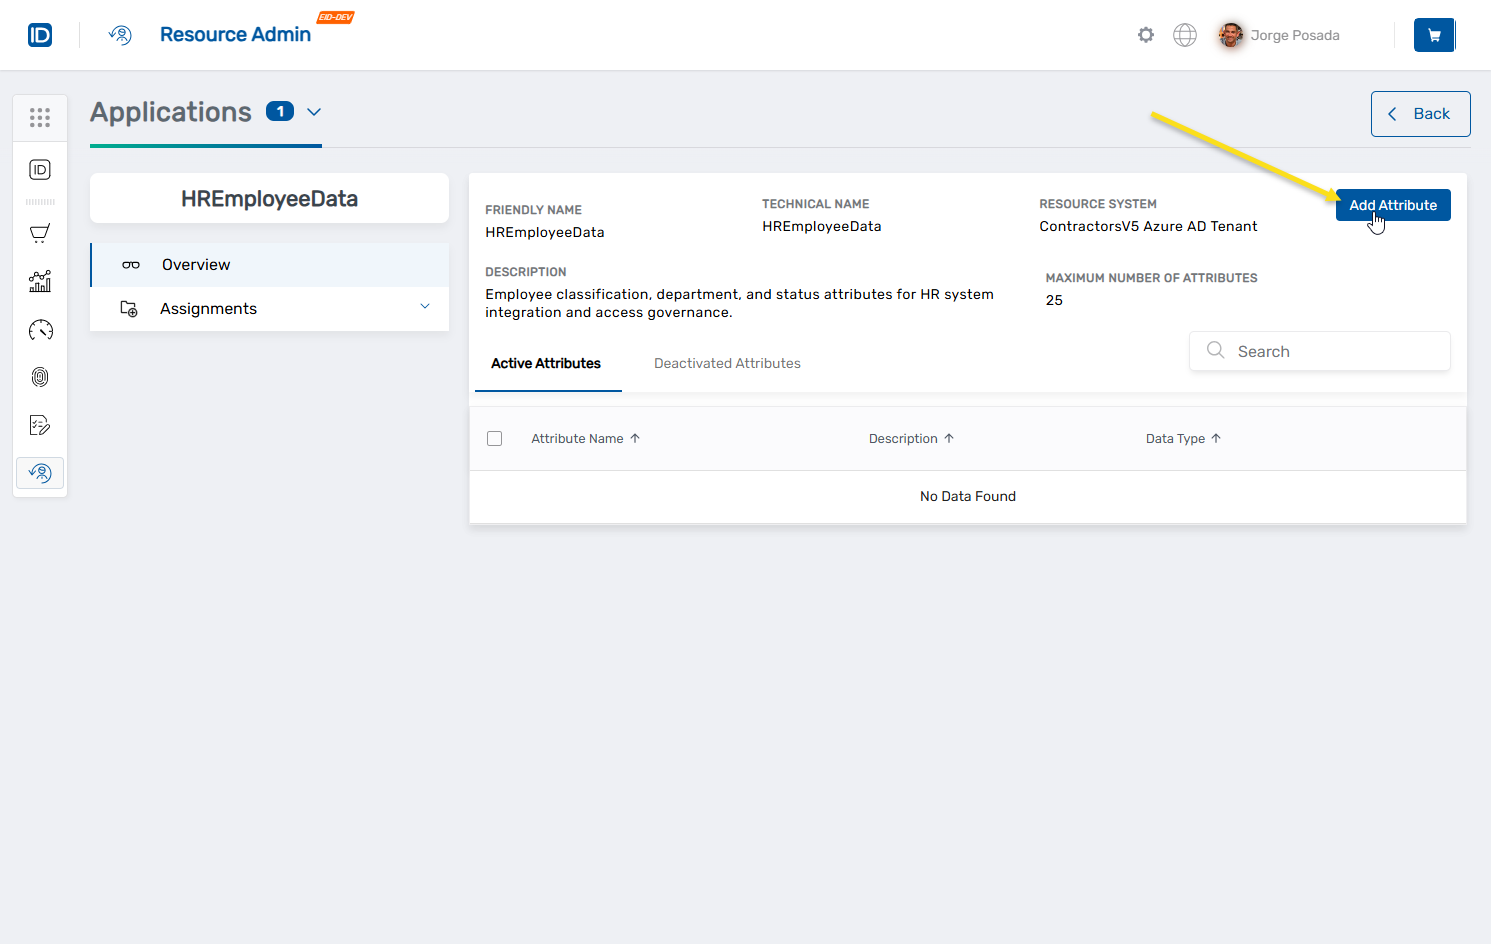
The Add Attribute dialog opens.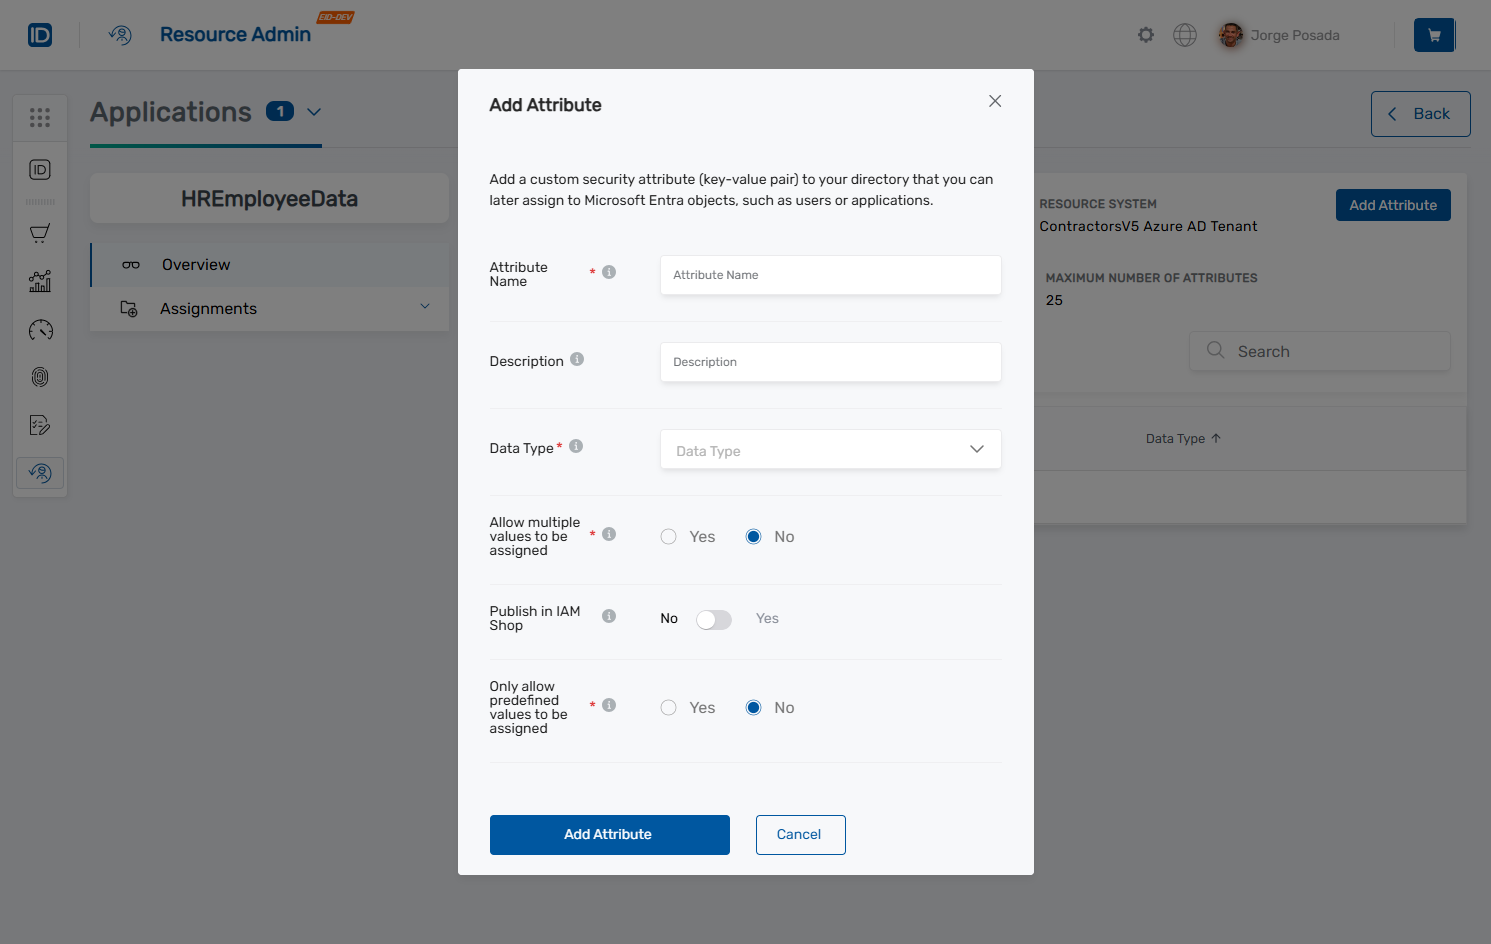
-
Configure the attribute settings:
- Attribute Name (Required): Enter a unique identifier within the attribute set (1-32 characters, alphanumeric only).
- Description (Optional): Provide an explanation of the attribute's purpose (up to 128 characters).
- Data Type (Required): Select String, Integer, or Boolean.
- Allow multiple values: Select No for single value or Yes for multiple values.
- Only allow predefined values: Select No for free text or Yes for a predefined list.
-
If you selected Yes for "Only allow predefined values", do the following:
- Click Add value to define each allowed value.
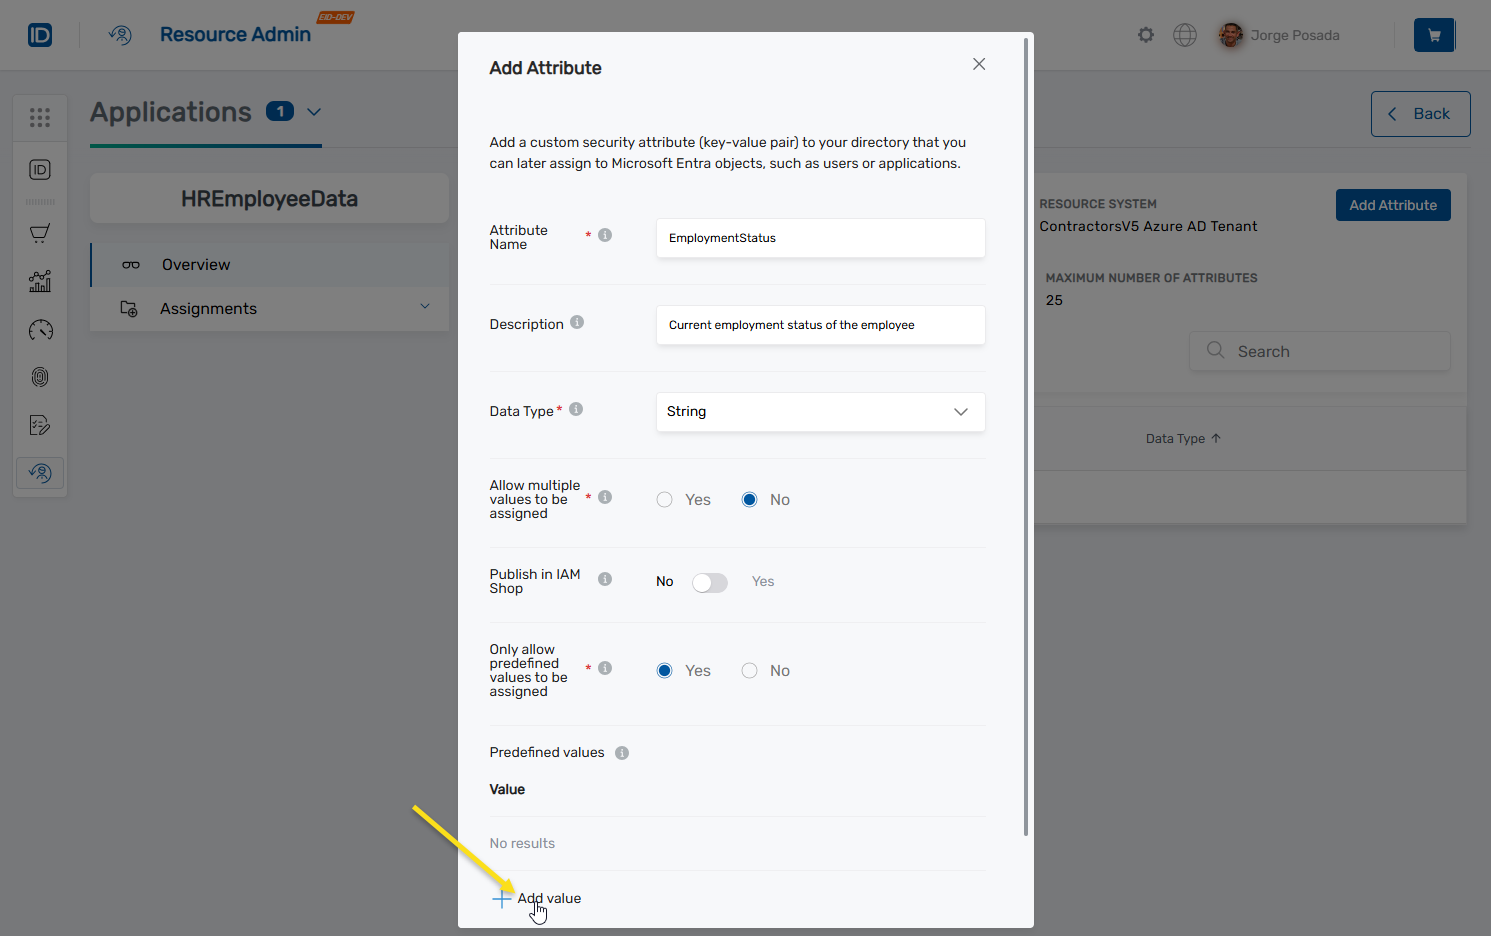
- Enter the value in the Value field and press ENTER.
- Repeat to add additional values.
- Click the X next to any value to remove it.
- Click Add value to define each allowed value.
-
Click Add Attribute to create the attribute.
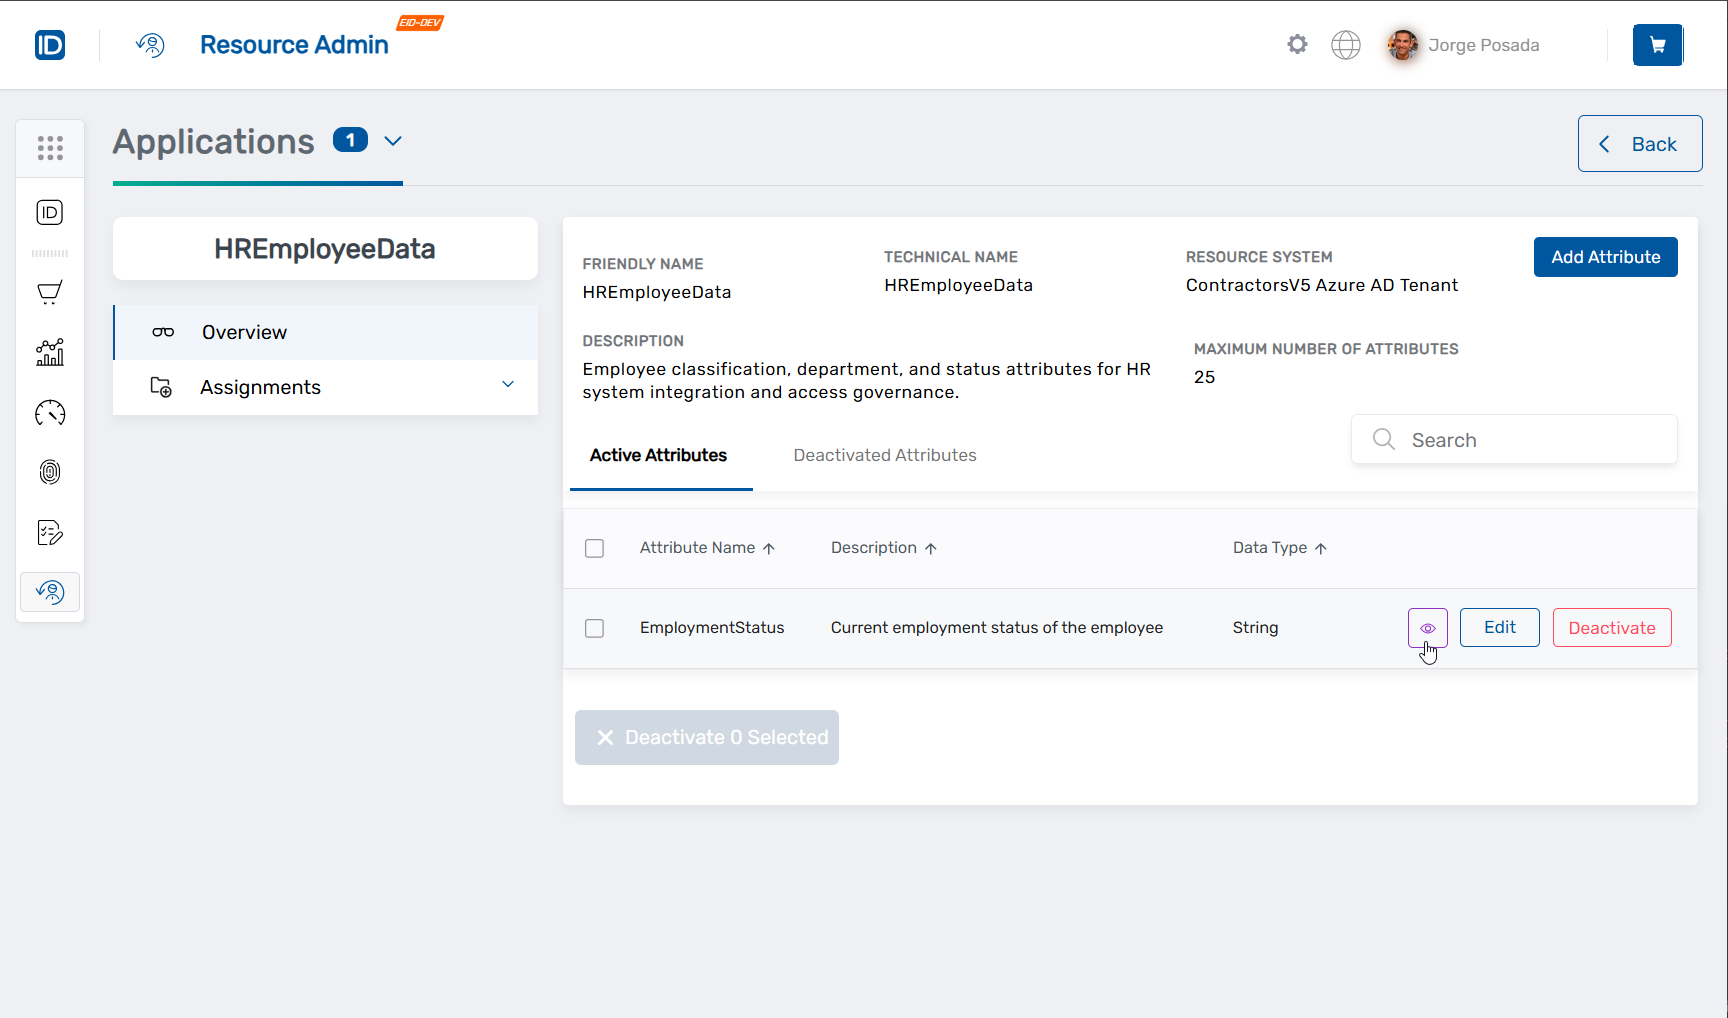
The attribute appears in the Active Attributes list.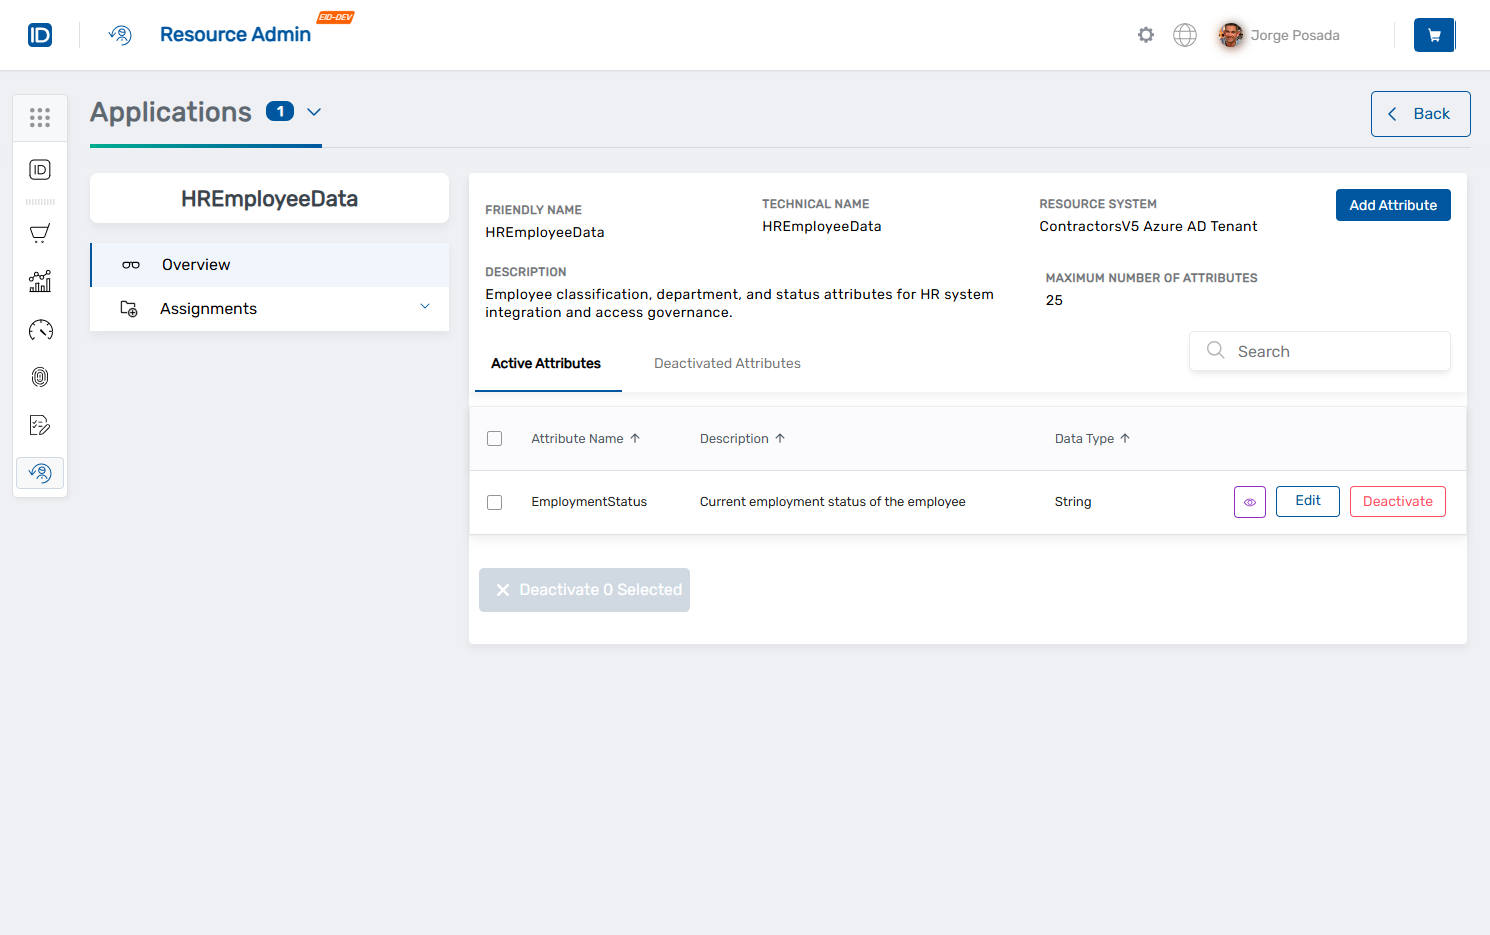 tip
tipAttribute values can be quickly viewed by clicking the View button (eye icon) on the attribute record.
After creation, you cannot change:
- Attribute name
- Data type
- Allow multiple values setting
- Only allow predefined values setting
Only the description and predefined values can be modified after creation.
Next Steps
After creating an attribute:
- Activate and deactivate attributes to manage visibility
- Edit attributes to modify descriptions or manage predefined values
- Review the overview documentation for conceptual information