Onboarding Mailboxes
This procedure creates and configures room, equipment, and shared mailboxes within the organization's email infrastructure using a guided workflow.
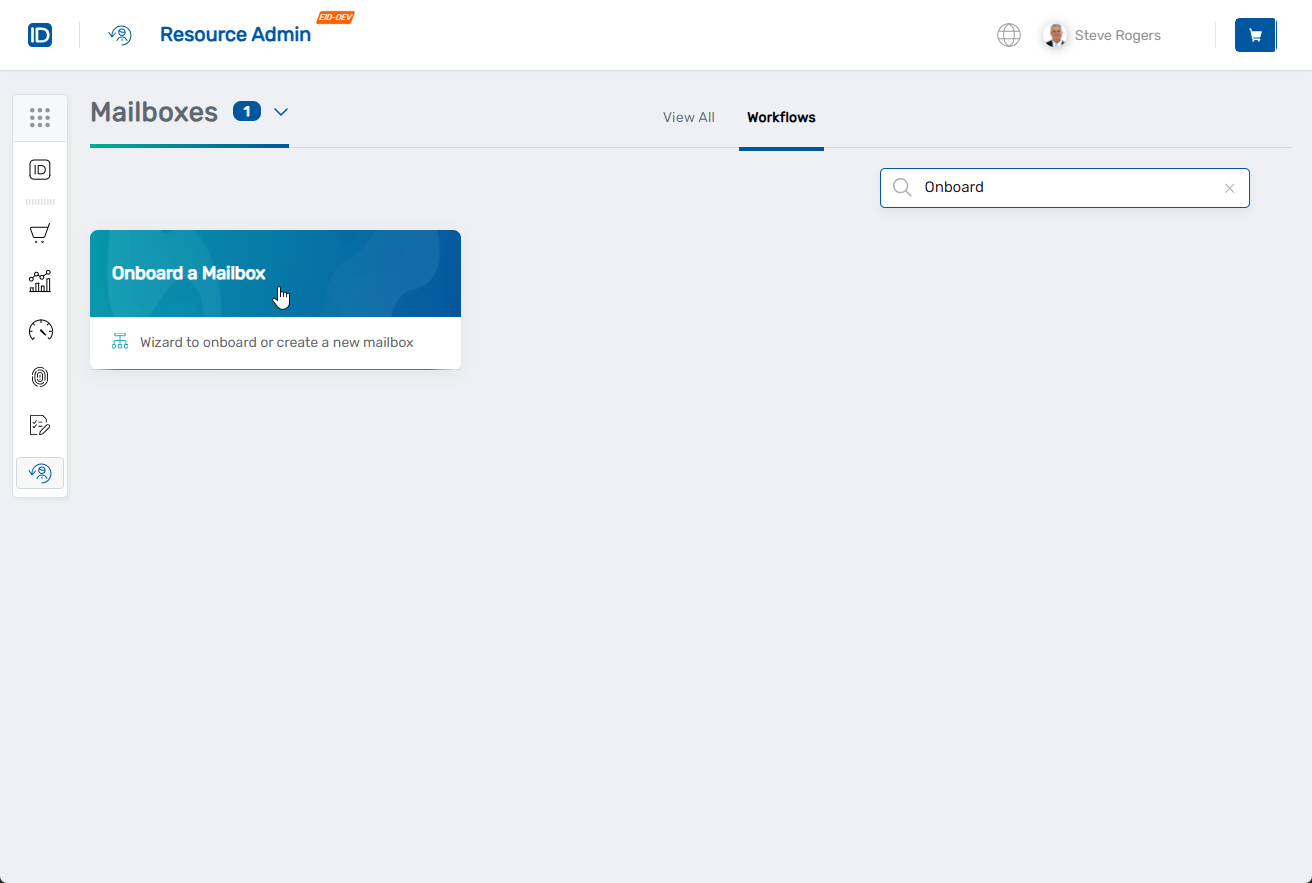
Onboard a Mailbox
-
Navigate to Resource Admin.
-
Select Mailboxes from the resource type navigation.
-
Click the Workflows tab.
-
Click Onboard a Mailbox.
-
Complete the general information:
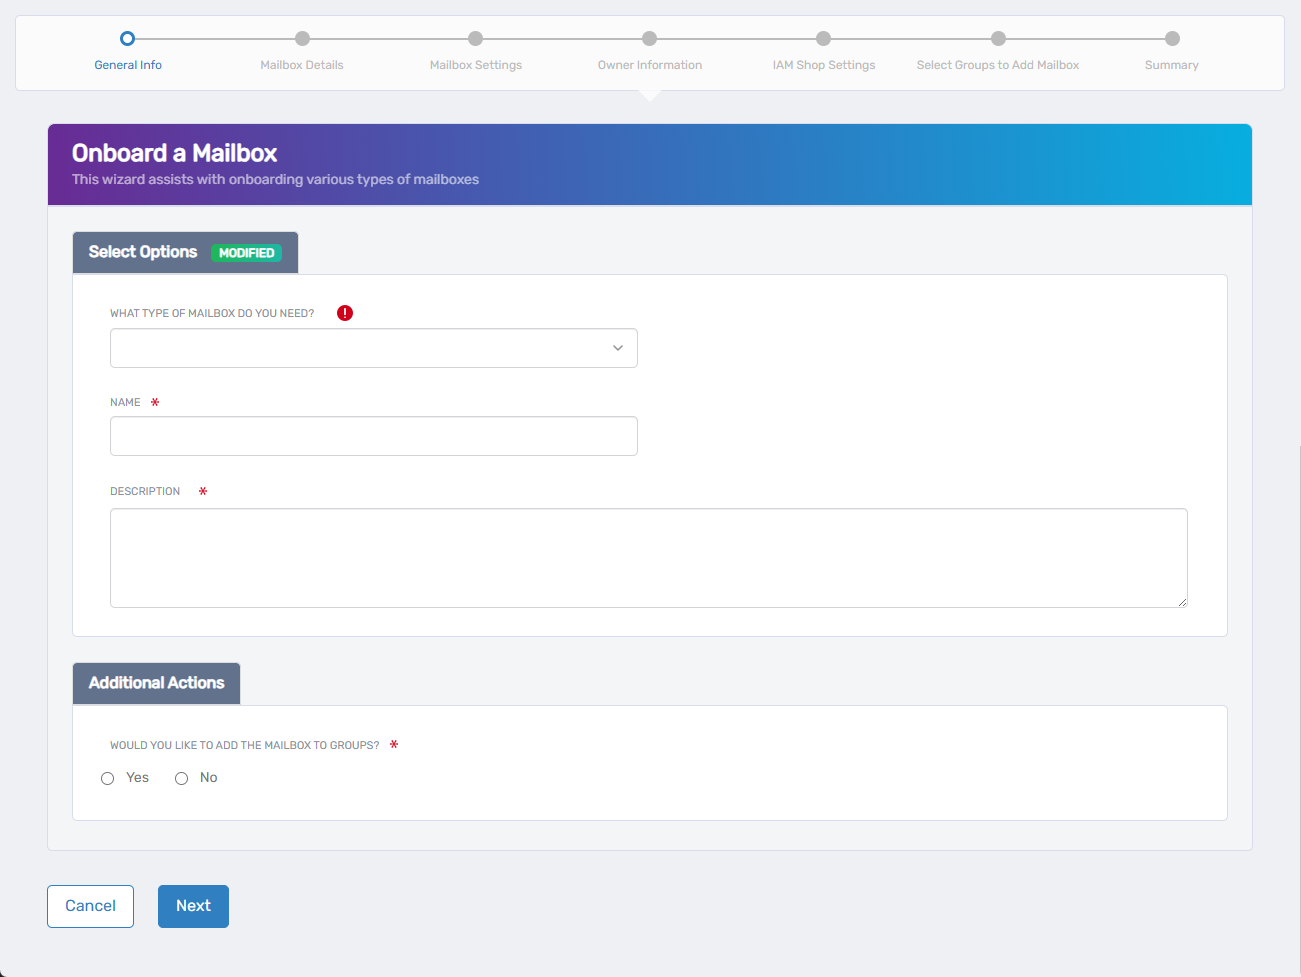
- What type of mailbox do you need?: Select the appropriate type
- Name: Enter a descriptive name
- Description: Enter the mailbox's intended use and purpose
- Would you like to add the mailbox to groups?: Select Yes or No
- Click Next.
-
Complete mailbox details:
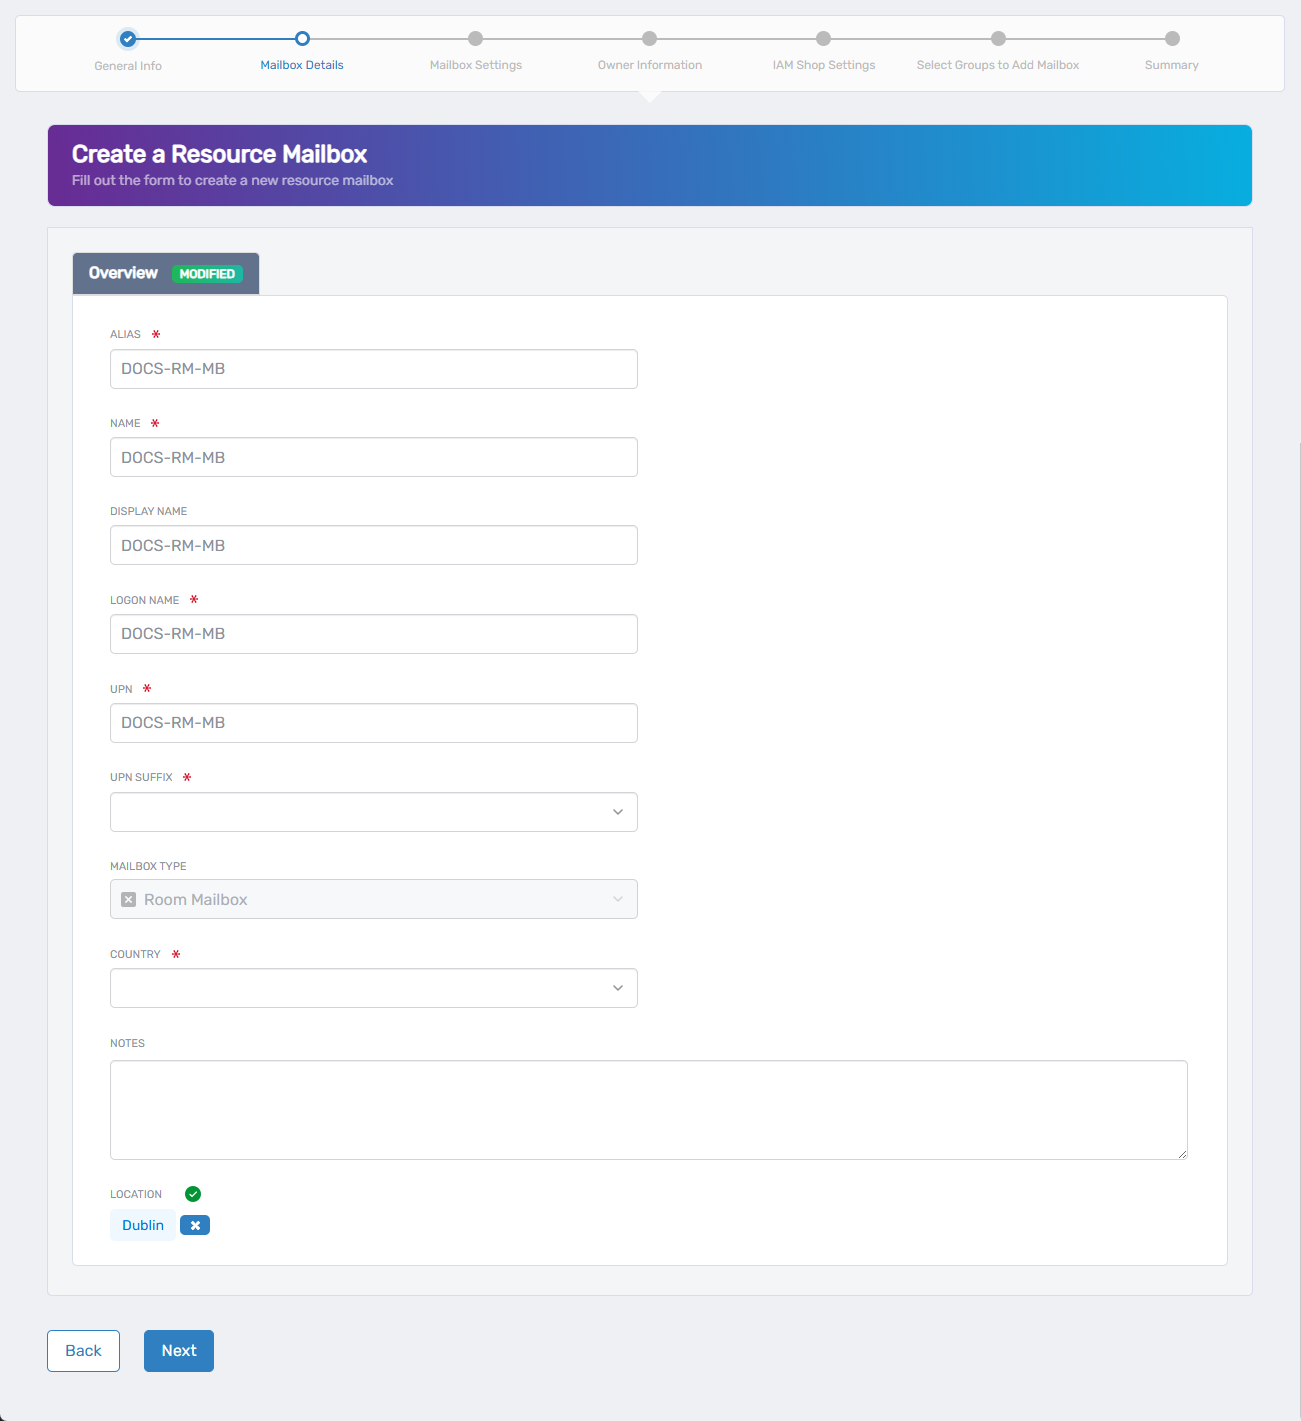
- ALIAS: Modify the auto-populated alias if needed
- NAME: Modify the auto-populated name if needed
- DISPLAY NAME: Modify the auto-populated display name if needed
- LOGON NAME: Modify the auto-populated logon name if needed
- UPN: Modify the auto-populated User Principal Name if needed
- UPN SUFFIX: Select the appropriate domain suffix
- MAILBOX TYPE: Review the type (read-only)
- COUNTRY: Select the appropriate country
- NOTES: Add any additional notes (optional)
- LOCATION: Select the appropriate location for RBAC control
- Click Next.
-
Configure mailbox settings:
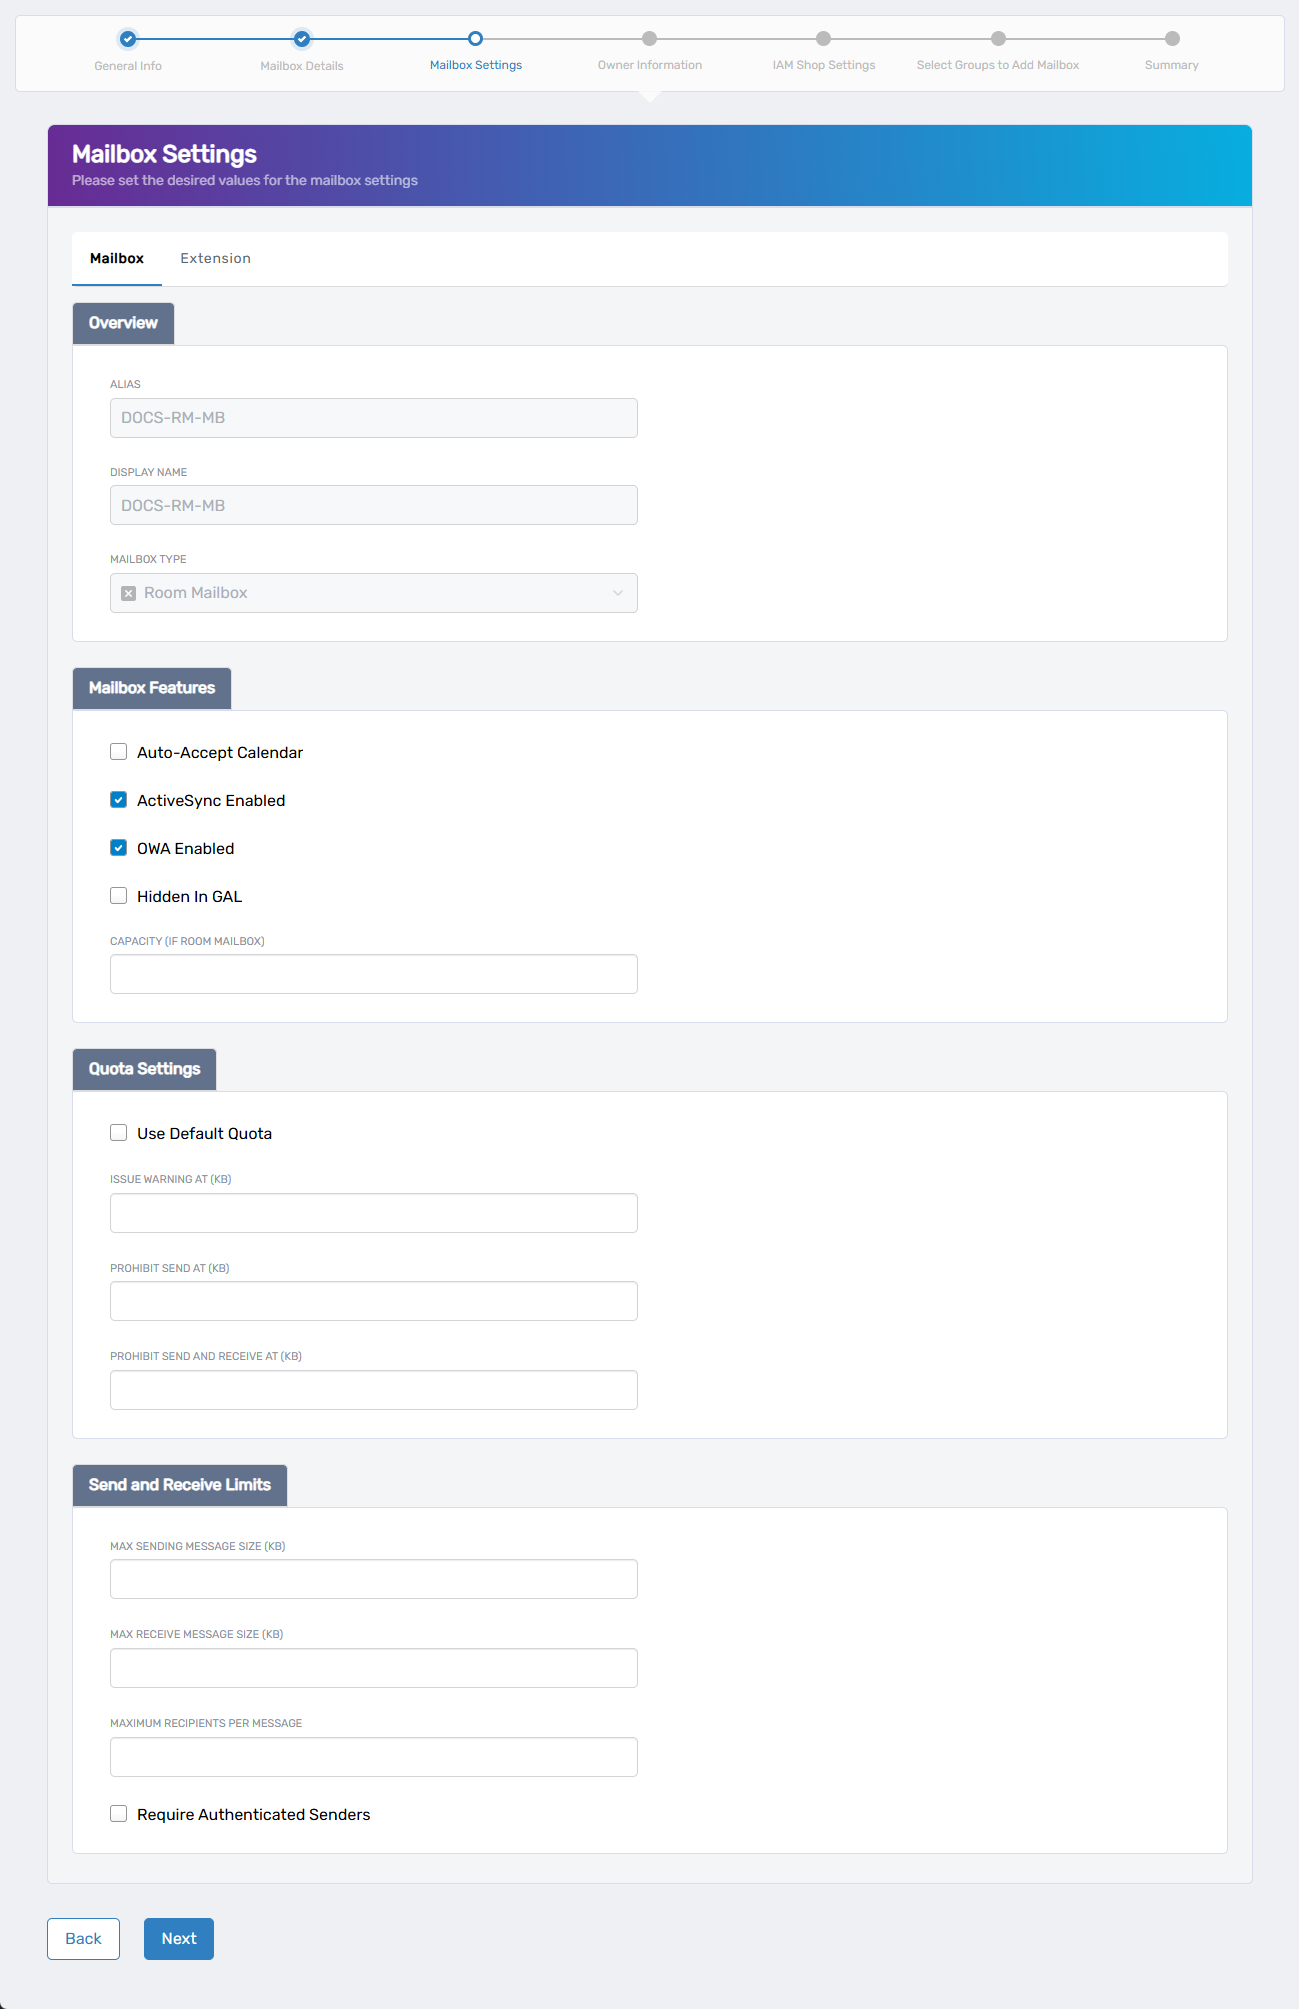
Mailbox tab - Overview section:- ALIAS: Review or modify the alias
- DISPLAY NAME: Review or modify the display name
- MAILBOX TYPE: Review the mailbox type (read-only)
Mailbox Features section: - Auto-Accept Calendar: Check to enable automatic calendar acceptance
- ActiveSync Enabled: Check to enable mobile device synchronization
- OWA Enabled: Check to enable Outlook Web Access
- Hidden In GAL: Check to hide from Global Address List
- CAPACITY OF ROOM MAILBOX: Enter room capacity if applicable
Quota Settings section: - Use Default Quota: Check to use system default quotas
- ISSUE WARNING AT (KB): Enter storage warning threshold
- PROHIBIT SEND AT (KB): Enter storage limit for sending
- PROHIBIT SEND AND RECEIVE AT (KB): Enter storage limit for all operations
tipSet the warning threshold lower than the send and receive limits to provide advance notice before storage restrictions take effect. A common practice is to set the warning at 80-90% of the prohibit send limit.
Send and Receive Limits section:
- MAX SENDING MESSAGE SIZE (KB): Enter maximum outbound message size
- MAX RECEIVE MESSAGE SIZE (KB): Enter maximum inbound message size
- MAXIMUM RECIPIENTS PER MESSAGE: Enter recipient limit
- Require Authenticated Senders: Check to require sender authentication
Extension tab (if needed): - EXTENSION ATTRIBUTE 1-15: Enter custom attribute values as required
- Click Next.
-
Set owner information:
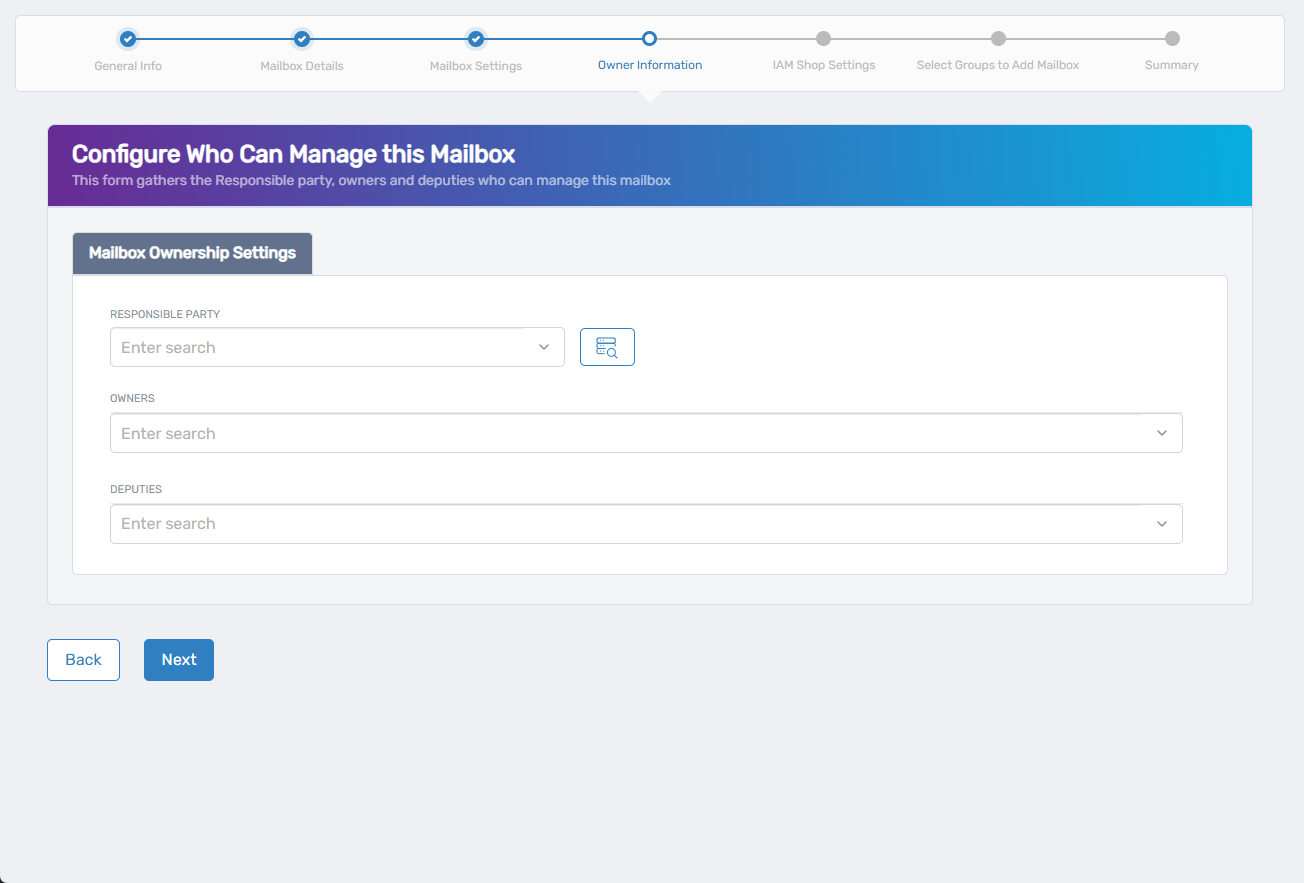
- RESPONSIBLE PARTY: Search for and select the person responsible
- OWNERS: Search for and select users with ownership rights
- DEPUTIES: Search for and select users with deputy access
- Click Next.
-
Configure IAM Shop settings:
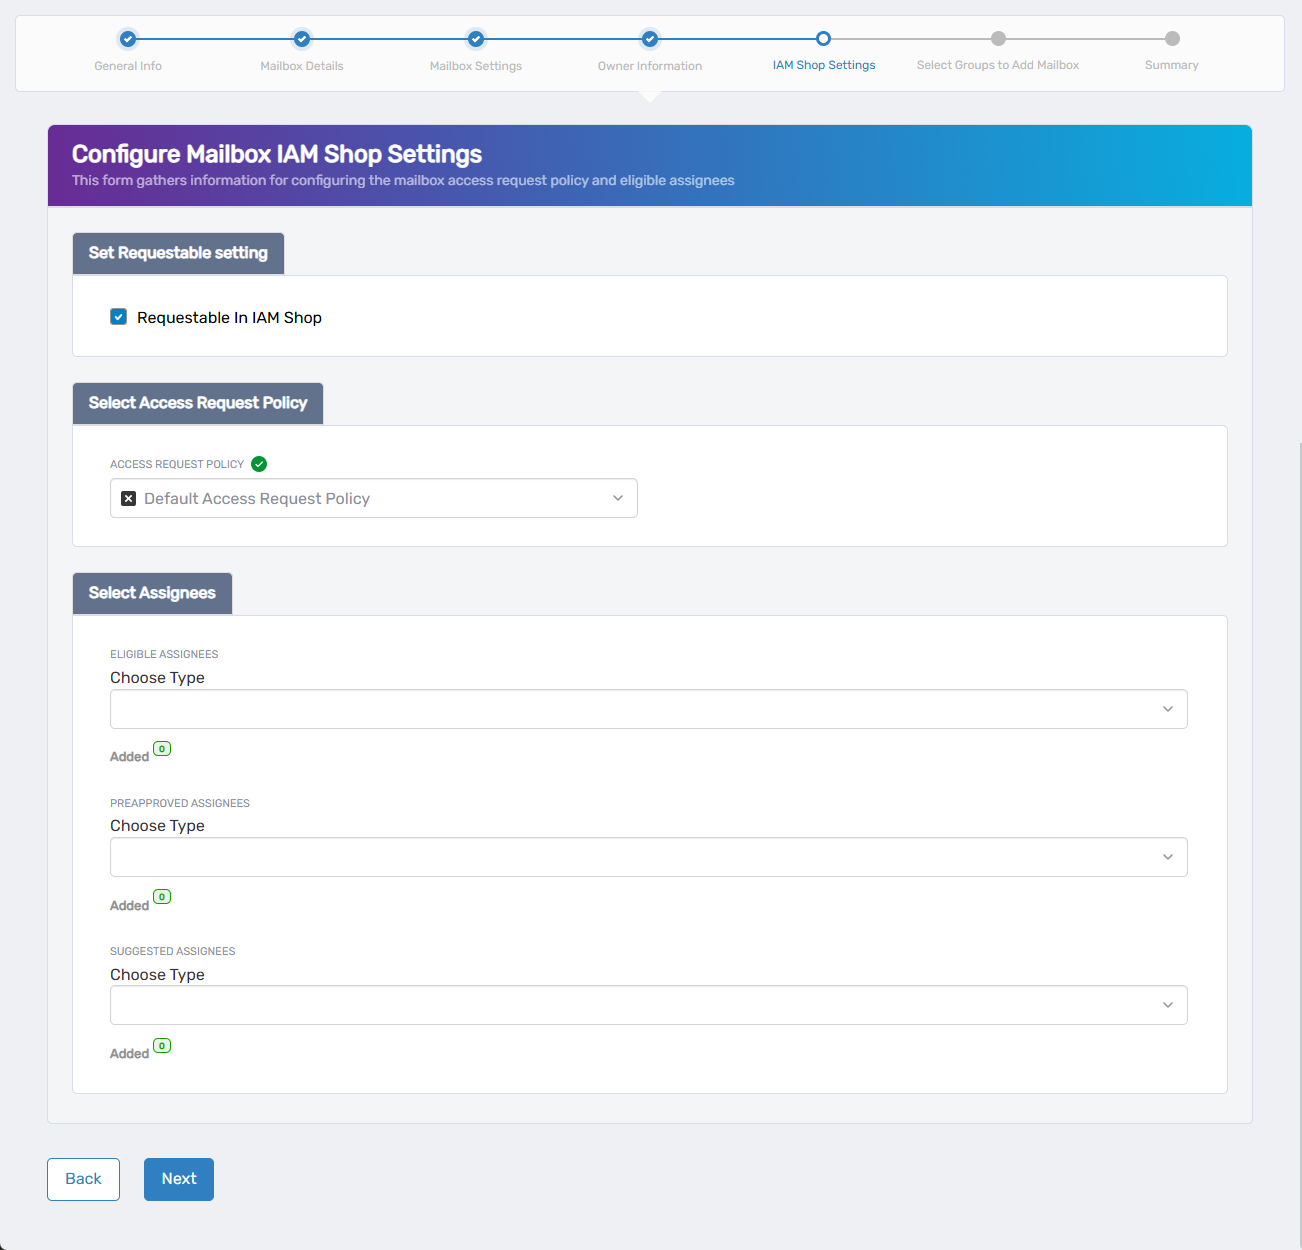
- Requestable in IAM Shop: Check if users should be able to request access
- Select Access Request Policy: Choose the policy for handling requests
- Eligible Assignees: Configure who can request access
- Preapproved Assignees: Configure who receives automatic access
- Suggested Assignees: Configure who sees this mailbox as suggested
- Click Next.
-
If applicable, select groups for mailbox membership and click Next.
-
Review the configuration summary and verify all settings.
-
Click Submit.
-
Review the Operation Execution Summary.
-
Click Submit to complete the workflow.
Results
- Mailbox is created according to the specified configuration
- Users can access the mailbox through standard email clients
- Mailbox becomes available for ongoing management in Resource Admin
- Owners and deputies are assigned administrative permissions
- Access request settings are configured if enabled