Onboard a New Person
When someone new joins your team, you can create their EmpowerID account, assign their role, and set up their access to systems and applications. The Onboard Person workflow guides you through the process with three different approaches depending on how much detail you need to configure.
- Simple Mode – Quick setup for standard new hires (5 minutes)
- Advanced Mode – Detailed setup when you need to assign specific groups or permissions (15 minutes)
- From Another Person – Copy setup from someone with a similar role and adjust as needed (10 minutes)
Before You Start
You need access to the Resource Admin application to onboard new people. If you can't access this workflow, contact your IT department to request permissions.
Start the Onboarding Process
- Navigate to the Resource Admin portal
- Select People from the resource type menu
- Click the Workflows tab
- Find and click Onboard a New Person
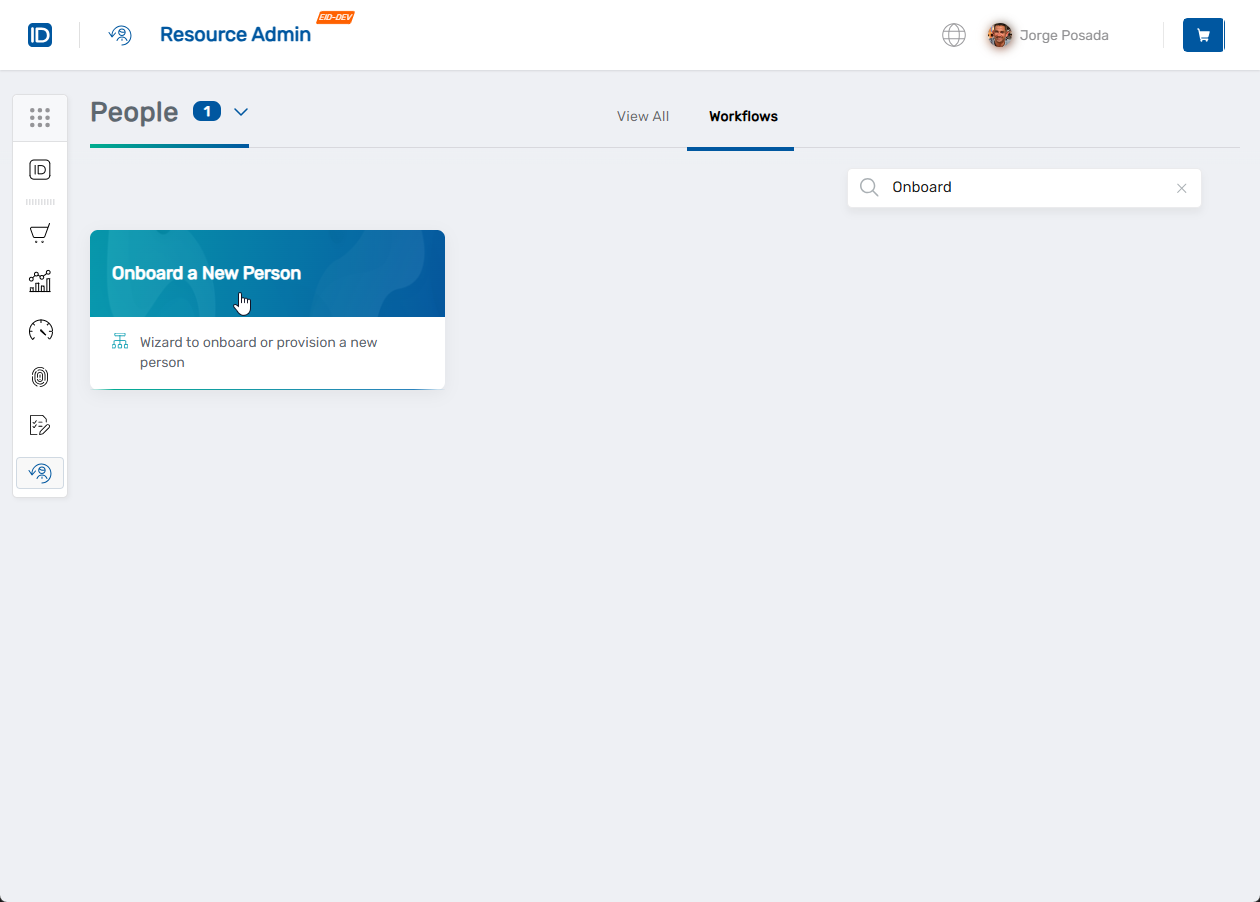 The workflow will open showing three method options:

- Choose the method that fits your needs
- Simple Mode
- Advanced Mode
- From Another Person
Simple Mode (5 minutes)
Perfect for most new hires when you just need to get them set up quickly with their basic role and access.
Enter the New Person's Information
-
Select Simple Mode and click Next
-
Fill in the required information:
Basic Details:
- First Name and Last Name – How their name should appear in the system
- Primary Business Role and Location – This determines what systems they can access:
- Click Select a Role and Location
- Find their Business Role (like "Sales Representative" or "Marketing Manager")
- Find their Location (their office or region)
- Click Select to save both choices
Optional Contact Information:
- Email – Their work email address
- Personal Email – Used to send them welcome instructions (recommended)
- Manager – Select their direct supervisor (they'll get a notification email)
Make sure to select both a Business Role AND Location before clicking Select. The Business Role determines what applications and permissions they'll have access to.
Complete the Setup
- Click Next to review what you've entered
- Check that everything looks correct and click Submit
- You'll see a confirmation screen showing the new person has been created
- Click Submit to finish
What Happens Next
- The new person will appear in EmpowerID immediately
- They'll get access to applications based on their assigned role
- If you provided their personal email, they'll receive welcome instructions
- They can start using their assigned systems right away
Advanced Mode (15 minutes)
Use this when you need to set up someone with specific group memberships, additional roles, or custom settings that aren't covered by their standard business role.
Step 1: Choose What to Configure
-
Select Advanced Mode and decide which additional settings you need:
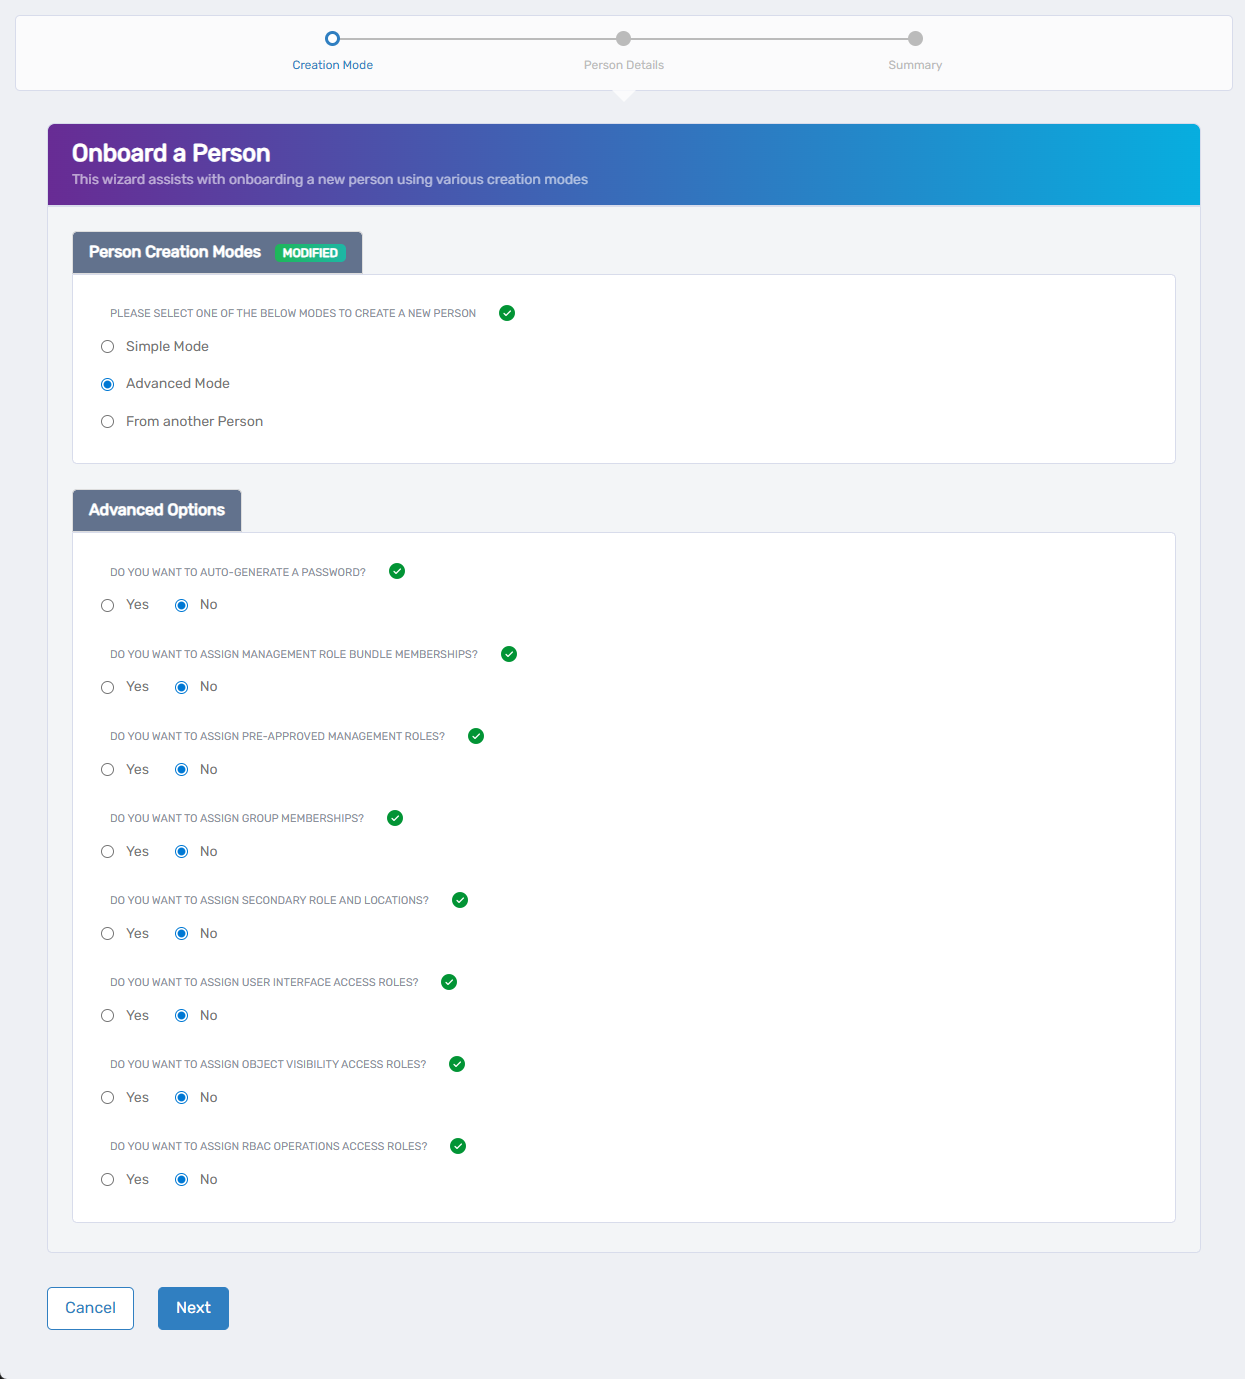
Password Settings:
- Auto-generate a password? – Choose Yes (recommended) to create a secure password automatically
Additional Role Assignments:
- Assign Management Role Bundle memberships? – Yes if they need management-level access to multiple areas
- Assign pre-approved Management Roles? – Yes if they need specific management permissions
- Assign group memberships? – Yes if they need to be in specific teams, departments, or project groups
- Assign secondary role and locations? – Yes if they work in multiple roles or locations
Special Access Permissions:
- Assign User Interface access roles? – Yes if they need access to special admin areas
- Assign Object Visibility access roles? – Yes if they need to see specific people or resources
- Assign RBAC Operations access roles? – Yes if they need to perform admin tasks
All options start as No. Only select Yes for things you actually need to configure. Each Yes adds an extra step where you can make specific assignments.
- Click Next when you've made your choices
Step 2: Enter Person Details
Fill out information across three tabs:
General Information:
- First Name, Last Name (required)
- Login – Their username (will be generated if you leave blank)
- Email – Work email address
- Primary Business Role and Location (required) – Same process as Simple Mode
- Manager – Their direct supervisor
If you chose manual password:
- Password – Create a strong password or click Generate for an automatic one
- Confirm Password – Enter the password again
Personal Information:
- Personal Email – For welcome messages
- Preferred Language – Interface language
- Description – Brief note about their role
- Notes – Any internal notes
Step 3: Add Organization Details
Click the Organization tab for workplace information:

Job Information:
- Company – Which company or division
- Title – Their official job title
- Office – Physical office location
- Department – Which department or team they're joining
Contact Details:
- Address – Complete business address
- Phone Numbers – Work and mobile numbers
Step 4: Account Settings
Click the Advanced tab for account options:
- Enabled – Keep as Yes so they can use their account
- Allow Login – Keep as Yes so they can sign in
- Must Change Password On Next Login – Choose Yes if you want them to set their own password
- Disable Notifications – Choose Yes only if you don't want them to get welcome emails
- Allow Attribute Sync – Usually keep as Yes unless told otherwise
Step 5: Make Additional Assignments
You'll see extra screens for any options you chose in Step 1:
Management Roles: Choose specific management permissions they need Groups: Add them to department groups, project teams, or distribution lists Special Access: Set up any admin-level permissions they require
Don't worry about getting everything perfect. You can always add or remove roles and groups later if their responsibilities change.
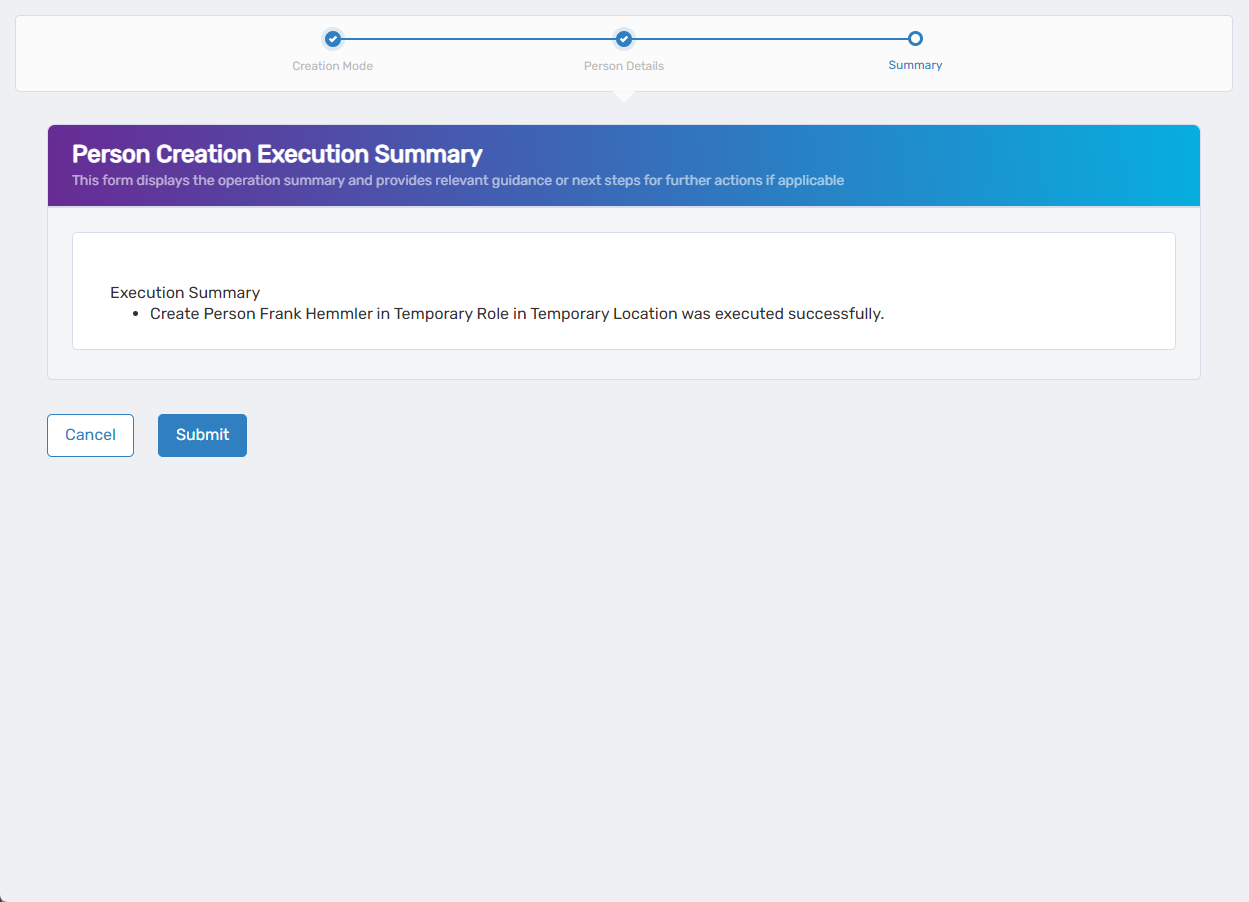
Step 6: Review and Finish
- Review the summary of everything you've configured
- Click Submit to create their account
- Check the confirmation screen to make sure it worked
- Click Submit to finish
What Happens Next
- The new person gets full access based on all your settings
- They'll receive welcome communications if you enabled notifications
- All their roles, groups, and permissions will be active immediately
- They can access all assigned systems and applications
From Another Person (10 minutes)
Great for when you're hiring someone into a similar role as an existing team member. Copy their setup and adjust what's different.
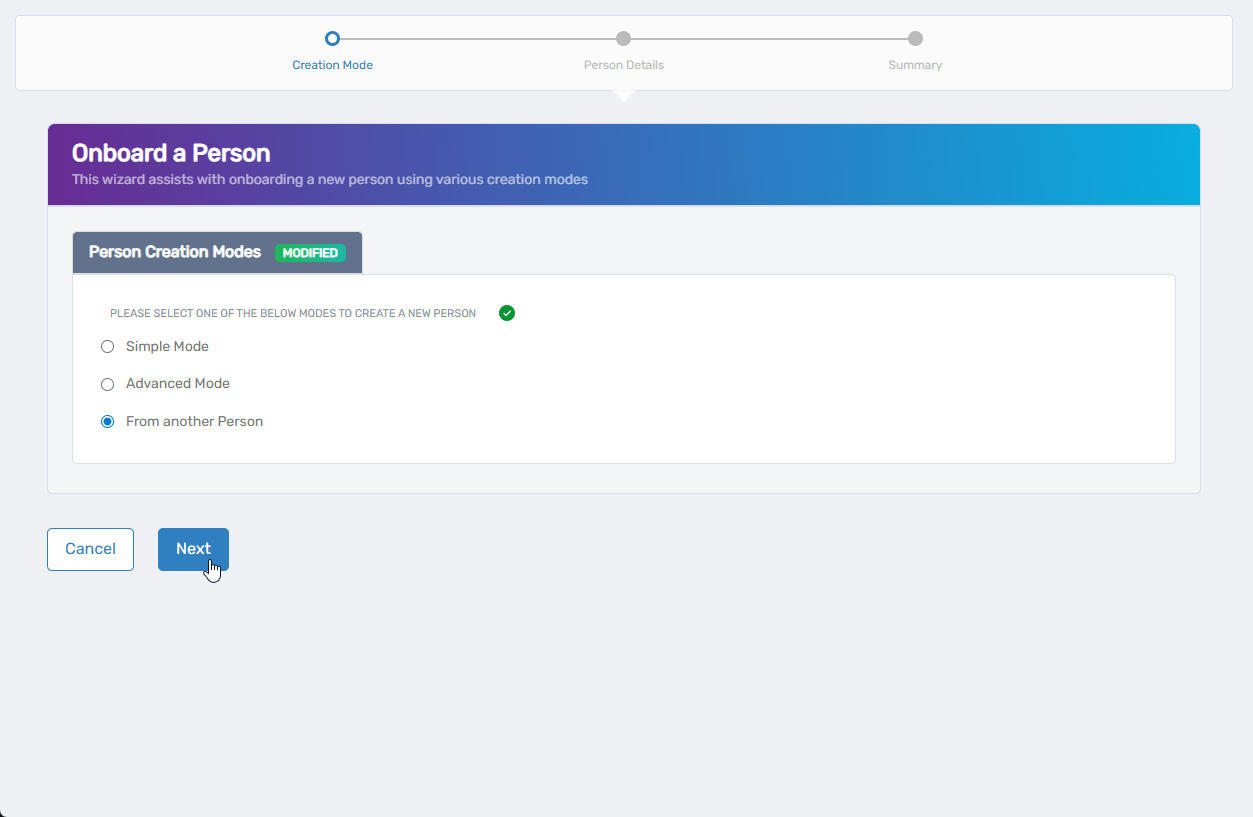
Step 1: Choose Your Template
-
Select From Another Person and click Next
-
Find someone whose role is similar to the new person:
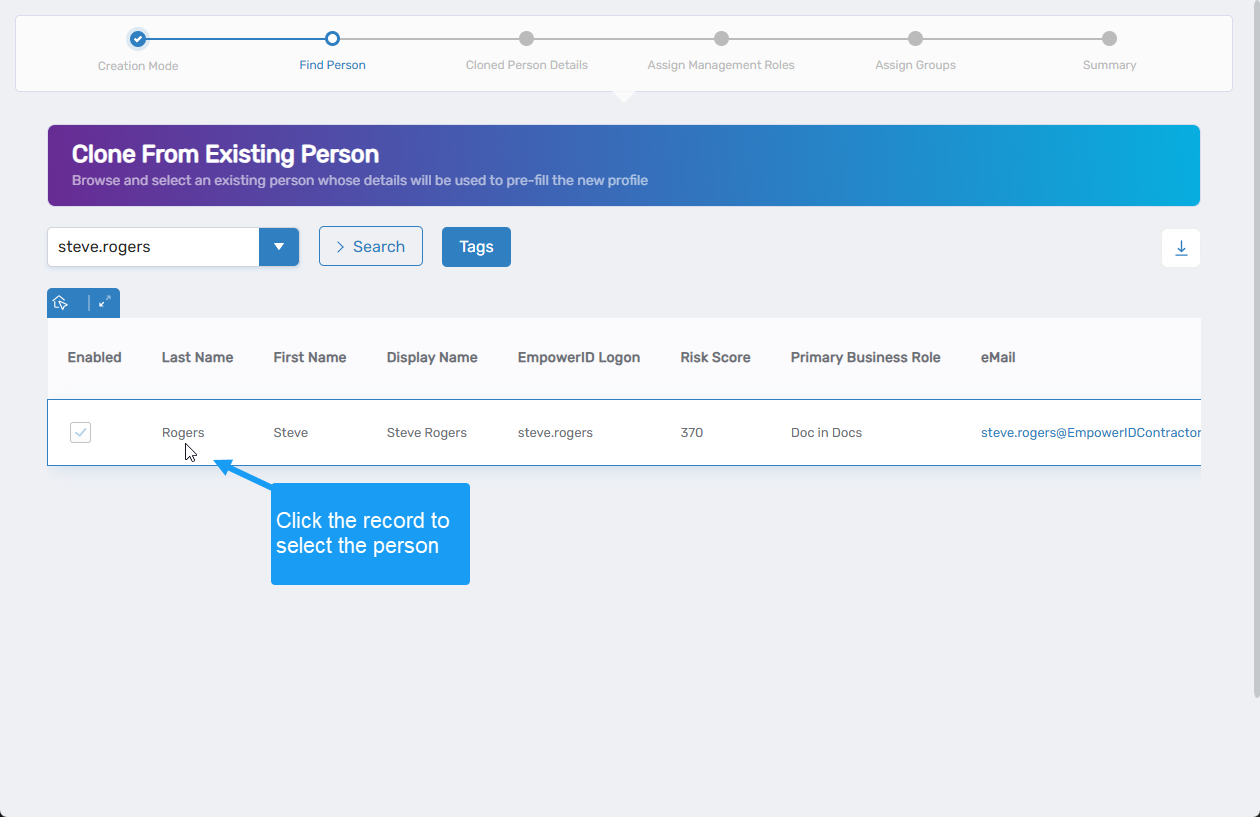
- Same department or team
- Similar job responsibilities
- Similar system access needs
-
Select them and click Next
Step 2: Update Personal Information
The form will be filled with the template person's information. Change what you need:
Personal Details:
- First Name, Last Name – Change to the new person's name
- Email – Update to their work email
- Primary Business Role and Location – Usually keep the same, but you can change:
- Click the × to clear the current selection
- Click Select a Role and Location to choose different ones
- Click Select to confirm
Password:
- Set a new password – Passwords are never copied for security
- Click Generate for an automatic secure password
- Or type one manually and confirm it
Personal Information:
- Update Personal Email, Description, and other details for the new person
Step 3: Update Work Information
Check the Organization tab and update:
- Title – Their specific job title
- Office, Department – Adjust if they're in a different location or team
- Contact Information – Add their phone numbers and address
Step 4: Check Account Settings
Review the Advanced tab settings:
- Usually keep Enabled and Allow Login as Yes
- Consider setting Must Change Password On Next Login to Yes
- Adjust notification settings as needed
Step 5: Review Role and Group Assignments
Management Roles: Choose which management permissions to give them (these aren't automatically copied) Groups: Select appropriate department groups, team lists, and project groups
Just because the template person has certain access doesn't mean the new person needs exactly the same thing. Think about what they actually need for their specific role.
Step 6: Finish Setup
- Review the summary to make sure everything is correct
- Click Submit to create their account
- Verify the confirmation shows successful creation
- Click Submit to finish
What Happens Next
- The new person gets an account based on your template with your modifications
- They'll appear in the system immediately with active access
- Welcome emails will be sent if you provided their personal email
- They can start using their assigned applications right away
If You Run Into Problems
Can't find the right Business Role: The roles available to you depend on your permissions. Contact your IT team if you need access to assign a specific role that doesn't appear in your list.
Manager notification doesn't work: Make sure the manager you selected has an email address set up in EmpowerID. They need a valid email to receive notifications.
Password doesn't work: Use the auto-generate option to create passwords that meet your company's security requirements. Manual passwords need to follow specific rules that may not be obvious.
Someone needs different access later: Don't worry - roles and group memberships can be changed after onboarding. Focus on getting them the basic access they need to start working.
After You Finish Onboarding
The new person will:
- Get welcome email instructions if you provided their personal email
- May need to change their password when they first log in
- Have immediate access to applications based on their assigned role
- See their access fully activated within about 30 minutes
You should:
- Let them know their account is ready
- Share any login instructions or system orientation materials
- Check with them in a few days to make sure everything is working
- Contact IT if they report any access issues