Create Custom Item Type Action Form Policies
You can create custom Item Type Action Form Policies to modify how forms appear and function for different user groups. This allows you to tailor the user experience based on roles, locations, or group memberships—for example, showing contractors a simplified form while employees see a full-featured version.
This article explains how to create a custom Item Type Action Form Policy.
Prerequisites
- Access to the Low Code/No Code Workflow section in EmpowerID
- Understanding of JSON structure for form configuration
- Knowledge of which fields and layout you want to customize
Before creating a custom policy, review About Item Type Action Form Policies to understand JSON structure, field types, and configuration options.
Procedure
-
In the EmpowerID application, navigate to Low Code/No Code Workflow > No Code Flows in the navbar.
-
Select the Item Type Action Form Policies tab and click the Add New button at the top of the Policy grid.
 This opens the form for creating a new policy.
-
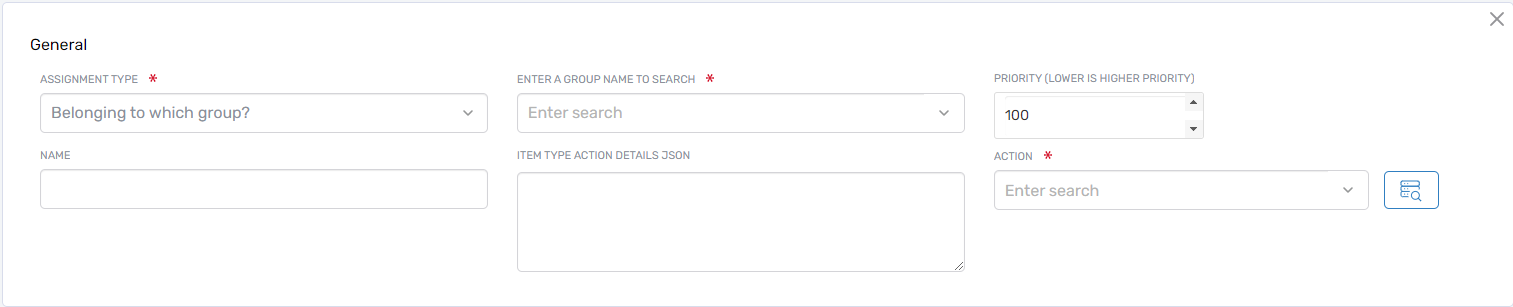
Complete the form fields:
-
Assignment Type — Select how the policy will be assigned:
Option Description Direct Assign the policy directly to a specific resource By Location Assign to people in a specific location (select from the location tree and save) Belonging to which group? Assign to members of a specified group Belonging to which Management Role? Assign to members of a specified Management Role Belonging to which Query-Based Collection? Assign to members of a Query-Based Collection -
Priority — Set a priority between 1 and 100. Lower numbers take precedence when multiple policies apply to the same assignment type.
-
Name — Enter a descriptive name for the policy.
-
Item Type Action Details JSON — Define the form structure and behavior using JSON (see example below).
-
Action — Select the action this policy applies to (e.g., Edit Person).
-
-
Click Save to create the custom policy.
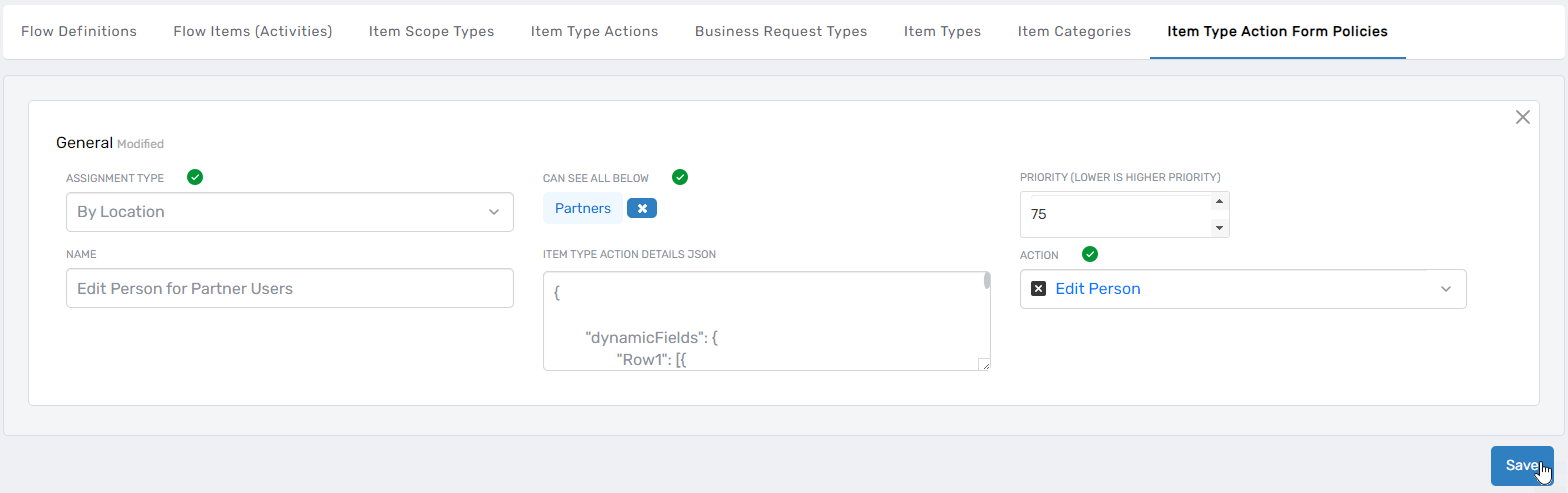
JSON Configuration Example
The following example shows a simplified policy for partners with specific customizations:
- Position and Telephone fields are editable and required
- Organization, Name, and Business Location fields are read-only
- Telephone field includes regex validation
{
  "dynamicFields": {
    "Row1": [{
      "width": 50,
      "localeKey": "Position",
      "fieldName": "primaryOrgRoleId",
      "fieldNameLabel": "primaryOrgRoleName",
      "fieldType": "tree",
      "apiUrl": "/api/lookups/businessrolestree",
      "fieldPlaceHolder": "SelectRole",
      "dataAttributes": {
        "value": "id",
        "label": "title"
      },
      "required": true
    },
    {
      "width": 50,
      "localeKey": "Organization",
      "fieldName": "primaryOrgZoneId",
      "fieldNameLabel": "primaryOrgZoneName",
      "fieldType": "tree",
      "apiUrl": "/api/lookups/businesslocationstree",
      "fieldPlaceHolder": "SelectLocation",
      "dataAttributes": {
        "value": "id",
        "label": "title"
      },
      "required": true,
      "disabled": true
    }],
    "Row2": [{
      "width": 100,
      "subColumn": [{
        "width": 30,
        "localeKey": "Name",
        "fieldName": "friendlyName",
        "fieldType": "text"
      },
      {
        "width": 30,
        "localeKey": "Telephone",
        "fieldName": "telephone",
        "fieldType": "phoneWithCountryCode",
        "countryCode": "+1",
        "required": true,
        "validationRegex": "^\\+?[0-9\\-\\(\\) ]{3,}$",
        "validationMessage": "EnterValidValue"
      },
      {
        "width": 40,
        "localeKey": "Business Location",
        "fieldName": "streetAddress",
        "fieldType": "text"
      }]
    }]
  },
  "accessDetails": {
    "apiEndPoint": "/api/applications",
    "friendlyName": "Applications",
    "type": "Application"
  }
}
Verify the Custom Policy
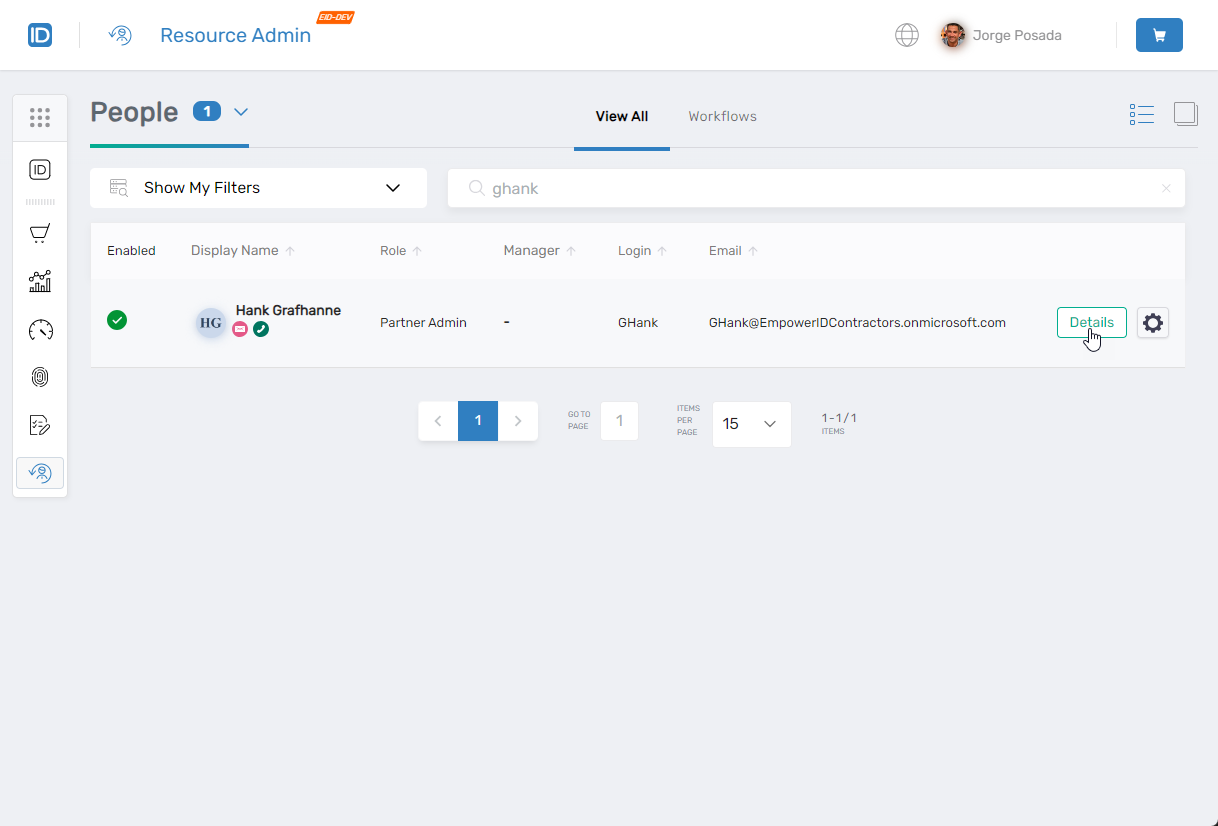
To confirm the policy is applied correctly:
- Navigate to Resource Admin.
- Select People as the resource type.
- Locate a user who falls under the custom policy's assignment criteria.
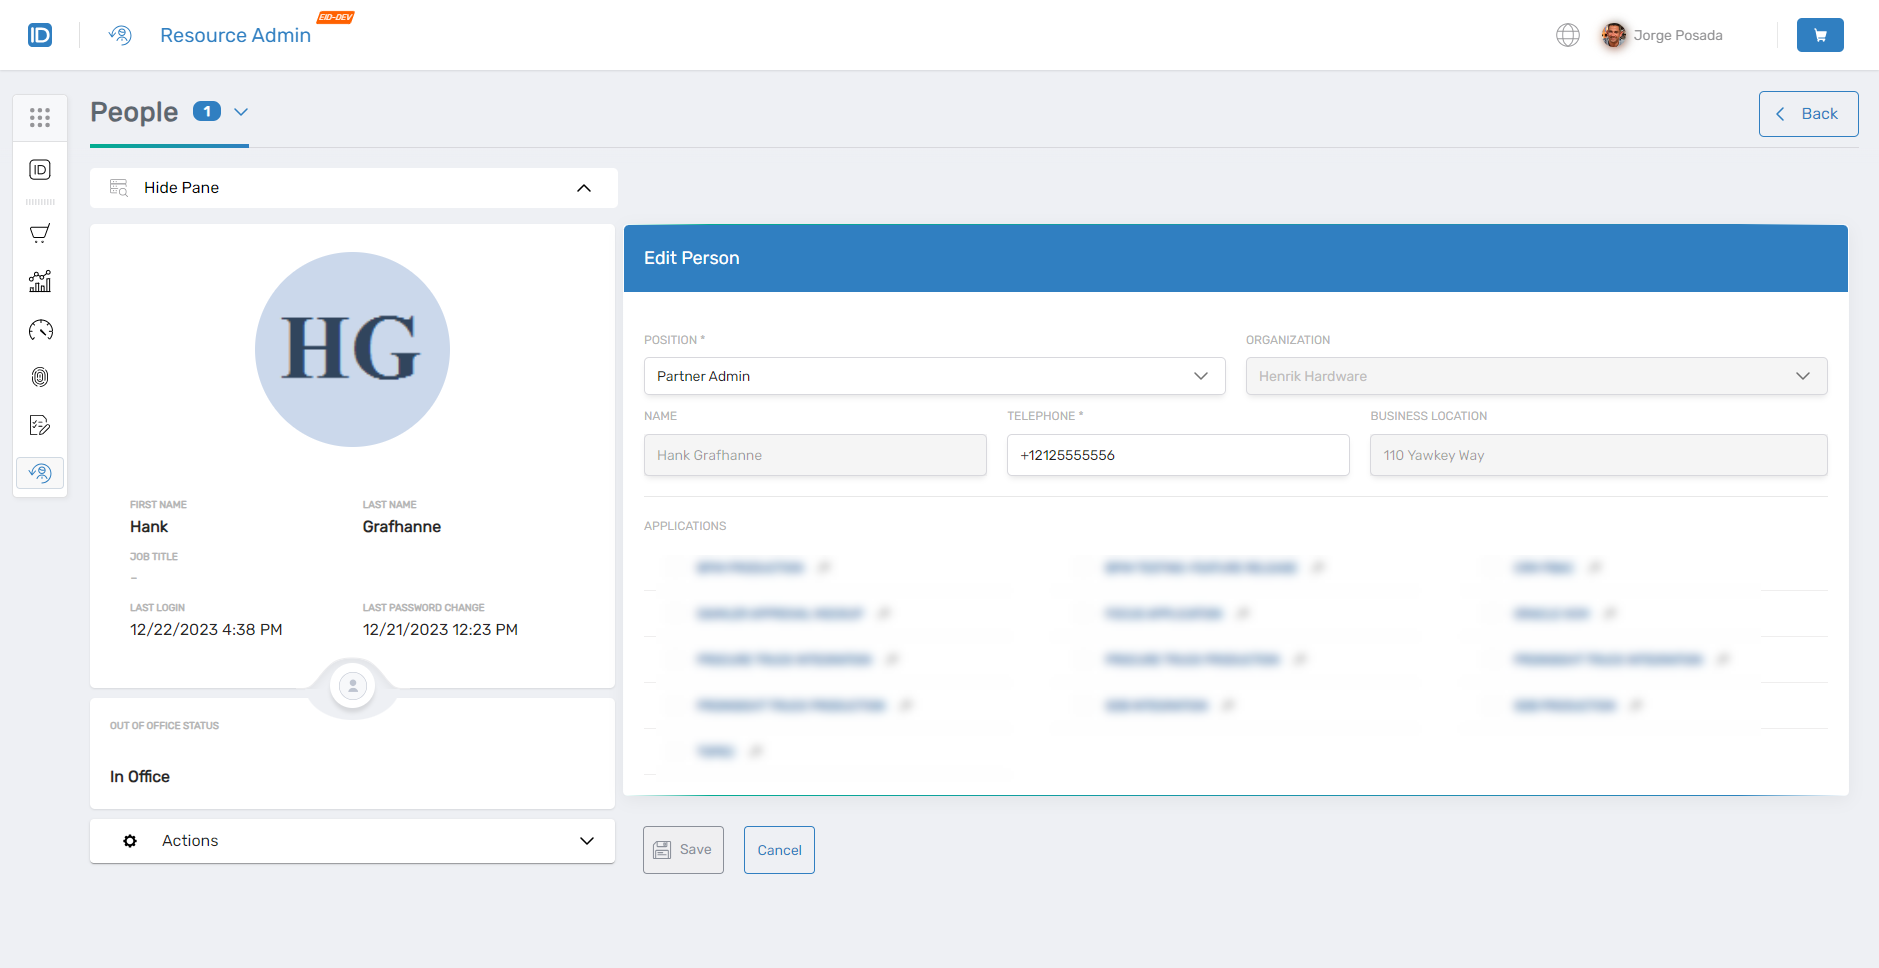
- Click Details to view the Edit Person form.
- Verify the form displays according to your policy configuration.
Results
After creating the custom policy:
- Users matching the assignment criteria see the customized form when performing the specified action
- The policy takes effect based on its priority relative to other policies
- Form fields display according to your JSON configuration (required, disabled, validated, etc.)
When multiple policies apply to a user, the policy with the lowest priority number takes precedence. Use priority values strategically to ensure the correct policy applies in overlapping scenarios.